STEP 1
Open up the wallpapers_101 image in your PSP workspace
WINDOW >>> DUPLICATE
Close the original Image
LAYERS >>> Promote background layer
.
|
STEP 2
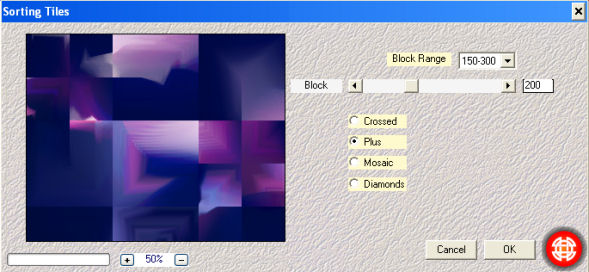
EFFECTS >>> PLUGINS >>> Mehdi >>> Sorting Tiles
 , ,
|
STEP 3
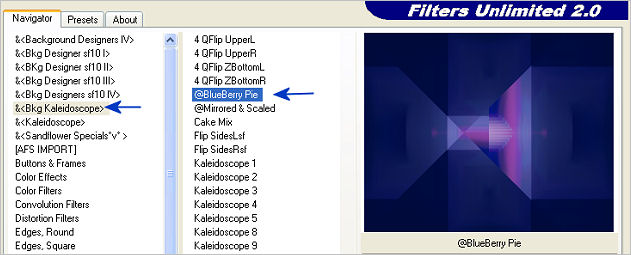
EFFECTS >>> PLUGINS >>> <I.C.NET Software> Filters Unlimited 2 >>>
&<Bkg Kaleidoscope> >>> @BlueBerry Pie
|
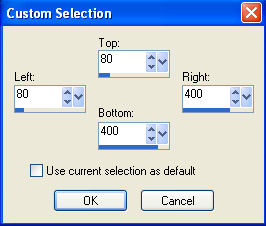
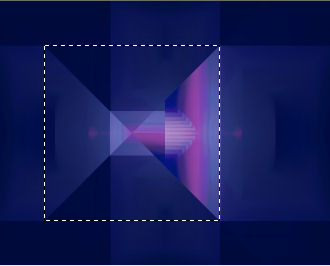
STEP 4
Choose your SELECTION TOOL then click on the
CUSTOM SELECTION symbol
and enter these coordinates.
|
|
STEP 5
LAYERS >>> PROMOTE SELECTION TO LAYER
|
|
STEP 6
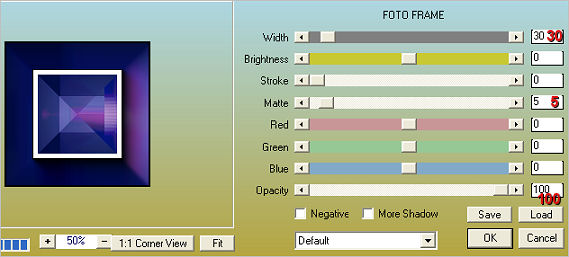
EFFECTS >>> PLUGINS >>> AAA Frames >>> Foto Frame
WIDTH = 30
MATTE = 5
OPACITY = 100
|
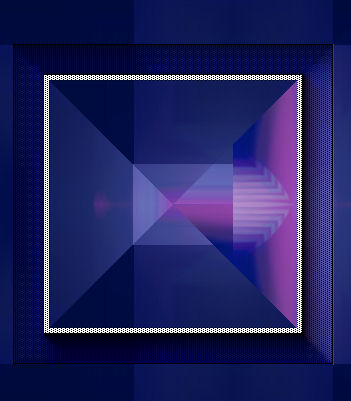
STEP 7
SELECTIONS >>> MODIFY >>> CONTRACT = 37
SELECTIONS >>> INVERT
EFFECTS >>> PLUGINS >>> Cybia >>> Screenworks >>>
Dot Screen
DESELECT
|
|
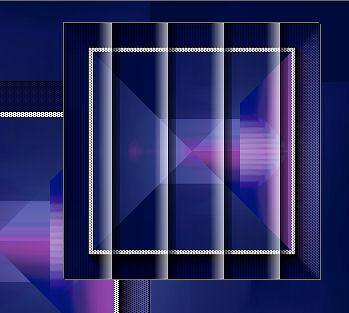
STEP 8
LAYERS >>> DUPLICATE
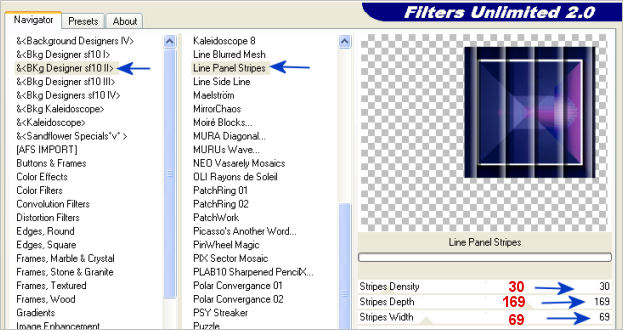
EFFECTS >>> PLUGINS >>> <I.C.NET Software> Filters Unlimited 2 >>>
&<Bkg Designer sf10 II> >>> Line Panel Stripes
|
STEP 9
IMAGE >>> RESIZE = 80%
Ensure "Resize all layers" is UNCHECKED
Resample using WEIGHTED AVERAGE
ADJUST >>> SHARPNESS >>> SHARPEN
EFFECTS >>> IMAGE EFFECTS >>> OFFSET
Horizontal Offset = 190
Vertical Offset = 90
Edge Mode = Transparent
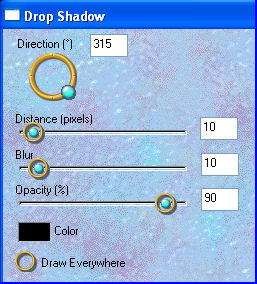
EFFECTS >>> 3D EFFECTS >>> DROP SHADOW
Vertical & Horizontal offsets = 1
Colour = Grey #808080
Opacity = 100
Blur = 0
Repeat Drop Shadow effect changing
Vertical & Horizontal Offsets to - ( minus ) 1
Click OK
|
|
STEP 10
EFFECTS >>> PLUGINS >>> EYE CANDY 3 >>>
DROP SHADOW
|
|
STEP 11
ACTIVATE Promoted Selection layer
IMAGE >>> RESIZE = 80%
Ensure "Resize all layers" is UNCHECKED
Resample using WEIGHTED AVERAGE
ADJUST >>> SHARPNESS >>> SHARPEN
PSP9: IMAGE >>> ROTATE >>> FREE ROTATE = RIGHT 90
Ensure "All layers" is UNCHECKED
CHECK "Rotate single later around canvas centre"
PSPX - PSPX7: IMAGE >>> FREE ROTATE = RIGHT 90
Ensure "All layers" is UNCHECKED
CHECK "Rotate single later around canvas centre"
EFFECTS >>> IMAGE EFFECTS >>> OFFSET
Horizontal Offset = - (Minus) 150
Vertical Offset = - (Minus) 140
Edge Mode = Transparent
|
|
STEP 12
EFFECTS >>> 3D EFFECTS >>> DROP SHADOW
Vertical & Horizontal offsets = 1
Colour = Grey #808080
Opacity = 100
Blur = 0
Repeat Drop Shadow effect changing
Vertical & Horizontal Offsets to - ( minus ) 1
Click OK
EFFECTS >>> PLUGINS >>> EYE CANDY 3 >>>
DROP SHADOW
Same settings |
|
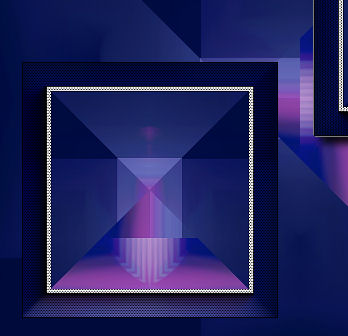
STEP 13
ACTIVATE Raster 1
LAYERS >>> DUPLICATE
IMAGE >>> MIRROR
In your LAYER PALETTE change the
BLEND MODE to DODGE
|
|
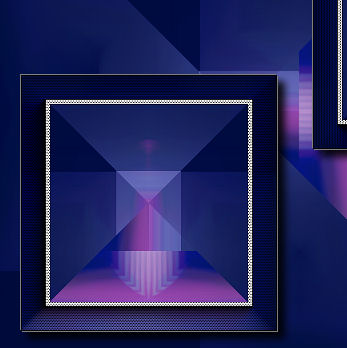
STEP 14
IMAGE >>> RESIZE = 80%
Ensure "Resize all layers" is UNCHECKED
Resample using WEIGHTED AVERAGE
ADJUST >>> SHARPNESS >>> SHARPEN
EFFECTS >>> 3D EFFECTS >>> DROP SHADOW
Vertical & Horizontal offsets = 1
Colour = Grey #808080
Opacity = 100
Blur = 0
Repeat Drop Shadow effect changing
Vertical & Horizontal Offsets to - ( minus ) 1
Click OK
|
|
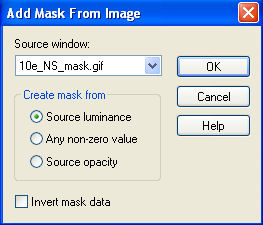
STEP 14
LAYERS >>> NEW RASTER LAYER
Flood fill with BLUE #013ac3
Open up the 10e_NS_mask image in your PSP workspace
and minimize
On your tag image....
LAYERS >>> NEW MASK LAYER >>> FROM IMAGE
Source window = 10e_NS_mask.gif
|
|
STEP 15
LAYERS >>> MERGE >>> MERGE GROUP
In your LAYER PALETTE change the
BLEND MODE to DIFFERENCE
|
|
STEP 16
ADJUST >>> SHARPNESS >>> SHARPEN MORE
ACTIVATE
Copy of Raster 1
SELECTIONS >>> SELECT ALL
SELECTIONS >>> FLOAT
SELECTIONS >>> DEFLOAT
LAYERS >>> NEW RASTER LAYER
LAYERS >>> ARRANGE >>> MOVE UP
EFFECTS >>> PLUGINS >>> EYE CANDY 3 >>>
DROP SHADOW |
|
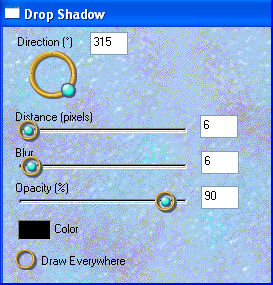
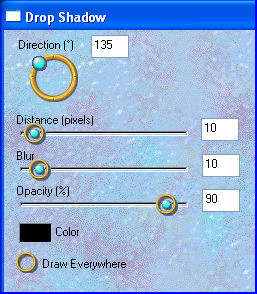
STEP 17
EDIT >>> Repeat Drop Shadow.. change DIRECTION to 135
DESELECT |
|
STEP 18
ACTIVATE the TOP layer
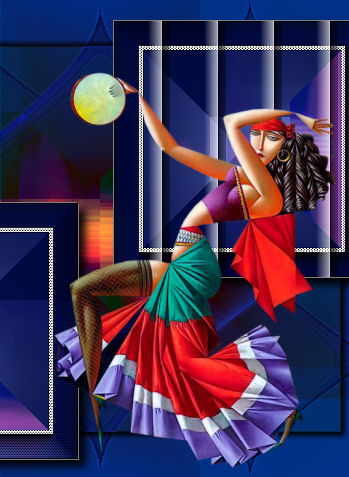
Open up the Gabry-woman 501 image in your PSP workspace
Right click on the Title Bar and select COPY from the options
Right click on the Title Bar of your tag image
and select PASTE AS NEW LAYER from the options.
IMAGE >>> MIRROR
IMAGE >>> RESIZE = 65%
Ensure "Resize all layers" is UNCHECKED
Resample using WEIGHTED AVERAGE
ADJUST >>> SHARPNESS >>> SHARPEN
Reposition with your MOVER tool |
|
STEP 19
EFFECTS >>> PLUGINS >>> EYE CANDY 3 >>>
DROP SHADOW |
|
STEP 20
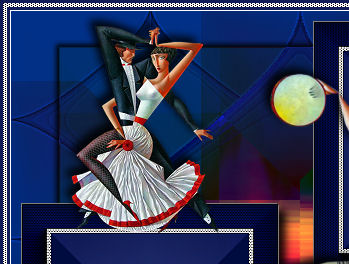
Open up the Gabry-danzatori 12 image in your PSP workspace
Right click on the Title Bar and select COPY from the options
Right click on the Title Bar of your tag image
and select PASTE AS NEW LAYER from the options.
IMAGE >>> RESIZE = 30%
Ensure "Resize all layers" is UNCHECKED
Resample using WEIGHTED AVERAGE
ADJUST >>> SHARPNESS >>> SHARPEN
EFFECTS >>> PLUGINS >>> EYE CANDY 3 >>>
DROP SHADOW
Same settings
Reposition with your MOVER tool |
|
STEP 21
LAYERS >>> NEW RASTER LAYER
Flood fill with DARK BLUE #121d58
SELECTIONS >>> SELECT ALL
SELECTIONS >>> MODIFY >>> CONTRACT = 3
EDIT >>> CLEAR
Flood fill with WHITE
EFFECTS >>> PLUGINS >>> Cybia >>> Screenworks >>>
Dot Screen
SELECTIONS >>> MODIFY >>> CONTRACT = 4
EDIT >>> CLEAR |
|
STEP 22
Flood fill with DARK BLUE #121d58
SELECTIONS >>> MODIFY >>> CONTRACT = 3
EDIT >>> CLEAR
Flood fill with WHITE
SELECTIONS >>> MODIFY >>> CONTRACT = 1
EDIT >>> CLEAR
DESELECT |
|
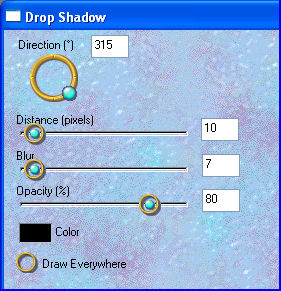
STEP 23
EFFECTS >>> PLUGINS >>> EYE CANDY 3 >>>
DROP SHADOW |
|
STEP 24
EDIT >>> Repeat Drop Shadow.. change DIRECTION to 135 |
|
STEP 25
Open up the JF_WA_28 image in your PSP workspace
Right click on the Title Bar and select COPY from the options
Right click on the Title Bar of your tag image
and select PASTE AS NEW LAYER from the options.
ADJUST >>> COLOUR BALANCE >>> NEGATIVE IMAGE
PSPX - X7: IMAGE >>> NEGATIVE IMAGE
IMAGE >>> RESIZE = 70%
Ensure "Resize all layers" is UNCHECKED
Resample using WEIGHTED AVERAGE
ADJUST >>> SHARPNESS >>> SHARPEN
Reposition with your MOVER tool |
|
STEP 26
EFFECTS >>> 3D EFFECTS >>> DROP SHADOW
Vertical & Horizontal offsets = 2
Colour = Black
Opacity = 100
Blur = 5.00 |
STEP 27
LAYERS >>> NEW RASTER LAYER
Select your TEXT tool
Using a font of your choice
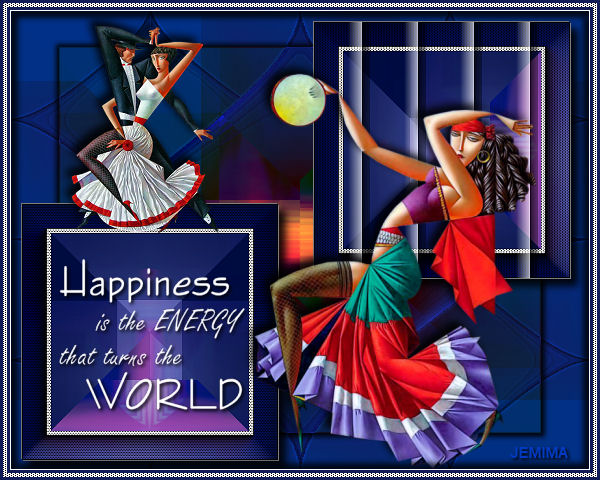
Add your name |
STEP 28
LAYERS >>> MERGE >>> MERGE ALL (Flatten)
Save as .jpg image |
| |
|
| |
|
|
|