So often with the newer versions of Windows some plugins don't seem to work
without a heap of hassles and time spent trying, often with no success.
The older version of EyeCandy3 is one of those plugins.
However, you can produce almost identical Perspective Shadows
using the DROP SHADOW effect in your Paint Shop Pro programme.
I'll show you how to create a Perspective Shadow here without a plugin. |
ALSO
In this exercise I will be indicating exact placements for the tubes
because
we will be making a tag as we go through the instructions.
When creating shadows on your own tags you will be able to create the
perspective shadows and move the layers around to suit your final image |
STEP 1
Open a new image 650 x 650
Transparent background
PSPX - X2: Colour Depth = 8bits/channel
PSPX3-6: Colour Depth RGB = 8bits/channel
VIEW >>> RULERS
|
STEP 2
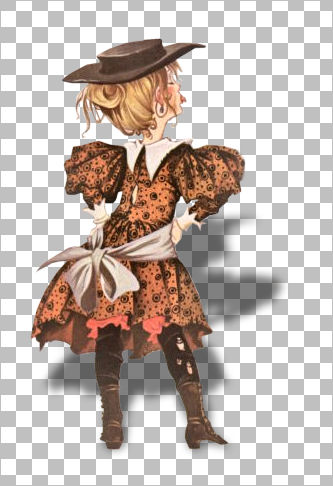
Open up the JF25 image in your PSP workspace
Right click on the Title Bar and select
COPY from the options
Right click on the Title Bar of your tag image
and select PASTE AS NEW LAYER from the options.
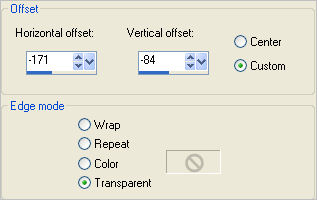
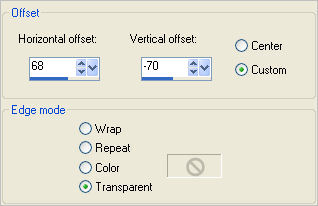
EFFECTS >>> IMAGE EFFECTS >>> OFFSET
|
|
STEP 3
LAYERS >>> DUPLICATE
SELECTIONS >>> SELECT ALL
SELECTIONS >>> FLOAT
SELECTIONS >>> DEFLOAT
PSPX6: EDIT >>> CLEAR
Flood fill with
BLACK
DESELECT
In your LAYER PALETTE change the OPACITY to 50%
LAYERS >>> ARRANGE >>> MOVE DOWN
|
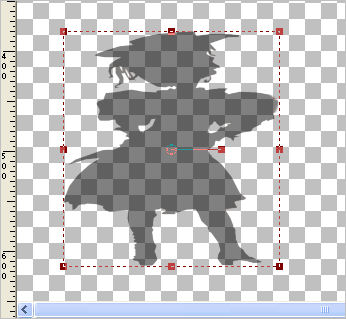
STEP 4
CLOSE Raster 2
Select your RASTER DEFORM tool
Mode = SCALE
use default settings
PSPX-X6:Select your PICK tool
Drag the centre top node down to the 380 pixel mark
on your left ruler
|
|
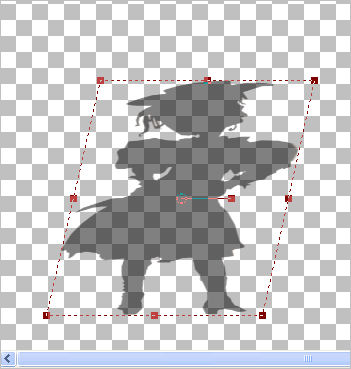
STEP 5
With your RASTER DEFORM / PICK tool
Change the Mode = Shear (Shift)
Drag the top right node to the right
so it is level with
314 pixel mark
on your top ruler
Drag the top left node to the right
so it is level with 100 pixel mark
on your top ruler
|
|
STEP 6
Click the RESET RECTANGLE arrow
Select your MOVER tool to disengage
the Deformation / Pick tool
ADJUST >>> BLUR >>> GAUSSIAN BLUR
Radius = 4.00
OPEN & ACTIVATE Raster 2
|
|
STEP 7
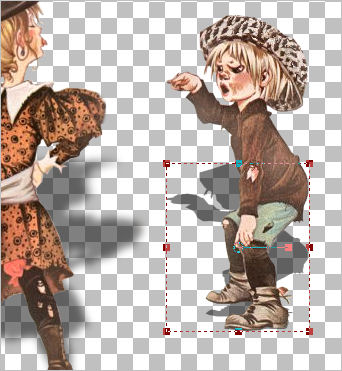
Open up the JF26 image in your PSP workspace
Right click on the Title Bar and select
COPY from the options
Right click on the Title Bar of your tag image
and select PASTE AS NEW LAYER from the options.
EFFECTS >>> IMAGE EFFECTS >>> OFFSET |
|
STEP 8
LAYERS >>> DUPLICATE
SELECTIONS >>> SELECT ALL
SELECTIONS >>> FLOAT
SELECTIONS >>> DEFLOAT
PSPX6: EDIT >>> CLEAR
Flood fill with BLACK
DESELECT
In your LAYER PALETTE change the OPACITY to 50%
LAYERS >>> ARRANGE >>> MOVE DOWN |
STEP 9
This time we'll do the shadow with the top layer visible
Select your RASTER DEFORM tool
Mode = SCALE
use default settings
PSPX-X6:Select your PICK tool
Drag the centre top node down to the 380 pixel mark
on your left ruler |
|
STEP 10
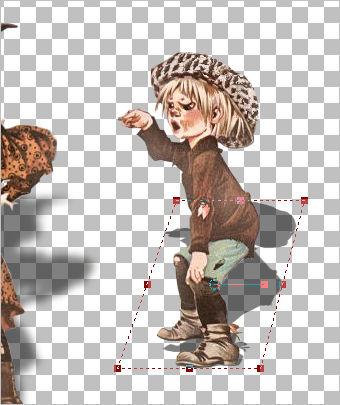
With your RASTER DEFORM / PICK tool
Change the Mode = Shear (Shift)
Drag the top right node to the right
so it is level with 510 pixel mark
on your top ruler
Drag the top left node to the right
so it is level with 380 pixel mark
on your top ruler |
|
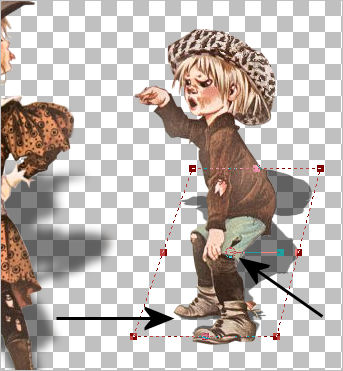
STEP 11
Drag the circle in the centre of the Rotating Arm
up a little so the feet and shadow feet are level
|
|
STEP 12
Click the RESET RECTANGLE arrow
Select your MOVER tool to disengage
the Deformation / Pick tool
ADJUST >>> BLUR >>> GAUSSIAN BLUR
Radius = 4.00
OK ... that was easy... wasn't it...
now let's finish the tag |
STEP 13
ACTIVATE Raster 1
Flood fill with WHITE
CLOSE
Raster 1
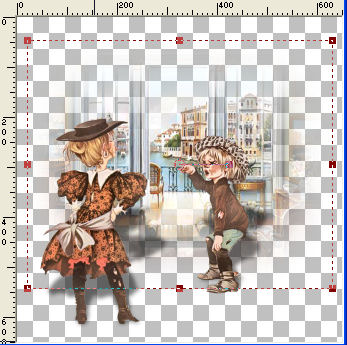
Open up the 28-4-06victorianroom3_sw image
in your PSP workspace
Right click on the Title Bar and select COPY from the options
Right click on the Title Bar of your tag image
and select PASTE AS NEW LAYER from the options.
LAYERS >>> DUPLICATE (Twice)
LAYERS >>> MERGE >>> MERGE DOWN (Twice)
|
STEP 14
Select your RASTER DEFORM tool
Mode = SCALE
use default settings
PSPX-X3:Select your PICK tool
Drag the centre top node up to the 45 pixel mark
on your left ruler
Drag the centre bottom node down to the 540 pixel mark
on your left ruler
Drag the centre left node left to the 20 pixel mark
on your top ruler
Drag the centre right node right to the 630 pixel mark
on your top ruler
NOTE: These don't have to be EXACT- just close as possible
|
|
STEP 15
Click the RESET RECTANGLE arrow
Select your MOVER tool to disengage
the Deformation / Pick tool
LAYERS >>> DUPLICATE (Twice)
LAYERS >>> MERGE >>> MERGE DOWN (Twice)
EFFECTS >>> EDGE EFFECTS >>> ENHANCE
OPEN & ACTIVATE Raster 1
|
|
STEP 16
SELECTIONS >>> SELECT ALL
SELECTIONS >>> MODIFY >>> CONTRACT = 30
SELECTIONS >>> INVERT
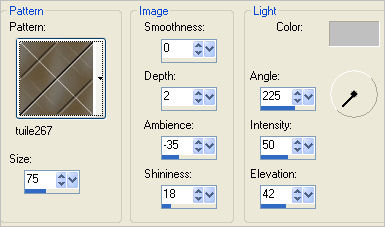
EFFECTS >>> TEXTURE EFFECTS >>> SCULPTURE
COLOUR = #c0c0c0
|
STEP 17
EFFECTS >>> 3D EFFECTS >>> DROP SHADOW
Repeat Drop Shadow effect changing
Vertical & Horizontal Offsets to - ( minus ) 4
Click OK
DESELECT
|
|
STEP 18
LAYERS >>> MERGE >>> MERGE VISIBLE
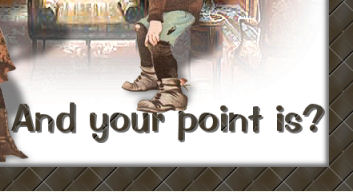
Open up the sakbs_attitude wordart 1 image
in your PSP workspace
Activate the and your point is layer
Right click on the Title Bar and select COPY from the options
Right click on the Title Bar of your tag image
and select PASTE AS NEW LAYER from the options.
Reposition with your MOVER tool |
|
STEP 19
EFFECTS >>> TEXTURE EFFECTS >>> SCULPTURE
COLOUR = #c0c0c0
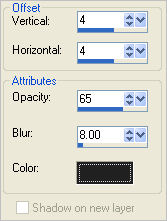
EFFECTS >>> 3D EFFECTS >>> DROP SHADOW
Vertical & Horizontal offsets = 2
Colour = Black
Opacity = 65
Blur = 0
|
|
STEP 20
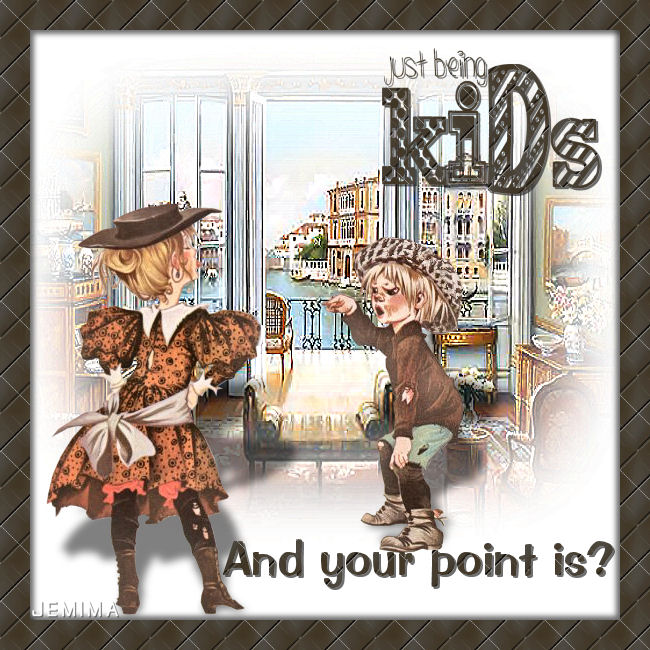
Open up the just being kids image
in your PSP workspace
Right click on the Title Bar and select COPY from the options
Right click on the Title Bar of your tag image
and select PASTE AS NEW LAYER from the options.
IMAGE >>> RESIZE = 40%
Ensure "Resize all layers" is UNCHECKED
Resample using WEIGHTED AVERAGE
Reposition with your MOVER tool |
|
STEP 21
EFFECTS >>> TEXTURE EFFECTS >>> SCULPTURE
COLOUR = #c0c0c0
EFFECTS >>> 3D EFFECTS >>> DROP SHADOW
Vertical & Horizontal offsets = 2
Colour = Black
Opacity = 65
Blur = 0
LAYERS >> NEW RASTER LAYER
Select your TEXT TOOL
with font and settings of your choice
add your name
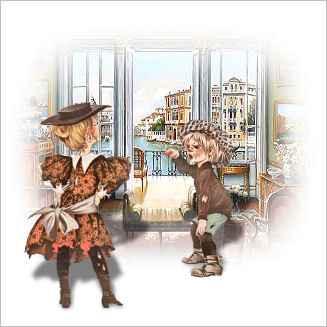
LAYERS >>> MERGE >>> MERGE ALL (Flatten)
Save as .jpg image
|
|
|
|
|
|
|