STEP 14
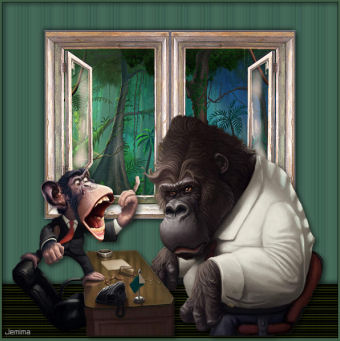
Open up the Monkey and gorilla digital art image in your PSP workspace
WINDOW >>> DUPLICATE
Close the original Image
DELETE Layer 2
LAYERS >>> DUPLICATE
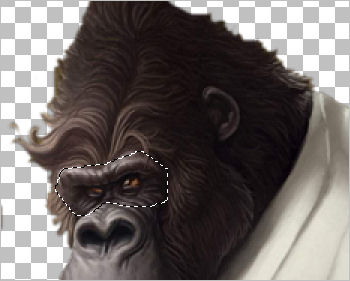
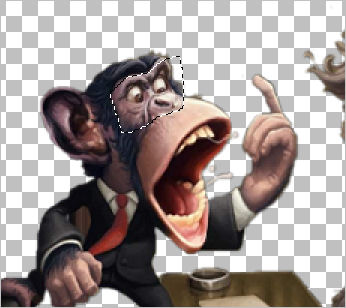
Choose your FREEHAND SELECTION TOOL
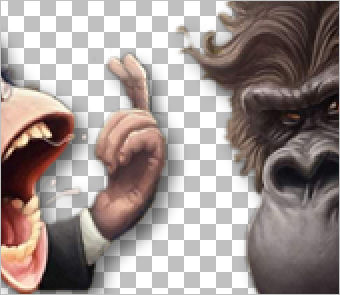
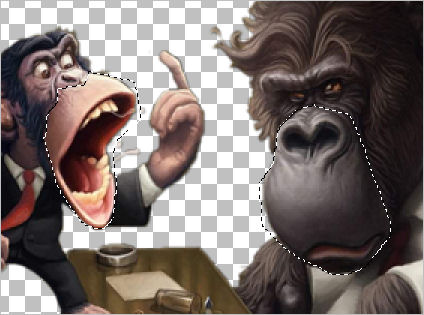
 Zoom in and select the areas shown
|
STEP 15
EFFECTS >>> DISTORTION EFFECTS >>> PINCH
Strength - 10%
LAYERS >>> DUPLICATE
EFFECTS >>> DISTORTION EFFECTS >>> PINCH
Strength - 10%
LAYERS >>> DUPLICATE
EFFECTS >>> DISTORTION EFFECTS >>> PINCH
Strength - 10%
DESELECT
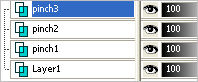
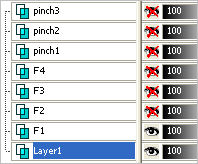
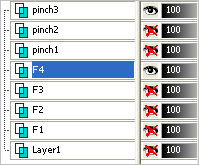
Rename the layers as shown
|
|
STEP 16
CLOSE pinch3, pinch2 and Layer 1
ACTIVATE pinch1 layer
Choose your FREEHAND SELECTION TOOL
Same settings
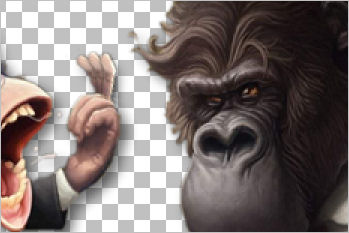
Zoom in and select the area shown
|
|
STEP 17
EFFECTS >>> DISTORTION EFFECTS >>> PUNCH
Strength - 10%
ADJUST >>> SHARPNESS >>> SHARPEN
CLOSE pinch1 layer
OPEN & ACTIVATE pinch2 Layer
EFFECTS >>> DISTORTION EFFECTS >>> PUNCH
Strength - 20%
ADJUST >>> SHARPNESS >>> SHARPEN
CLOSE pinch2 layer
OPEN & ACTIVATE pinch3 Layer
EFFECTS >>> DISTORTION EFFECTS >>> PUNCH
Strength - 30%
ADJUST >>> SHARPNESS >>> SHARPEN
DESELECT |
STEP 18
CLOSE pinch3, pinch2 and Layer 1
ACTIVATE pinch1 layer
Choose your FREEHAND SELECTION TOOL
Same settings
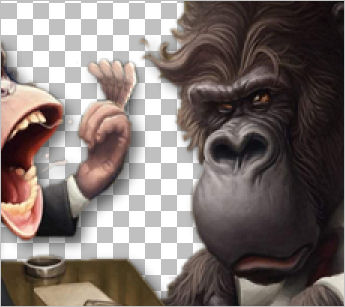
Zoom in and select the area shown |
|
STEP 19
EFFECTS >>> DISTORTION EFFECTS >>> PINCH
Strength - 10%
ADJUST >>> SHARPNESS >>> SHARPEN
CLOSE pinch1 layer
OPEN & ACTIVATE pinch2 Layer
EFFECTS >>> DISTORTION EFFECTS >>> PINCH
Strength - 20%
ADJUST >>> SHARPNESS >>> SHARPEN
CLOSE pinch2 layer
OPEN & ACTIVATE pinch3 Layer
EFFECTS >>> DISTORTION EFFECTS >>> PINCH
Strength - 30%
ADJUST >>> SHARPNESS >>> SHARPEN
DESELECT |
STEP 20
OPEN ALL LAYERS
ACTIVATE Layer 1
EFFECTS >>> PLUGINS >>> EYE CANDY 3 >>> DROP SHADOW
Same settings
ACTIVATE pinch1
EDIT >>> Repeat Drop Shadow.
ACTIVATE pinch2
EDIT >>> Repeat Drop Shadow.
ACTIVATE pinch3
EDIT >>> Repeat Drop Shadow. |
STEP 21
CLOSE layers pinch3, pinch2 and pinch1
ACTIVATE Layer1
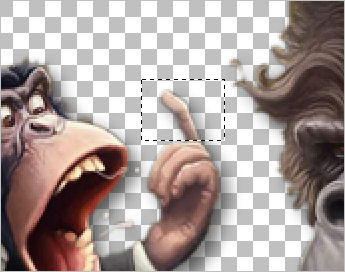
Choose your SELECTION TOOL
Selection Type = Rectangle
Mode = Replace
Feather = 0
Antialias = UNChecked
Select the "FINGER"
SELECTIONS >>> PROMOTE SELECTION TO LAYER
Rename the Promoted Selection layer F1
ACTIVATE Layer 1
EDIT >>> CLEAR
|
|
STEP 22
OPEN layers pinch3, pinch2 and pinch1
ACTIVATE pinch1
EDIT >>> CLEAR
ACTIVATE pinch2
EDIT >>> CLEAR
ACTIVATE pinch3
EDIT >>> CLEAR
DESELECT
CLOSE layers pinch3, pinch2 and pinch1
ACTIVATE Layer F1
|
|
STEP 23
LAYERS >>> DUPLICATE
PSP9:IMAGE >>> ROTATE >>> FREE ROTATE = RIGHT 15
Ensure "All layers" is UNCHECKED
PSPX - PSPX6: IMAGE >>> FREE ROTATE = RIGHT 15
Ensure "All layers" is UNCHECKED
ADJUST >>> SHARPNESS >>> SHARPEN
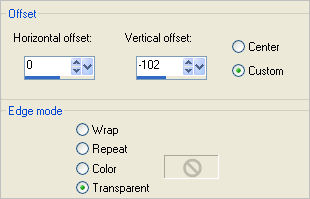
EFFECTS >>> IMAGE EFFECTS >>> OFFSET
Horizontal offset = 5
Vertical offset = 0
Edge Mode = Transparent
Rename this layer F2
|
|
STEP 24
LAYERS >>> DUPLICATE
PSP9:IMAGE >>> ROTATE >>> FREE ROTATE = RIGHT 15
Ensure "All layers" is UNCHECKED
PSPX - PSPX6: IMAGE >>> FREE ROTATE = RIGHT 15
Ensure "All layers" is UNCHECKED
ADJUST >>> SHARPNESS >>> SHARPEN
EFFECTS >>> IMAGE EFFECTS >>> OFFSET
Horizontal offset = 5
Vertical offset = (minus) -2
Edge Mode = Transparent
Rename this layer F3 |
|
STEP 25
LAYERS >>> DUPLICATE
PSP9:IMAGE >>> ROTATE >>> FREE ROTATE = RIGHT 15
Ensure "All layers" is UNCHECKED
PSPX - PSPX6: IMAGE >>> FREE ROTATE = RIGHT 15
Ensure "All layers" is UNCHECKED
ADJUST >>> SHARPNESS >>> SHARPEN
EFFECTS >>> IMAGE EFFECTS >>> OFFSET
Horizontal offset = 5
Vertical offset = (minus) -2
Edge Mode = Transparent
Rename this layer F4
Save as monkeys.pspimage |
|
NOTE
We're going to tackle the animation in a different way.
We're going to prepare all the frames in PSP before going into Animation Shop,
just to show you there's an alternate way to create your animation.
|
STEP 26
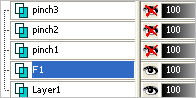
Set up your LAYER PALETTE as shown
Right click on the Title Bar and select
COPY MERGED from the options
|
|
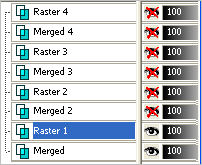
STEP 27
MAXIMIZE the bgd image you saved earlier
With the Merged layer active
Right click on the Title Bar
and select PASTE AS NEW LAYER from the options.
EFFECTS >>> IMAGE EFFECTS >>> OFFSET
CLOSE the Merged layer and Raster 1
OPEN & ACTIVATE the Merged 2 Layer
|
|
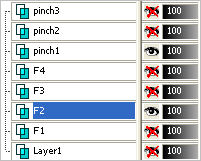
STEP 28
Back to the Monkeys image
Set up your LAYER PALETTE as shown
F2 and pinch 1 OPEN
Right click on the Title Bar and select
COPY MERGED from the options |
|
STEP 29
Back to the bgd image you saved earlier
Right click on the Title Bar
and select PASTE AS NEW LAYER from the options.
EFFECTS >>> IMAGE EFFECTS >>> OFFSET
Same settings
CLOSE the Merged 2 and Raster 2 layers
OPEN & ACTIVATE the Merged 3 Layer
********
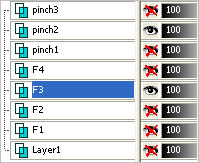
Back to the Monkeys image
Set up your LAYER PALETTE as shown
F3 and pinch 2 OPEN
Right click on the Title Bar and select
COPY MERGED from the options
|
|
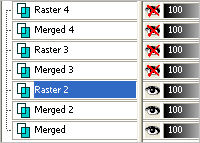
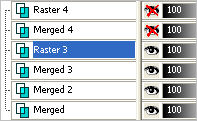
STEP 30
Back to the bgd image you saved earlier
Right click on the Title Bar
and select PASTE AS NEW LAYER from the options.
EFFECTS >>> IMAGE EFFECTS >>> OFFSET
Same settings
CLOSE the Merged 3 layer and Raster 3
OPEN & ACTIVATE the Merged 4 Layer
********
Back to the Monkeys image
Set up your LAYER PALETTE as shown
F4 and pinch 3 OPEN
Right click on the Title Bar and select
COPY MERGED from the options |
|
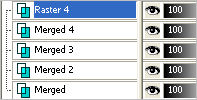
STEP 31
Back to the bgd image you saved earlier
Right click on the Title Bar
and select PASTE AS NEW LAYER from the options.
EFFECTS >>> IMAGE EFFECTS >>> OFFSET
Same settings
|
|
STEP 32
Set up your LAYER PALETTE as shown
|
|
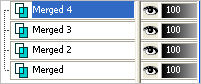
STEP 33
LAYERS >>> MERGE >>> MERGE DOWN
Set up your LAYER PALETTE as shown
|
|
STEP 34
LAYERS >>> MERGE >>> MERGE DOWN
Set up your LAYER PALETTE as shown |
|
STEP 35
LAYERS >>> MERGE >>> MERGE DOWN
Set up your LAYER PALETTE as shown |
|
STEP 36
LAYERS >>> MERGE >>> MERGE DOWN
Save as Monkeys_animation.pspimage
|
|
STEP 37
OPEN Animation Shop
FILE >>> OPEN
Locate the Monkeys_animation.psp file
Click OPEN
Edit >> Select All
Edit >> Copy
Click inside frame 4 (F:4) to activate
Edit >> Paste After Current Frame
Animation >> Reverse frames |
STEP 38
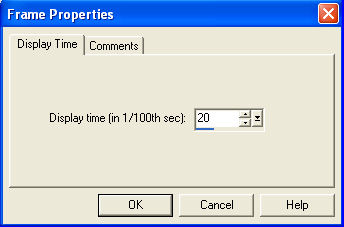
Edit >> Select All
Right click on Title Bar of frames
Select 'Frame Properties' from the options
Display time =20
|
|
STEP 39
Right click inside frame 5 (F:5)
Select 'Frame Properties' from the options
Display time = 50
*************************************************
View >> Animation
and while it is still running,
File >> Save As
Locate the folder in which you wish to save it.
Name your animation.
With the Gif Optimiser keep pressing NEXT
until you get to the last one... click FINISH
Close the Animation
Close the frames.
Close Animation Shop |
|
|
|
|