You'll be happy to know this is a quick tutorial even though it took me hours to create. *S*
I've done all the hard work for you in creating the jigsaw pieces.
Had I not.... the tut would be at least 4 pages long.
So... please enjoy!
|
STEP 1
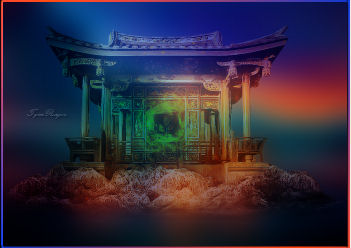
Open up the Background- corinne.vicaire image
in your PSP workspace
WINDOW >>> DUPLICATE
Close the original Image
LAYERS >>> Promote background Layer
|
STEP 2
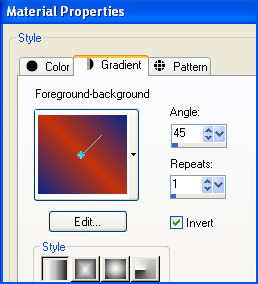
In your MATERIALS PALETTE
Load ORANGE " #c6320b" in your foreground
Load BLUE " #0a268a " in your background
Then click on the GRADIENT option
in your foreground palette
and select the Foreground-background gradient
with these settings |
|
STEP 3
SELECTIONS >>> SELECT ALL
SELECTIONS >>> MODIFY >>> CONTRACT = 6
SELECTIONS >>> INVERT
Flood fill with the gradient
(NOTE: PSPX6 users may need to add a
new layer, then merge down)
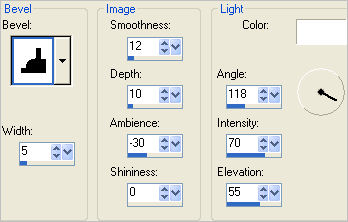
EFFECTS >>> 3D EFFECTS >>> INNER BEVEL
|
|
STEP 4
DESELECT |
|
STEP 5
Open up the T.Reagen_3123 image
in your PSP workspace
Right click on the Title Bar and select COPY from the options
Right click on the Title Bar of your tag image
and select PASTE AS NEW LAYER from the options.
In your LAYER PALETTE change the
BLEND MODE to SOFT LIGHT
NOTE: You may wish to remove the tuber text.. I left it
because it's mostly hidden in final result...and I'm lazy! *S*)
|
|
STEP 6
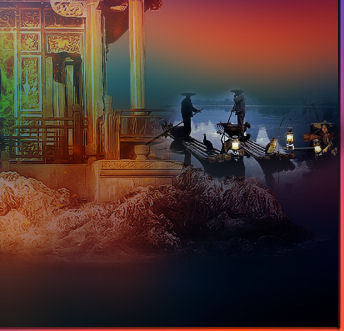
Open up the libellulegraphisme_pecheurs_asiatique image
in your PSP workspace
Right click on the Title Bar and select COPY from the options
Right click on the Title Bar of your tag image
and select PASTE AS NEW LAYER from the options.
IMAGE >>> RESIZE = 40%
Ensure "Resize all layers" is UNCHECKED
Resample using WEIGHTED AVERAGE
Reposition with your MOVER tool
|
|
STEP 7
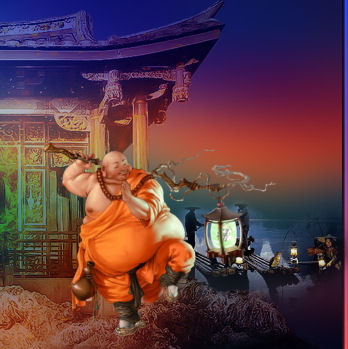
Open up the tube-sonja-chinese-maneke-2006 image
in your PSP workspace
Right click on the Title Bar and select COPY from the options
Right click on the Title Bar of your tag image
and select PASTE AS NEW LAYER from the options.
IMAGE >>> RESIZE = 50%
Ensure "Resize all layers" is UNCHECKED
Resample using WEIGHTED AVERAGE
ADJUST >>> SHARPNESS >>> SHARPEN
Reposition with your MOVER tool
|
|
STEP 8
Open up the KAT_2007_020645 image
in your PSP workspace
Right click on the Title Bar and select COPY from the options
Right click on the Title Bar of your tag image
and select PASTE AS NEW LAYER from the options.
Reposition with your MOVER tool
LAYERS >>> MERGE >>> MERGE VISIBLE
|
|
STEP 9
LAYERS >> NEW RASTER LAYER
Select your TEXT TOOL
with font and settings of your choice
add your name
LAYERS >>> MERGE >>> MERGE VISIBLE
|
|
STEP 10
Open up the jigsaw-pieces image
in your PSP workspace
WINDOW >>> DUPLICATE
Close the original Image
Right click on the Title Bar of your MERGED image
and select COPY from the options
Right click on the Title Bar of your tag image
and select PASTE AS NEW LAYER from the options.
LAYERS >>> ARRANGE >>> SEND TO BOTTOM
Rename this layer Merged
|
STEP 11
With the Merged layer active
and all layers open
Right click on Title Bar and select
Copy merged from the options
In ANIMATION SHOP
Right click the workspace and select
'Paste As New Animation' from the options.
|
STEP 12
Back to PSP.
CLOSE Raster1
Right click on Title Bar and select
Copy merged from the options
In ANIMATION SHOP
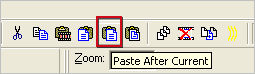
Right click the workspace and click on the
Paste After Current icon
|
STEP 13
CLOSE Raster2
Right click on Title Bar and select
Copy merged from the options
In ANIMATION SHOP
Right click the workspace and
click on the Paste After Current icon
|
STEP 14
Continue in this manner closing the Raster layers
one at a time
until all Raster layers are closed and you have 13 frames in Animation Shop
|
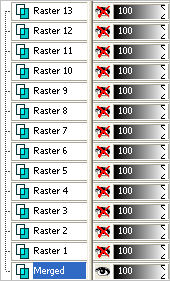
STEP 15
Finally, with your
LAYER PALETTE
set up
as shown
Right click on Title Bar and select
Copy from the options
|
|
STEP 16
In ANIMATION SHOP
Right click the workspace and click on the Paste After Current icon
You should have 14 frames
Edit >> Select All
Right click on Title Bar of frames
Select 'Frame Properties' from the options
Display time = 50
|
STEP 17
RIGHT Click inside the last frame (F:14) to activate
Select 'Frame Properties' from the options
Display time = 100
|
STEP 18
View >> Animation
and while it is still running,
File >> Save As
Locate the folder in which you wish to save it.
Name your animation.
With the Gif Optimiser keep pressing NEXT
until you get to the last one... click FINISH
Close the Animation
Close the frames.
Close Animation Shop
|
| |
|
| |
|
| |
|