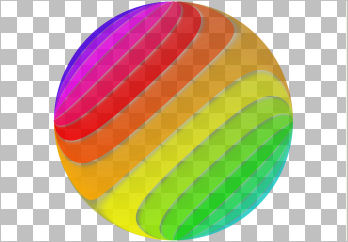
STEP 1
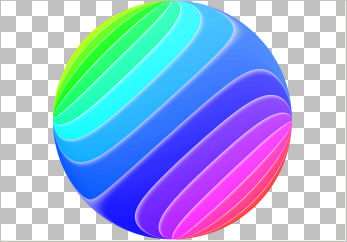
Open up the 158-colored-curved-lines image in your PSP workspace
WINDOW >>> DUPLICATE
Close the original Image.
LAYERS >>> Promote background layer
EFFECTS >>> PLUGINS >>> Transparency >>> Eliminate Black
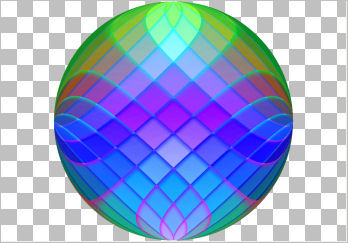
EFFECTS>>> GEOMETRIC EFFECTS >>> CIRCLE
Edge Mode = Transparent
 |
STEP 2
LAYERS >>> NEW RASTER LAYER
Flood fill with WHITE
LAYERS >>> ARRANGE >>> MOVE DOWN
EFFECTS>>> GEOMETRIC EFFECTS >>> CIRCLE
Edge Mode = Transparent
ACTIVATE Raster 1
In your LAYER PALETTE change the
BLEND MODE to DIFFERENCE
|
|
STEP 3
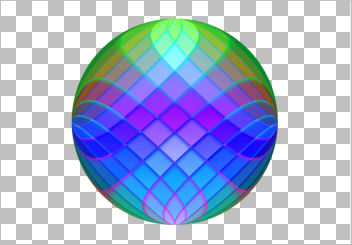
LAYERS >>> DUPLICATE
IMAGE >>> MIRROR
LAYERS >>> MERGE >>> MERGE VISIBLE. |
|
STEP 4
IMAGE >>> RESIZE = 700 X 487 pixels
Resample using WEIGHTED AVERAGE.
Ensure "Lock aspect ratio " is CHECKED
Ensure "Resize all layers" is CHECKED
|
|
STEP 5
IMAGE >>> RESIZE = 85%
Ensure "Resize all layers" is UNCHECKED
Resample using WEIGHTED AVERAGE
(Sharpen if you wish... I didn't)
|
|
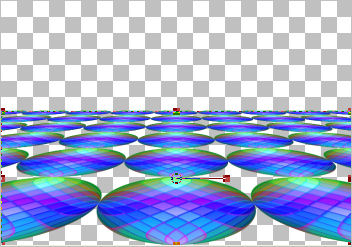
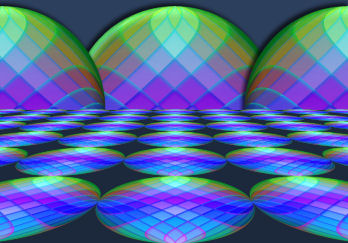
STEP 6
LAYERS >>> DUPLICATE
CLOSE the Merged layer
With the Copy of Merged layer active
EFFECTS >>> PLUGINS >>> MuRa's Filter Meister >>> Perspective Tiling
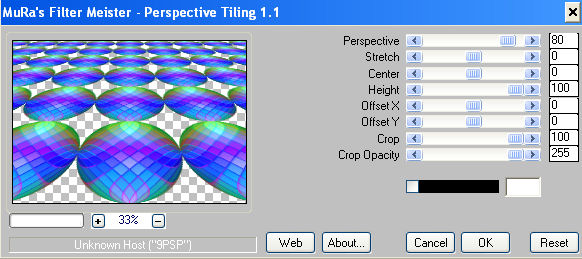
Click OK
VIEW >>> RULERS |
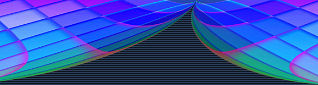
STEP 7
Select your RASTER DEFORM tool
Mode = SCALE
use default settings
PSPX-X6:Select your PICK tool
Drag the centre top node down to
the 220 pixel mark on your left ruler
|
|
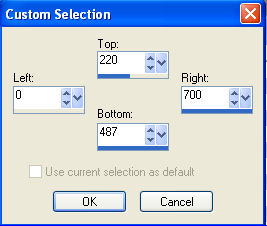
STEP 8
Click the RESET RECTANGLE arrow
Select the MOVER tool to disengage the
DEFORMATION tool (PICK tool)
LAYERS >>> NEW RASTER LAYER
Choose your SELECTION TOOL then click on the
CUSTOM SELECTION symbol
and enter these coordinates.
|
|
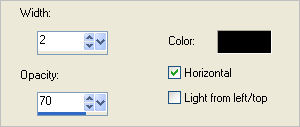
STEP 9
Flood fill with BLUE #2c3f5d
LAYERS >>> ARRANGE >>> MOVE DOWN
EFFECTS >>> TEXTURE EFFECTS >>> BLINDS
|
|
STEP 10
SELECTIONS >>> INVERT
LAYERS >>> NEW RASTER LAYER
Flood fill with BLUE
DESELECT
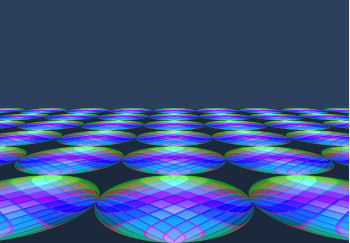
-*-*-*-*-*-*-*-*-*-*-*-*-
CLOSE-UP (100%)
|
|
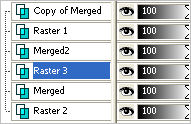
STEP 11
Rearrange layers in your LAYER PALETTE
as shown
and open & activate the Merged layer |
|
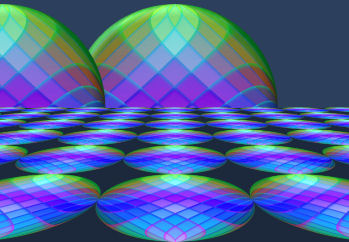
STEP 12
EFFECTS >>> IMAGE EFFECTS >>> OFFSET
Horizontal Offset = 0
Vertical Offset = 25
Edge Mode = Transparent
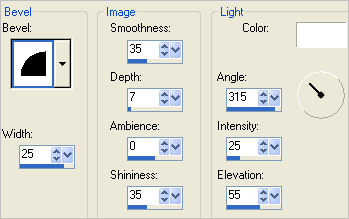
EFFECTS >>> 3D EFFECTS >>> INNER BEVEL
|
|
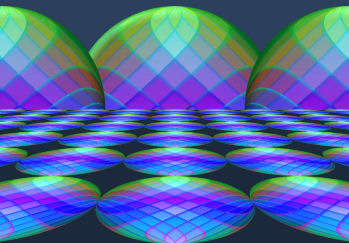
STEP 13
LAYERS >>> DUPLICATE
EFFECTS >>> IMAGE EFFECTS >>> OFFSET
Horizontal Offset = - (minus) 345
Vertical Offset = 0
Edge Mode = Transparent |
|
STEP 14
LAYERS >>> DUPLICATE
IMAGE >>> MIRROR
LAYERS >>> MERGE >>> MERGE DOWN
Rename this layer Merged2
|
|
STEP 15
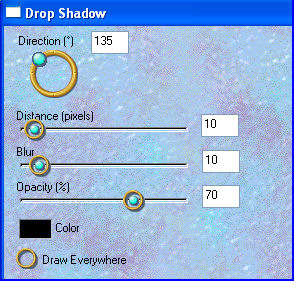
EFFECTS >>> PLUGINS >>> EYE CANDY 3 >>>
DROP SHADOW |
|
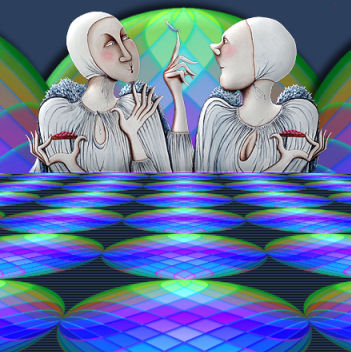
STEP 16
ACTIVATE the Merged layer
EDIT >>> Repeat Drop Shadow. |
|
STEP 17
ACTIVATE Copy of Merged layer
Open up the qu'est ce que c'est image in your PSP workspace
Right click on the Title Bar and select COPY from the options
Right click on the Title Bar of your tag image
and select PASTE AS NEW LAYER from the options.
IMAGE >>> RESIZE = 50%
Ensure "Resize all layers" is UNCHECKED
Resample using WEIGHTED AVERAGE
ADJUST >>> SHARPNESS >>> SHARPEN
EFFECTS >>> 3D EFFECTS >>> INNER BEVEL
Same settings... BUT Change DEPTH to 3
Reposition with your MOVER tool |
|
STEP 18
In your LAYER PALETTE move this layer
under Merged2 |
|
STEP 19
EFFECTS >>> PLUGINS >>> EYE CANDY 3 >>>
DROP SHADOW
Same settings |
|
STEP 20
ACTIVATE the top layer
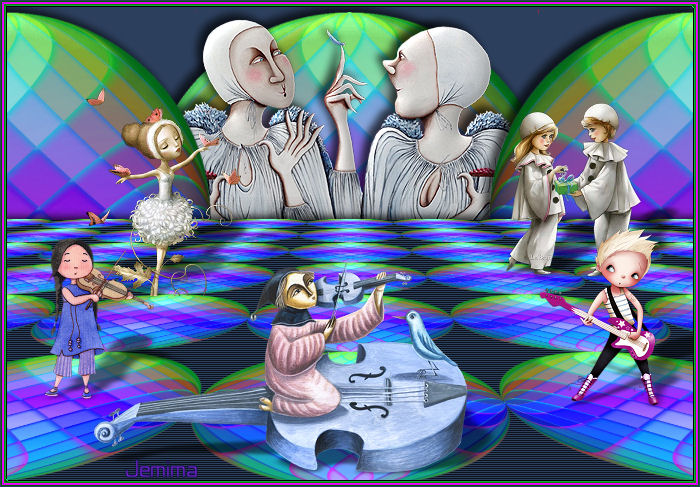
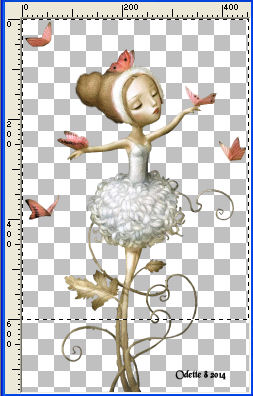
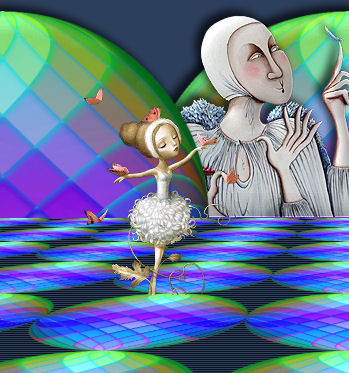
Open up the danseuse fleur-art.Nicoletta Ceccoli image
in your PSP workspace
Choose your SELECTION TOOL
Selection Type = Rectangle
Mode = Replace
Feather = 0
Antialias = UNChecked
Select the area shown
Right click on the Title Bar and select COPY from the options
Right click on the Title Bar of your tag image
and select PASTE AS NEW LAYER from the options. |
|
STEP 21
IMAGE >>> RESIZE = 35%
Ensure "Resize all layers" is UNCHECKED
Resample using WEIGHTED AVERAGE
ADJUST >>> SHARPNESS >>> SHARPEN
Reposition with your MOVER tool |
|
STEP 22
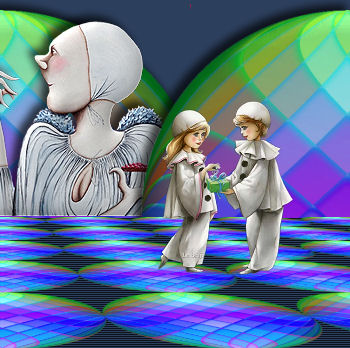
Open up the 2011-6-7_Pierrot1_La_Bruji image
in your PSP workspace
Right click on the Title Bar and select COPY from the options
Right click on the Title Bar of your tag image
and select PASTE AS NEW LAYER from the options.
IMAGE >>> RESIZE = 35%
Ensure "Resize all layers" is UNCHECKED
Resample using WEIGHTED AVERAGE
ADJUST >>> SHARPNESS >>> SHARPEN
Reposition with your MOVER tool |
|
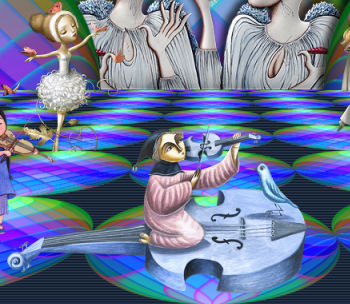
STEP 23
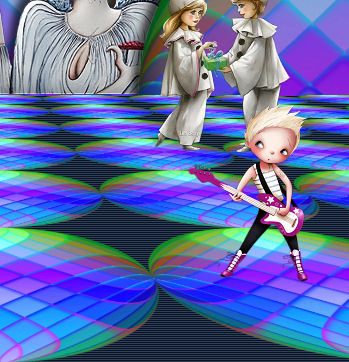
Open up the tubtatie_ROCK STARgars2 image
in your PSP workspace
Right click on the Title Bar and select COPY from the options
Right click on the Title Bar of your tag image
and select PASTE AS NEW LAYER from the options.
IMAGE >>> RESIZE = 45%
Ensure "Resize all layers" is UNCHECKED
Resample using WEIGHTED AVERAGE
ADJUST >>> SHARPNESS >>> SHARPEN
Choose your SELECTION TOOL ... Same settings
Select the text and delete
DESELECT
Reposition with your MOVER tool |
|
STEP 24
Open up the Mira_8978056 image
in your PSP workspace
Right click on the Title Bar and select COPY from the options
Right click on the Title Bar of your tag image
and select PASTE AS NEW LAYER from the options.
IMAGE >>> RESIZE = 27%
Ensure "Resize all layers" is UNCHECKED
Resample using WEIGHTED AVERAGE
ADJUST >>> SHARPNESS >>> SHARPEN
Reposition with your MOVER tool
|
|
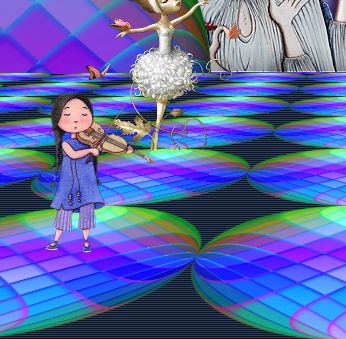
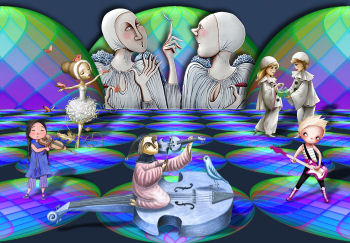
STEP 25
Open up the berceuse-art.Bimba Landmann image
in your PSP workspace
Right click on the Title Bar and select COPY from the options
Right click on the Title Bar of your tag image
and select PASTE AS NEW LAYER from the options.
Choose your SELECTION TOOL ... Same settings
Select the text and delete
DESELECT
IMAGE >>> RESIZE = 60%
Ensure "Resize all layers" is UNCHECKED
Resample using WEIGHTED AVERAGE
ADJUST >>> SHARPNESS >>> SHARPEN
Reposition with your MOVER tool |
|
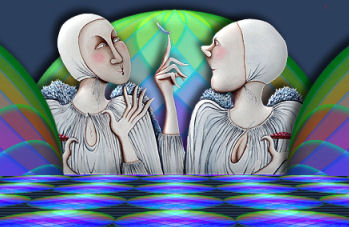
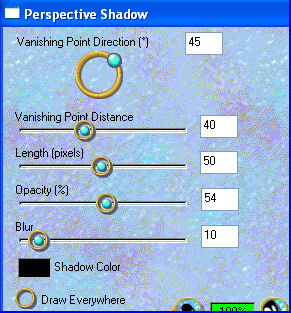
STEP 26
EFFECTS >>> PLUGINS >>> EYE CANDY 3 >>>
PERSPECTIVE SHADOW |
|
STEP 27
Activate Raster 7
EDIT >>> Repeat Perspective Shadow.
Activate Raster 6
EDIT >>> Repeat Perspective Shadow.
Activate Raster 5
EDIT >>> Repeat Perspective Shadow.
Activate Raster 4
EDIT >>> Repeat Perspective Shadow. |
|
STEP 28
LAYERS >>> MERGE >>> MERGE VISIBLE
Open up the TWAS-Frame image in your PSP workspace
Right click on the Title Bar and select COPY from the options
Right click on the Title Bar of your tag image
and select PASTE AS NEW LAYER from the options.
, |
STEP 29
LAYERS >>> NEW RASTER LAYER
Select your TEXT tool
Using a font of your choice
Add your name |
STEP 30
LAYERS >>> MERGE >>> MERGE ALL (Flatten)
Save as .jpg image |
|
|
|
|
|
|