STEP 1
Open a new image 700 x 500
Transparent background
PSP9: Colour Depth = 16 Million Colors (24bit)
PSPX-X6: Colour Depth RGB = 8bits/channel
VIEW >>> RULERS
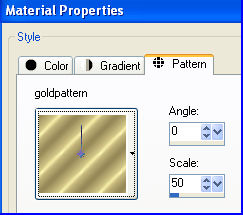
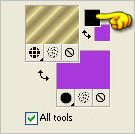
In your MATERIALS PALETTE load
goldpattern pattern in the foreground using the settings below
and PURPLE #a838dc in the background
Load BLACK
#000000 in the background as shown below
|
STEP 2
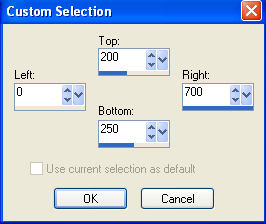
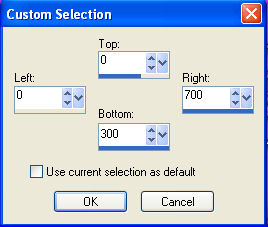
Choose your SELECTION TOOL then click on the CUSTOM SELECTION symbol
and enter these coordinates.
|
|
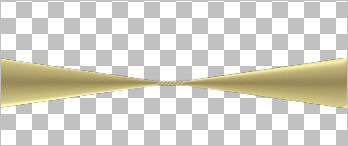
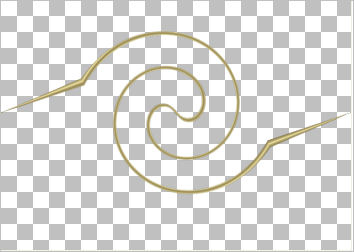
STEP 3
Flood fill with goldpattern
DESELECT
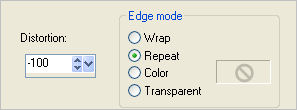
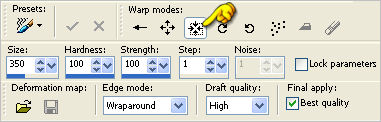
Select your WARP BRUSH tool
with CONTRACT settings
|
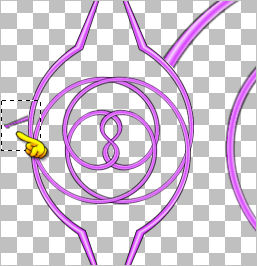
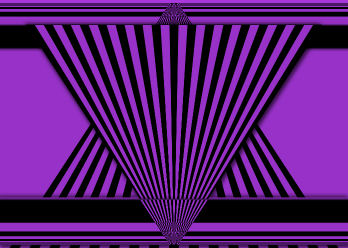
STEP 4
Place your cursor at 350 pixels across and
225 pixels down
and left click until you image looks like this
in the centre
Click APPLY
|
|
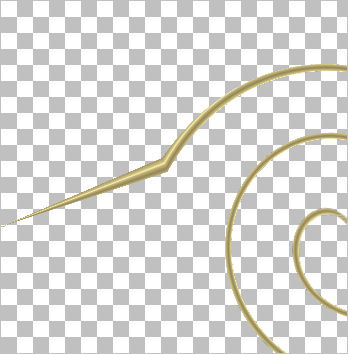
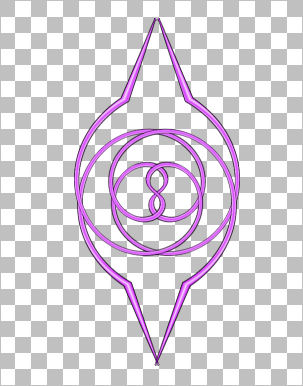
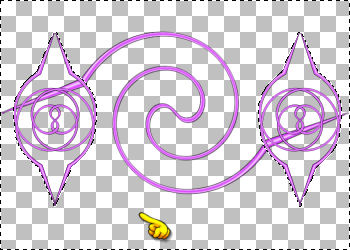
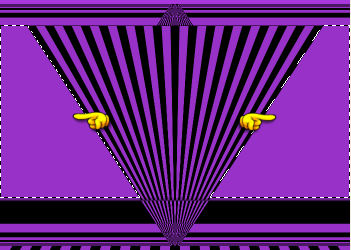
STEP 5
Change your WARP BRUSH tool to RIGHT TWIRL with these settings

Place your cursor at 350 pixels across and 225 pixels down.
Hold down your left mouse button until it "twirls"
twice
and looks like the image below
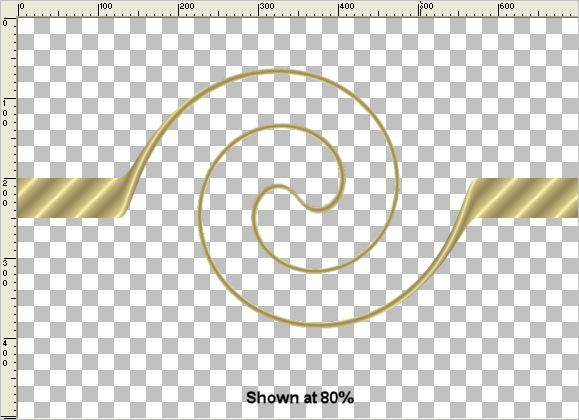
Click APPLY |
NOTE
If your 'TWIRL" is not exactly the same
as mine... DON'T STRESS OUT... *S*
It will just mean that the design created in STEP 11
will be slightly different...
not worth worrying about. *S*
|
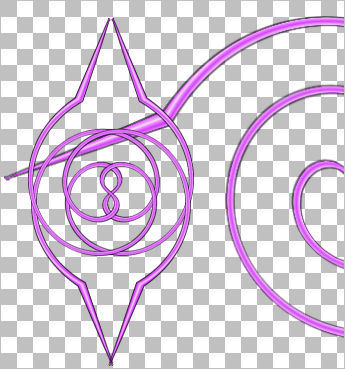
STEP 6
Change your WARP BRUSH tool back to
CONTRACT settings as in STEP 3
Place your cursor at 0 pixels across and 225 pixels down.
and left click until you image looks like this
Click APPLY
|
|
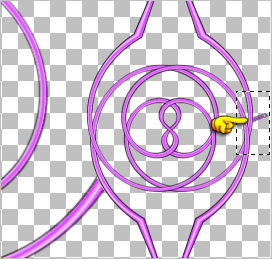
STEP 7
Place your cursor at 699 pixels across and 225 pixels down.
and left click until you image looks like this
Click APPLY |
|
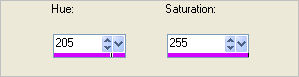
STEP 8
ADJUST >>> HUE & SATURATION >>> COLORIZE
LAYERS >>> DUPLICATE (Twice)
LAYERS >>> MERGE >>> MERGE VISIBLE
IMAGE >>> RESIZE = 99%
Ensure "Resize all layers" is UNCHECKED
Resample using WEIGHTED AVERAGE
|
|
STEP 9
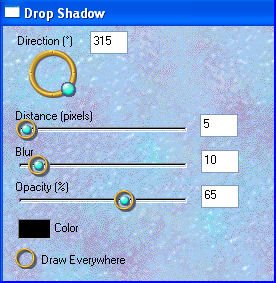
EFFECTS >>> 3D EFFECTS >>> DROP SHADOW
Vertical & Horizontal offsets = 1
Colour = Black
Opacity = 65
Blur = 0
Repeat Drop Shadow effect changing
Vertical & Horizontal Offsets to - ( minus ) 1
Click OK
|
STEP 10
LAYERS >>> DUPLICATE
CLOSE the Merged layer
IMAGE >>> RESIZE = 50%
Ensure "Resize all layers" is UNCHECKED
Resample using WEIGHTED AVERAGE
PSP9: IMAGE >>> ROTATE >>> FREE ROTATE =
RIGHT 90
Ensure "All layers" is UNCHECKED
PSPX - PSPX6: IMAGE >>> FREE ROTATE = RIGHT 90
Ensure "All layers" is UNCHECKED
|
|
STEP 11
LAYERS >>> DUPLICATE
IMAGE >>> MIRROR
LAYERS >>> MERGE >>> MERGE DOWN
LAYERS >>> DUPLICATE
LAYERS >>> MERGE >>> MERGE DOWN
|
|
STEP 12
EFFECTS >>> IMAGE EFFECTS >>> OFFSET
Horizontal Offset = - (minus) 240
Vertical Offset = 0
Edge Mode = Transparent
OPEN the Merged layer |
|
STEP 13
LAYERS >>> DUPLICATE
EFFECTS >>> IMAGE EFFECTS >>> OFFSET
Horizontal Offset = 490
Vertical Offset = 0
Edge Mode = Transparent
LAYERS >>> MERGE >>> MERGE DOWN
|
STEP 14
With your MAGIC WAND
Mode = Replace
Match Mode = RGB Value
Tolerance = 0
Feather = 0
Antialias = UNchecked
Sample Merged = UNCHECKED
PSP9 - X6: Check CONTIGUOUS
PSPX - X6: There is no " Sample Merged"
PSPX - X6: Use all layers = UNChecked
Click outside the small designs
|
|
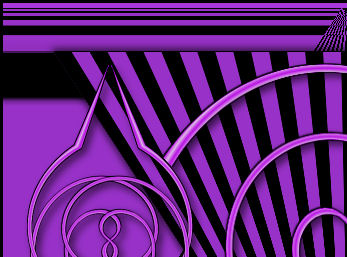
STEP 15
SELECTIONS >>> INVERT
ACTIVATE the Merged layer
Hit your DELETE key
DESELECT
Choose your SELECTION TOOL
Selection Type = Rectangle
Mode = Replace
Feather = 0
Antialias = UNChecked
Select the part of the image shown
|
|
STEP 16
Hit your DELETE key
DESELECT
Choose your SELECTION TOOL
Same settings
Select the part of the image shown
Hit your DELETE key
DESELECT |
|
STEP 17
LAYERS >>> MERGE >>> MERGE VISIBLE
ADJUST >>> BRIGHTNESS and CONTRAST >>> BRIGHTNESS/CONTRAST
|
|
STEP 18
EFFECTS >>> PLUGINS >>> EYE CANDY 3 >>>
DROP SHADOW |
|
STEP 19
LAYERS >>> NEW RASTER LAYER
Flood fill with PURPLE
LAYERS >>> ARRANGE >>> MOVE DOWN
LAYERS >>> DUPLICATE
|
STEP 20
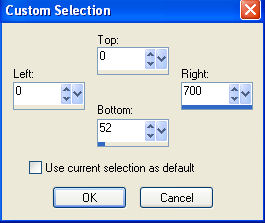
Choose your SELECTION TOOL then click on the
CUSTOM SELECTION symbol
and enter these coordinates. |
|
STEP 21
EDIT >>> CLEAR
SELECTIONS >>> INVERT
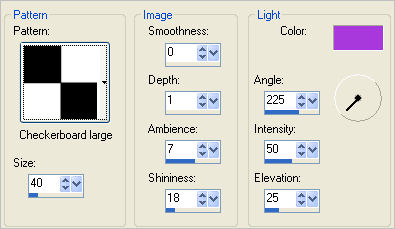
EFFECTS >>> TEXTURE EFFECTS >>> SCULPTURE
COLOUR = PURPLE #a838dc
PATTERN = Checkerboard large
DESELECT
|
STEP 22
EFFECTS>>> GEOMETRIC EFFECTS >>>
Perspective Vertical
|
|
STEP 23
LAYERS >>> DUPLICATE
IMAGE >>> FLIP
Choose your SELECTION TOOL then click on the
CUSTOM SELECTION symbol
and enter these coordinates.
|
|
STEP 24
EDIT >>> CLEAR
DESELECT
EFFECTS >>> 3D EFFECTS >>> DROP SHADOW
Vertical & Horizontal offsets = - ( minus ) 1
Colour = Black
Opacity = 100
Blur = 0
|
|
STEP 25
CLOSE the Merged layer
Still on Copy (2) of Raster 1
With your MAGIC WAND
Mode = Replace
Match Mode = RGB Value
Tolerance = 15
Feather = 0
Antialias = Checked
Sample Merged = UNCHECKED
PSP9 - X6: Check CONTIGUOUS
PSPX - X6: There is no " Sample Merged"
PSPX - X6: Use all layers = UNChecked.
PSP9 - X6: ANTIALIAS = Outside
and while depressing your SHIFT KEY...
Select the areas shown
|
|
STEP 26
EDIT >>> CLEAR
DESELECT
EFFECTS >>> PLUGINS >>> EYE CANDY 3 >>>
DROP SHADOW
Same settings
EDIT >>> Repeat Drop Shadow..
change DIRECTION to 135
LAYERS >>> MERGE >>> MERGE VISIBLE
|
|
STEP 27
OPEN & ACTIVATE the TOP Merged layer
LAYERS >>> NEW RASTER LAYER
Flood fill with BLACK
SELECTIONS >>> SELECT ALL
SELECTIONS >>> MODIFY >>> CONTRACT = 3
EDIT >>> CLEAR
DESELECT
|
|
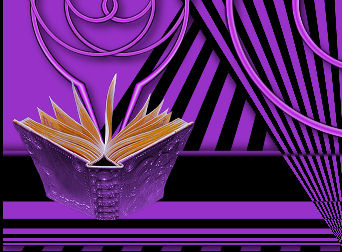
STEP 28
Open up the ENCHANTEDBOOK image
in your PSP workspace
Right click on the Title Bar and select
COPY from the options
Right click on the Title Bar of your tag image
and select PASTE AS NEW LAYER from the options.
IMAGE >>> RESIZE = 50%
Ensure "Resize all layers" is UNCHECKED
Resample using WEIGHTED AVERAGE
ADJUST >>> SHARPNESS >>> SHARPEN
Reposition to lower left with your MOVER tool
|
|
STEP 29
LAYERS >>> DUPLICATE
IMAGE >>> MIRROR
LAYERS >>> MERGE >>> MERGE DOWN
EFFECTS >>> PLUGINS >>> EYE CANDY 3 >>>
DROP SHADOW
Same settings
|
|
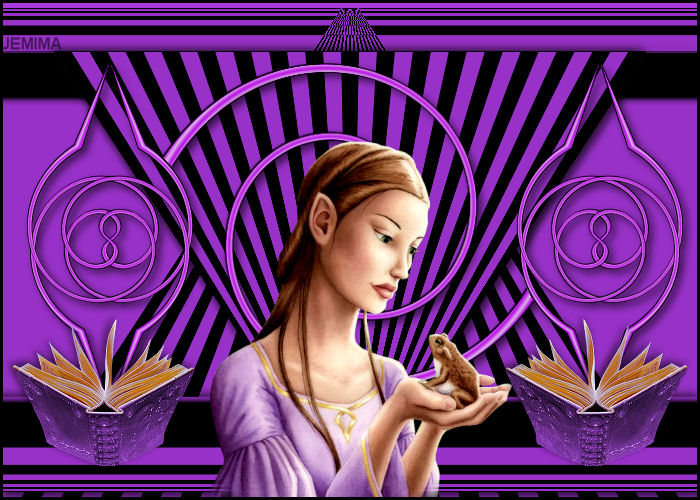
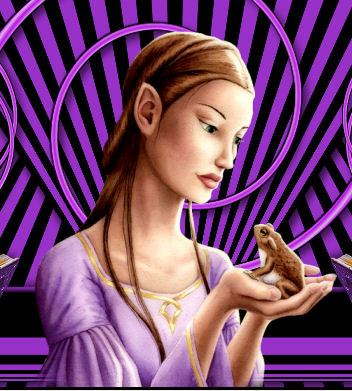
STEP 30
Open up the KAT_misted_notaprinceatall image
in your PSP workspace
Right click on the Title Bar and select
COPY from the options
Right click on the Title Bar of your tag image
and select PASTE AS NEW LAYER from the options.
IMAGE >>> RESIZE = 70%
Ensure "Resize all layers" is UNCHECKED
Resample using WEIGHTED AVERAGE
ADJUST >>> SHARPNESS >>> SHARPEN
Reposition down with your MOVER tool |
|
STEP 31
EFFECTS >>> PLUGINS >>> EYE CANDY 3 >>>
DROP SHADOW
Same settings
LAYERS >>> NEW RASTER LAYER
Select your TEXT tool
Using a font of your choice
Add your name
|
|
STEP 32
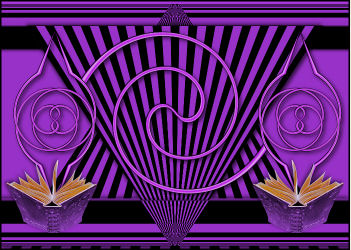
LAYERS >>> MERGE >>> MERGE ALL (Flatten)
Save as .jpg image
|
|
|
|
|
|
|