STEP 1
A quick and easy tutorial for a change..
Open a new image 600 x 500
Transparent background
PSP9: Colour Depth = 16 Million Colors (24bit)
PSPX-X6: Colour Depth RGB = 8bits/channel
Flood fill with #f5f0f7
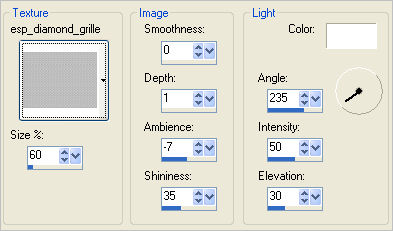
EFFECTS >>> TEXTURE EFFECTS >>> TEXTURE
TEXTURE = esp_diamond_grille
OPEN the Mask-Gabry-073 image and minimize
|
STEP 2
LAYERS >>> NEW RASTER LAYER
Flood fill with BLUE #4a67a8
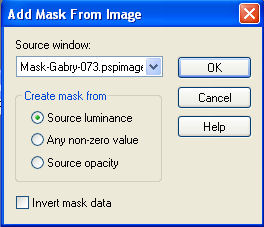
LAYERS >>> NEW MASK LAYER >>> FROM IMAGE
Source window: Mask-Gabry-073.pspimage
LAYERS >>> MERGE >>> MERGE GROUP
|
|
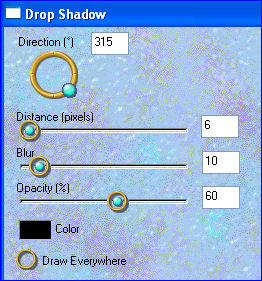
STEP 3
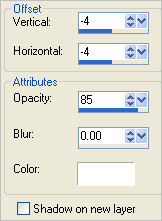
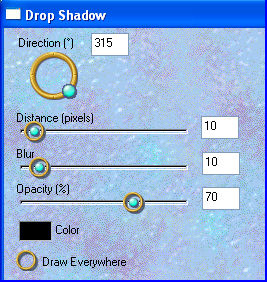
EFFECTS >>> 3D EFFECTS >>> DROP SHADOW
|
|
STEP 4
ADJUST >>> SHARPNESS >>> SHARPEN MORE |
|
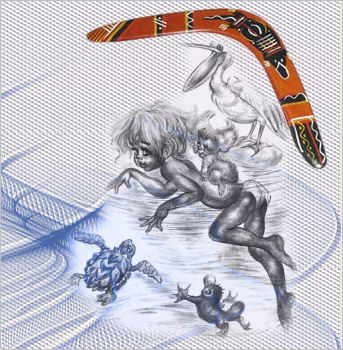
STEP 5
Open up the boomerang image in your PSP workspace
Right click on the Title Bar and select
COPY from the options
Right click on the Title Bar of your tag image
and select PASTE AS NEW LAYER from the options.
IMAGE >>> MIRROR
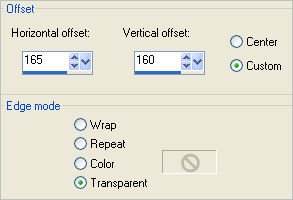
EFFECTS >>> IMAGE EFFECTS >>> OFFSET
|
|
STEP 6
Open up the aussies image in your PSP workspace
Right click on the Title Bar and select
COPY from the options
Right click on the Title Bar of your tag image
and select PASTE AS NEW LAYER from the options.
IMAGE >>> RESIZE = 40%
Ensure "Resize all layers" is UNCHECKED
Resample using WEIGHTED AVERAGE
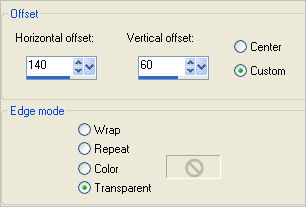
EFFECTS >>> IMAGE EFFECTS >>> OFFSET
|
|
STEP 7
In your LAYER PALETTE change the
BLEND MODE to LUMINANCE (L) |
|
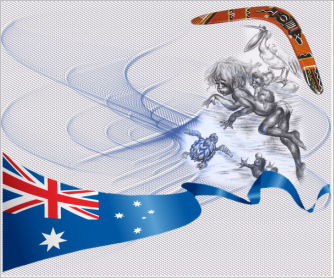
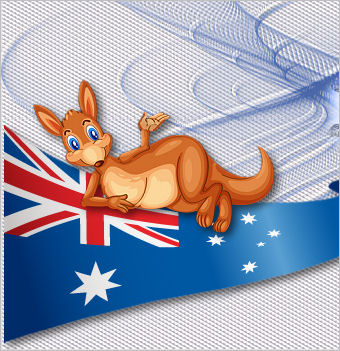
STEP 8
Open up the Australia-Day-Flag image
in your PSP workspace
Right click on the Title Bar and select
COPY from the options
Right click on the Title Bar of your tag image
and select PASTE AS NEW LAYER from the options.
EFFECTS >>> IMAGE EFFECTS >>> OFFSET
Horizontal = 2
Vertical = (minus) -135
|
|
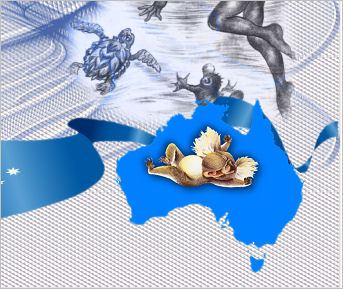
STEP 9
Open up the aussie-map image
in your PSP workspace
Right click on the Title Bar and select
COPY from the options
Right click on the Title Bar of your tag image
and select PASTE AS NEW LAYER from the options.
IMAGE >>> RESIZE = 55%
Ensure "Resize all layers" is UNCHECKED
Resample using WEIGHTED AVERAGE
Reposition with your MOVER tool
Sharpen if you wish.
|
|
STEP 10
EFFECTS >>> PLUGINS >>> EYE CANDY 3 >>>
DROP SHADOW |
|
STEP 11
ACTIVATE Raster 4
EDIT >>> Repeat Drop Shadow..
ACTIVATE Raster 2
EDIT >>> Repeat Drop Shadow..
ACTIVATE Raster 5
|
STEP 12
Open up the 400_F image in your PSP workspace
Right click on the Title Bar and select
COPY from the options
Right click on the Title Bar of your tag image
and select PASTE AS NEW LAYER from the options.
IMAGE >>> RESIZE = 65%
Ensure "Resize all layers" is UNCHECKED
Resample using WEIGHTED AVERAGE
ADJUST >>> SHARPNESS >>> SHARPEN
EFFECTS >>> PLUGINS >>> EYE CANDY 3 >>>
DROP SHADOW
Same settings
Reposition with your MOVER tool |
|
STEP 13
Open up the AD-wordart image in your PSP workspace
Activate the verse layer
Right click on the Title Bar and select
COPY from the options
Right click on the Title Bar of your tag image
and select PASTE AS NEW LAYER from the options.
Reposition with your MOVER tool
|
|
STEP 14
Back to the AD-wordart image in your PSP workspace
Activate the Aust Day layer
Right click on the Title Bar and select
COPY from the options
Right click on the Title Bar of your tag image
and select PASTE AS NEW LAYER from the options.
Reposition with your MOVER tool

|
STEP 15
LAYERS >>> NEW RASTER LAYER
Flood fill with BLUE #013778
SELECTIONS >>> SELECT ALL
SELECTIONS >>> MODIFY >>> CONTRACT = 3
EDIT >>> CLEAR
Flood fill with OFF WHITE #f5f0f7
SELECTIONS >>> MODIFY >>> CONTRACT = 3
EDIT >>> CLEAR
Flood fill with RED #9d1317
SELECTIONS >>> MODIFY >>> CONTRACT = 3
EDIT >>> CLEAR
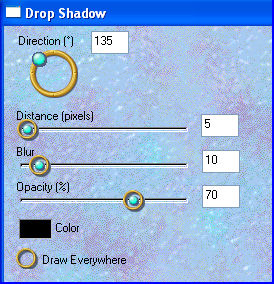
EFFECTS >>> 3D EFFECTS >>> DROP SHADOW
Vertical & Horizontal offsets = 1
Colour = Black
Opacity = 75
Blur = 0
Repeat Drop Shadow effect changing
Vertical & Horizontal Offsets to - ( minus ) 1
Click OK
DESELECT
|
|
STEP 16
EFFECTS >>> PLUGINS >>> EYE CANDY 3 >>>
DROP SHADOW |
|
STEP 17
EFFECTS >>> PLUGINS >>> EYE CANDY 3 >>>
DROP SHADOW |
|
STEP 18
LAYERS >>> NEW RASTER LAYER
ADD your name
LAYERS >>> MERGE >>> MERGE ALL (Flatten)
Save as .jpg image
|
|
|
|
|
|
|