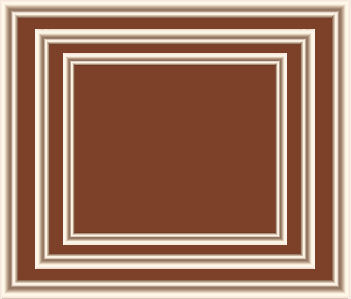
You have been supplied with 2 "Frame Borders" images.
We will only be using one... the other is for you to play with for your own unique creations.
|
STEP 1
Open a new image 700 x600
Transparent background
PSP9: Colour Depth = 16 Million Colors (24bit)
PSPX-X6: Colour Depth RGB = 8bits/channel |
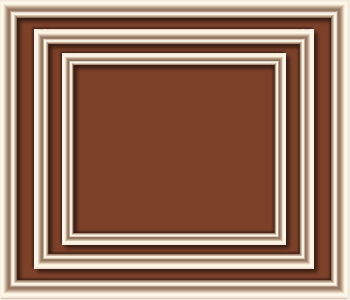
STEP 2
Open up the Frame_Borders2 image in your PSP workspace
Activate the beige layer
Right click on the Title Bar and select COPY from the options
Right click on the Title Bar of your frame image
and select PASTE AS NEW LAYER from the options.
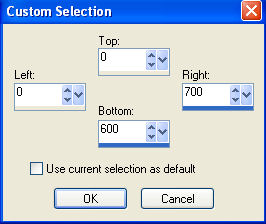
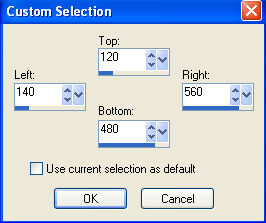
Choose your SELECTION TOOL then click on the
CUSTOM SELECTION
symbol
and enter these coordinates.
|
|
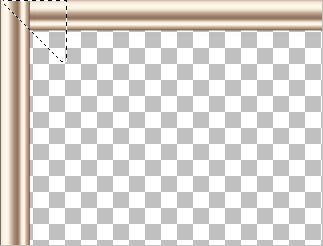
STEP 3
EDIT >>> CLEAR
DESELECT
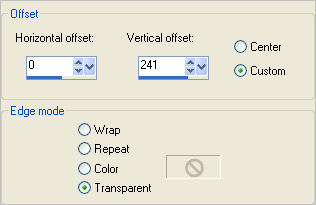
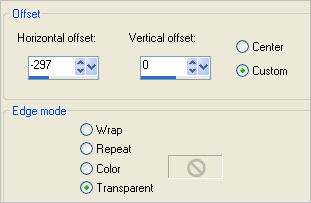
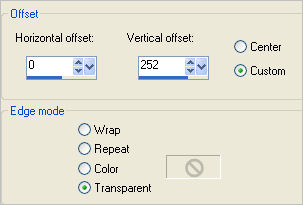
EFFECTS >>> IMAGE EFFECTS >>> OFFSET
|
|
STEP 4
LAYERS >>> DUPLICATE
IMAGE >>> FLIP
LAYERS >>> DUPLICATE
PSP9: IMAGE >>> ROTATE >>> FREE ROTATE = RIGHT 90
Ensure "All layers" is UNCHECKED
PSPX - PSPX6: IMAGE >>> FREE ROTATE = RIGHT 90
Ensure "All layers" is UNCHECKED
|
|
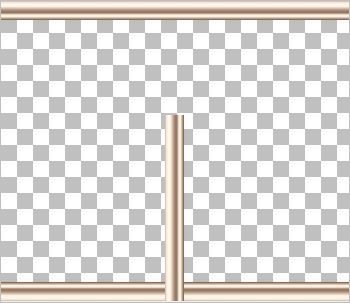
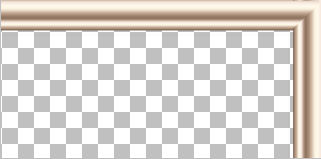
STEP 5
EFFECTS >>> IMAGE EFFECTS >>> OFFSET |
|
STEP 6
Choose your SELECTION TOOL then click on the
CUSTOM SELECTION symbol
and enter these coordinates.
|
|
STEP 7
SELECTIONS >>> INVERT
EDIT >>> CLEAR
DESELECT
This deletes the excess that you can't see.
LAYERS >>> DUPLICATE
IMAGE >>> MIRROR
LAYERS >>> MERGE >>> MERGE DOWN
Choose your FREEHAND SELECTION TOOL
Selection Type = Point to Point
Mode = Replace
Feather = 0
Smoothing = 6
Antialias = Checked
Select the top left corner as shown
|
|
STEP 8
EDIT >>> CLEAR
DESELECT
With your FREEHAND SELECTION TOOL
Same settings
Repeat the above instruction with the top right corner
|
|
STEP 9
EDIT >>> CLEAR
DESELECT
With your FREEHAND SELECTION TOOL
Same settings
Repeat the above instructions with the two lower corners
LAYERS >>> MERGE >>> MERGE DOWN
EDIT >>> Repeat Layer Merge Down
|
|
STEP 10
ACTIVATE Raster 1
Flood fill with #7d412a
ACTIVATE Raster 2
ADJUST >>> SHARPNESS >>> SHARPEN
LAYERS >>> DUPLICATE
IMAGE >>> RESIZE = 80%
Ensure "Resize all layers" is UNCHECKED
Resample using WEIGHTED AVERAGE
ADJUST >>> SHARPNESS >>> SHARPEN
|
|
STEP 11
LAYERS >>> DUPLICATE
IMAGE >>> RESIZE = 80%
Ensure "Resize all layers" is UNCHECKED
Resample using WEIGHTED AVERAGE
ADJUST >>> SHARPNESS >>> SHARPEN |
|
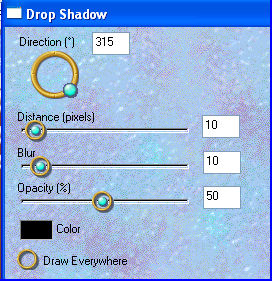
STEP 12
EFFECTS >>> PLUGINS >>> EYE CANDY 3 >>>
DROP SHADOW |
|
STEP 13
ACTIVATE Copy of Raster 2
EDIT >>> Repeat Drop Shadow..
ACTIVATE Raster 2
EDIT >>> Repeat Drop Shadow..
|
|
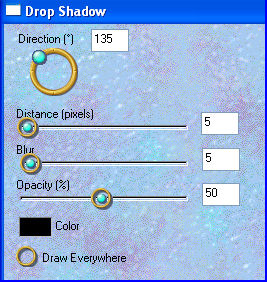
STEP 14
EFFECTS >>> PLUGINS >>> EYE CANDY 3 >>>
DROP SHADOW |
|
STEP 15
ACTIVATE Copy of Raster 2
EDIT >>> Repeat Drop Shadow..
ACTIVATE Copy (2) of Raster 2
EDIT >>> Repeat Drop Shadow..
|
|
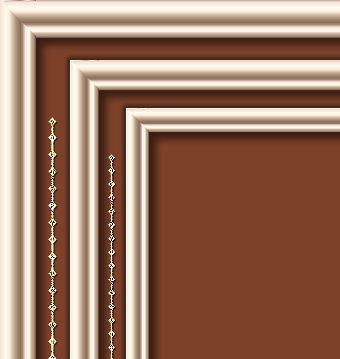
STEP 16
Open up the CherSwitz~Chains image in your PSP workspace
Activate Layer4
Right click on the Title Bar and select COPY from the options
Right click on the Title Bar of your frame image
and select PASTE AS NEW LAYER from the options.
EFFECTS >>> EDGE EFFECTS >>> ENHANCE MORE
EFFECTS >>> 3D EFFECTS >>> DROP SHADOW
Vertical & Horizontal offsets = 1
Colour = Black
Opacity = 100
Blur = 0
EFFECTS >>> IMAGE EFFECTS >>> OFFSET
|
|
STEP 17
LAYERS >>> DUPLICATE
IMAGE >>> MIRROR
LAYERS >>> MERGE >>> MERGE DOWN
LAYERS >>> DUPLICATE
IMAGE >>> RESIZE = 80%
Ensure "Resize all layers" is UNCHECKED
Resample using WEIGHTED AVERAGE
EFFECTS >>> EDGE EFFECTS >>> ENHANCE
LAYERS >>> MERGE >>> MERGE DOWN
|
|
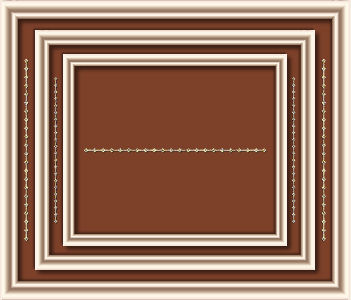
STEP 18
Open up the CherSwitz~Chains image in your PSP workspace
Activate Layer4
Right click on the Title Bar and select COPY from the options
Right click on the Title Bar of your frame image
and select PASTE AS NEW LAYER from the options.
PSP9: IMAGE >>> ROTATE >>> FREE ROTATE = RIGHT 90
Ensure "All layers" is UNCHECKED
PSPX - PSPX6: IMAGE >>> FREE ROTATE = RIGHT 90
Ensure "All layers" is UNCHECKED
EFFECTS >>> EDGE EFFECTS >>> ENHANCE MORE
EFFECTS >>> 3D EFFECTS >>> DROP SHADOW
Vertical & Horizontal offsets = 1
Colour = Black
Opacity = 100
Blur = 0
|
|
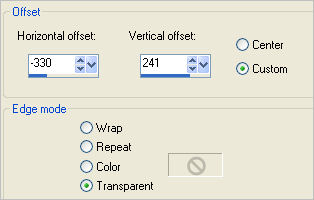
STEP 19
EFFECTS >>> IMAGE EFFECTS >>> OFFSET |
|
STEP 20
LAYERS >>> DUPLICATE
IMAGE >>> FLIP
LAYERS >>> MERGE >>> MERGE DOWN
LAYERS >>> DUPLICATE
IMAGE >>> RESIZE = 80%
Ensure "Resize all layers" is UNCHECKED
Resample using WEIGHTED AVERAGE
EFFECTS >>> EDGE EFFECTS >>> ENHANCE
LAYERS >>> MERGE >>> MERGE DOWN
|
|
STEP 21
CLOSE Raster 1
LAYERS >>> MERGE >>> MERGE VISIBLE
OPEN & ACTIVATE Raster 1
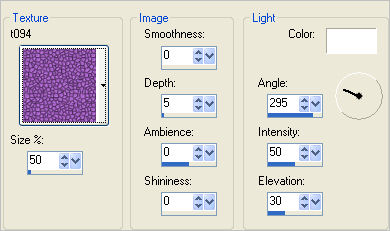
EFFECTS >>> TEXTURE EFFECTS >>> TEXTURE
TEXTURE = t094
|
STEP 22
Choose your SELECTION TOOL then click on the
CUSTOM SELECTION symbol
and enter these coordinates. |
|
STEP 23
EDIT >>> CLEAR
DESELECT
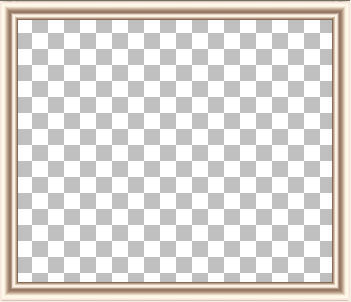
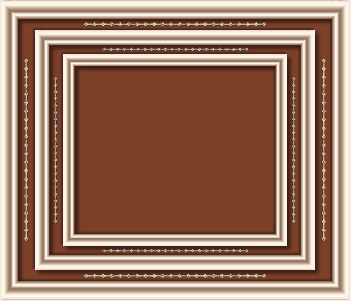
LAYERS >>> MERGE >>> MERGE VISIBLE
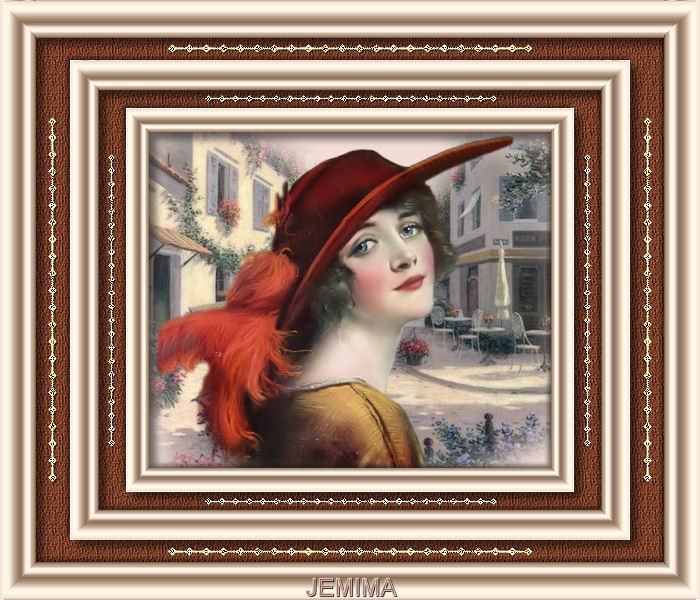
This is your frame
Save as .pspimage image
|
STEP 24
LAYERS >>> NEW RASTER LAYER
Flood fill with #f1ddd5
LAYERS >>> ARRANGE >>> MOVE DOWN
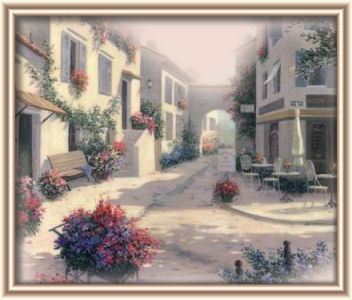
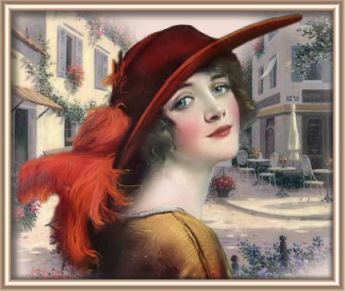
Open up the DaisyWeb_Christa Kieffer_SunnyAfternoon image
in your PSP workspace
Right click on the Title Bar and select COPY from the options
Right click on the Title Bar of your frame image
and select PASTE AS NEW LAYER from the options.
|
|
STEP 25
Open up the prettyju_femme039 image
in your PSP workspace
Right click on the Title Bar and select COPY from the options
Right click on the Title Bar of your frame image
and select PASTE AS NEW LAYER from the options.
IMAGE >>> RESIZE = 80%
Ensure "Resize all layers" is UNCHECKED
Resample using WEIGHTED AVERAGE
Reposition down and a little to the left
with your MOVER tool
|
|
STEP 26
ADD YOUR NAME
LAYERS >>> MERGE >>> MERGE ALL (Flatten)
Save as .jpg image |
|
|
|
|
|
|