STEP 1
Open up the bedroom image in your PSP workspace
WINDOW >>> DUPLICATE
Close the original Image
|
STEP 2
Open up the inthemoney-ani-layers image
in your PSP workspace
WINDOW >>> DUPLICATE
Close the original Image
ACTIVATE Raster 1
Right click on the Title Bar
and select COPY from the options
Right click on the Title Bar of your background image
and select PASTE AS NEW LAYER from the options.
CLOSE this layer
|
|
STEP 3
Back to your duplicated image
ACTIVATE Raster 2
Right click on the Title Bar
and select COPY from the options
Right click on the Title Bar of your bgd image
and select PASTE AS NEW LAYER from the options.
CLOSE this layer
|
|
STEP 4
Continue in this manner until all
6 layers are added to the background
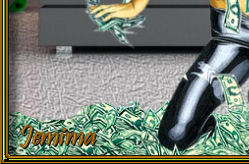
Your image should look like this when completed.
|
|
STEP 5
Open up the money-text image
in your PSP workspace
ACTIVATE the " We're " layer
Right click on the Title Bar
and select COPY from the options
Right click on the Title Bar of your tag image
and select PASTE AS NEW LAYER from the options.
Reposition with your MOVER tool
Rename this layer text 1
|
|
STEP 6
Back to the money-text image
in your PSP workspace
ACTIVATE the " in " layer
Right click on the Title Bar
and select COPY from the options
Right click on the Title Bar of your tag image
and select PASTE AS NEW LAYER from the options.
Reposition with your MOVER tool
Rename this layer text 2
|
|
STEP 7
Back to the money-text image
in your PSP workspace
ACTIVATE the " the " layer
Right click on the Title Bar
and select COPY from the options
Right click on the Title Bar of your tag image
and select PASTE AS NEW LAYER from the options.
Reposition with your MOVER tool
Rename this layer text 3
|
|
STEP 8
Back to the money-text image
in your PSP workspace
ACTIVATE the " money " layer
Right click on the Title Bar
and select COPY from the options
Right click on the Title Bar of your tag image
and select PASTE AS NEW LAYER from the options.
Reposition with your MOVER tool
Rename this layer text 4 |
|
STEP 9
Open up the frame image
in your PSP workspace
Right click on the Title Bar
and select COPY from the options
Right click on the Title Bar of your tag image
and select PASTE AS NEW LAYER from the options.
Rename this layer frame |
|
STEP 10
LAYERS >> NEW RASTER LAYER
Select your TEXT TOOL
with font and settings of your choice
add your name to the bottom left corner of the layer.
Rename this layer name. |
|
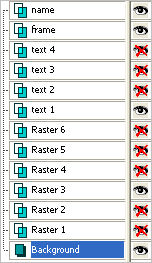
STEP 11
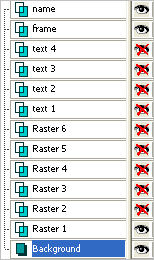
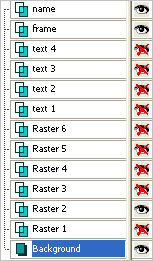
Set up LAYER PALETTE as shown
Right click on Title Bar and select
Copy merged from the options
|
|
STEP 12
In ANIMATION SHOP
Right click the workspace and select
'Paste As New Animation' from the options.
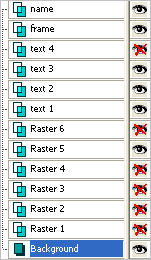
Back to PSP.
Set up LAYER PALETTE as shown
Right click on Title Bar and select
Copy merged from the options
|
|
STEP 13
In ANIMATION SHOP
Right click top of frame image and select
'Paste After Current Frame' from the options.
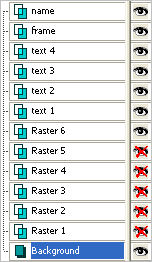
Back to PSP.
Set up LAYER PALETTE as shown
Right click on Title Bar and select
Copy merged from the options
|
|
STEP 14
In ANIMATION SHOP
Right click top of frame image and select
'Paste After Current Frame' from the options.
Back to PSP.
Set up LAYER PALETTE as shown
Right click on Title Bar and select
Copy merged from the options
|
|
STEP 15
In ANIMATION SHOP
Right click top of frame image and select
'Paste After Current Frame' from the options.
Back to PSP.
Set up LAYER PALETTE as shown
Right click on Title Bar and select
Copy merged from the options |
|
STEP 16
In ANIMATION SHOP
Right click top of frame image and select
'Paste After Current Frame' from the options.
Back to PSP.
Set up LAYER PALETTE as shown
Right click on Title Bar and select
Copy merged from the options |
|
STEP 17
In ANIMATION SHOP
Right click top of frame image and select
'Paste After Current Frame' from the options.

|
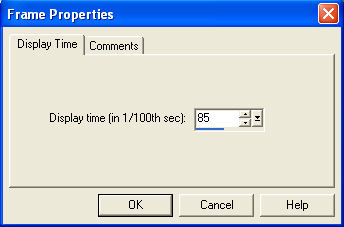
STEP 18
Edit >> Select All
Right click on Title Bar of frames
Select 'Frame Properties' from the options
Display time =85
|
|
STEP 19
View >> Animation
and while it is still running,
File >> Save As
Locate the folder in which you wish to save it.
Name your animation.
With the Gif Optimiser keep pressing NEXT
until you get to the last one... click FINISH
Close the Animation
Close the frames.
Close Animation Shop |
|
|
|
|