STEP 1
Open up the background image in your PSP workspace
WINDOW >>> DUPLICATE
Close the original Image
Rename this layer bgd |
STEP 2
Open up the blackberry image in your PSP workspace
Right click on the Title Bar and select COPY from the options
Right click on the Title Bar of your tag image
and select PASTE AS NEW LAYER from the options.
Rename this layer phone
EFFECTS >>> PLUGINS >>> EYE CANDY 3 >>>
DROP SHADOW
|
|
STEP 3
EDIT >>> Repeat Drop Shadow.. change DIRECTION to 135
LAYERS >>> DUPLICATE (5 times)
Rename the layers as shown
ACTIVATE the bgd layer
|
|
STEP 4
LAYERS >>> NEW RASTER LAYER
Choose your SELECTION TOOL then click on the
CUSTOM SELECTION symbol
and enter these coordinates.
|
|
STEP 5
Flood fill with #264f91
Rename this layer blue bgd
DESELECT
-------------------------------
Open up the oops image in your PSP workspace
Right click on the Title Bar and select COPY from the options
Right click on the Title Bar of your tag image
and select PASTE AS NEW LAYER from the options.
IMAGE >>> RESIZE = 60%
(or smaller if you wish)
Ensure "Resize all layers" is UNCHECKED
Resample using WEIGHTED AVERAGE
ADJUST >>> SHARPNESS >>> SHARPEN
Reposition with your MOVER tool
Rename this layer tube
|
|
STEP 6
Set up the LAYER PALETTE as shown
ACTIVATE layer H
|
|
STEP 7
Choose your SELECTION TOOL
Selection Type = Rounded Rectangle
Mode = Replace
Feather = 0
Antialias = UNChecked
Select the letter H on the keyboard
|
|
STEP 8
ADJUST >>> HUE & SATURATION >>> COLORIZE

EFFECTS >>> DISTORTION EFFECTS >>> PINCH
STRENGTH = 50%
ADJUST >>> BRIGHTNESS and CONTRAST >>> CLARIFY
Strength of effect = 5
PSPX3: BRIGHTNESS and CONTRAST >>> LOCAL TONE
Mapping strength = 5
DESELECT
|
|
STEP 9
CLOSE the H layer
OPEN and ACTIVATE the E layer
Choose your SELECTION TOOL
Same settings
Select the letter E on the keyboard
ADJUST >>> HUE & SATURATION >>> COLORIZE
Same settings
EFFECTS >>> DISTORTION EFFECTS >>> PINCH
STRENGTH = 50%
ADJUST >>> BRIGHTNESS and CONTRAST >>> CLARIFY
Strength of effect = 5
PSPX3: BRIGHTNESS and CONTRAST >>> LOCAL TONE
Mapping strength = 5
DESELECT
|
|
STEP 10
CLOSE the E layer
OPEN and ACTIVATE the L1 layer
Choose your SELECTION TOOL
Same settings
Select the letter L on the keyboard
NOTE: if you'd rather get an exact selection
Use your Freehand (Lasso) Selection Tool
ADJUST >>> HUE & SATURATION >>> COLORIZE
Same settings
EFFECTS >>> DISTORTION EFFECTS >>> PINCH
STRENGTH = 50%
ADJUST >>> BRIGHTNESS and CONTRAST >>> CLARIFY
Strength of effect = 5
PSPX3: BRIGHTNESS and CONTRAST >>> LOCAL TONE
Mapping strength = 5
DO NOT DESELECT |
|
STEP 11
CLOSE the L1 layer
OPEN and ACTIVATE the L2 layer
The letter L on the keyboard is already selected
ADJUST >>> HUE & SATURATION >>> COLORIZE
Change Saturation to 240
EFFECTS >>> DISTORTION EFFECTS >>> PINCH
STRENGTH = 60%
ADJUST >>> BRIGHTNESS and CONTRAST >>> CLARIFY
Strength of effect = 5
PSPX3: BRIGHTNESS and CONTRAST >>> LOCAL TONE
Mapping strength = 5
DESELECT
|
|
STEP 12
CLOSE the L2 layer
OPEN and ACTIVATE the O layer
Choose your SELECTION TOOL or Freehand Selection tool
Same settings
Select the letter O on the keyboard
ADJUST >>> HUE & SATURATION >>> COLORIZE
Change Saturation to 155
EFFECTS >>> DISTORTION EFFECTS >>> PINCH
STRENGTH = 50%
ADJUST >>> BRIGHTNESS and CONTRAST >>> CLARIFY
Strength of effect = 5
PSPX3: BRIGHTNESS and CONTRAST >>> LOCAL TONE
Mapping strength = 5
DESELECT
|
|
STEP 13
LAYERS >> NEW RASTER LAYER
Select your TEXT TOOL
with font and settings of your choice
add your name to the bottom left corner of the layer.
Rename this layer name. |
|
STEP 14
Set up LAYER PALETTE as shown
Right click on Title Bar and select
Copy merged from the options
In ANIMATION SHOP
Right click the workspace and select
'Paste As New Animation' from the options.
|
|
STEP 15
Back to PSP.
Set up LAYER PALETTE as shown
Right click on Title Bar and select
Copy merged from the options
In ANIMATION SHOP
Right click top of frame image and select
'Paste After Current Frame' from the options. |
|
STEP 16
Back to PSP.
Set up LAYER PALETTE as shown
Right click on Title Bar and select
Copy merged from the options |
|
STEP 17
In ANIMATION SHOP
Right click top of frame image and select
'Paste After Current Frame' from the options.

|
STEP 18
Back to PSP.
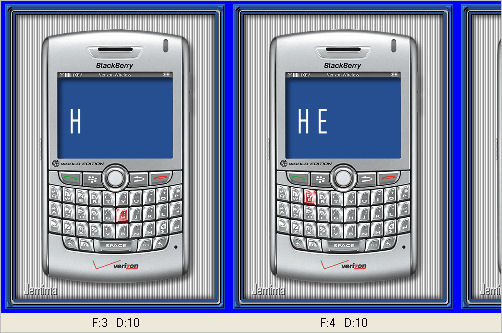
CLOSE the H layer
OPEN the E layer
Right click on Title Bar and select
Copy merged from the options
In ANIMATION SHOP
Right click top of frame image and select
'Paste After Current Frame' from the options. |
|
STEP 19
Back to PSP.
CLOSE the E layer
OPEN the L1 layer
Right click on Title Bar and select
Copy merged from the options
In ANIMATION SHOP
Right click top of frame image and select
'Paste After Current Frame' from the options.
|
STEP 20
Back to PSP.
CLOSE the L1 layer
OPEN the L2 layer
Right click on Title Bar and select
Copy merged from the options
In ANIMATION SHOP
Right click top of frame image and select
'Paste After Current Frame' from the options. |
|
STEP 21
Back to PSP.
CLOSE the L2 layer
OPEN the O layer
Right click on Title Bar and select
Copy merged from the options
In ANIMATION SHOP
Right click top of frame image and select
'Paste After Current Frame' from the options. |
|
STEP 22
Still in ANIMATION SHOP
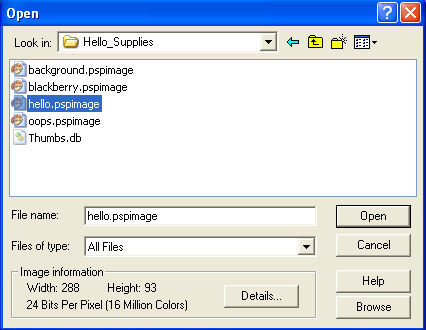
FILE >>> OPEN
Locate the hello.pspimage file
Click OPEN

Once it opens
Right click in
frame 1 (F:1) and select
DELETE
Edit >> Select All
Edit >> Copy
Edit >> Propagate Paste
|
STEP 23
ACTIVATE the "phone" frames
Holding down your SHIFT key
Click inside frames 7 / 6 / 5 / 4 and 3 to select
Edit >> Paste into selected frame
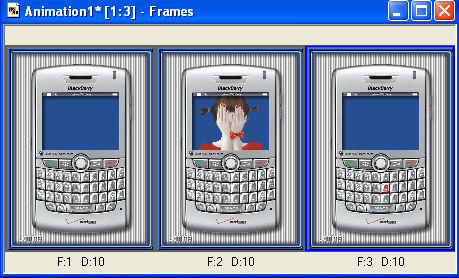
ZOOM in on the THIRD frame (F:3) and place the image as shown
then release your mouse button

|
STEP 24
Edit >> Select All
Right click on Title Bar of frames
Select 'Frame Properties' from the options
Display time =65
Edit >> Select NONE
Right Click inside frame 1
Select 'Frame Properties' from the options
Display time = 90
Right Click inside frame 2
Select 'Frame Properties' from the options
Display time = 100
|
STEP 25
Click on the Title Bar of the frames
Animation >> Resize animation
Select width and height in pixels
Click OK |
|
STEP 26
View >> Animation
and while it is still running,
File >> Save As
Locate the folder in which you wish to save it.
Name your animation.
With the Gif Optimiser keep pressing NEXT
until you get to the last one... click FINISH
Close the Animation
Close the frames.
Close Animation Shop |
|
|
|
|