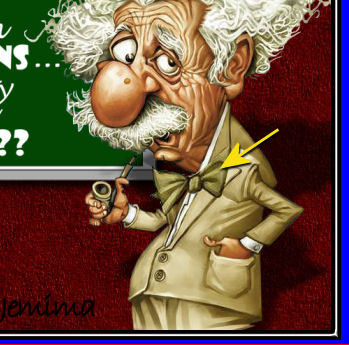
I included the untouched version of the Einstein tube for your collection |
STEP 1
Open a new image 600 x 480
Transparent background
PSPX - X2: Colour Depth = 8bits/channel
PSPX3: Colour Depth RGB = 8bits/channel
VIEW >>> RULERS
|
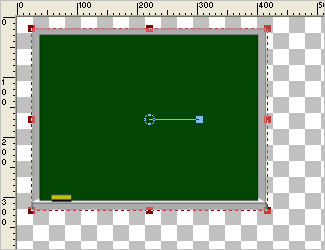
STEP 2
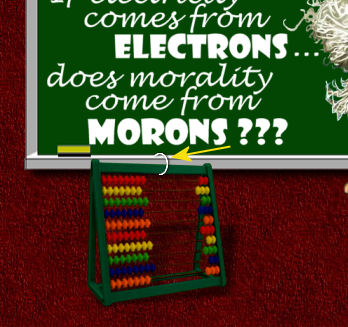
Open up the chalkboard image in your PSP workspace
Right click on the Title Bar and select COPY from the options
Right click on the Title Bar of your tag image
and select PASTE AS NEW LAYER from the options
Reposition with your MOVER tool to top left corner
Select your DEFORMATION tool
Mode = SCALE
use default settings
PSPX-X3:Select your PICK tool
Drag the center bottom node level with the 320 pixel mark
on your left ruler
|
|
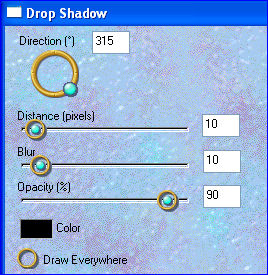
STEP 3
Click the RESET RECTANGLE arrow
Select the MOVER tool to disengage the
DEFORMATION tool (PICK tool)
EFFECTS >>> PLUGINS >>> EYE CANDY 3 >>>
DROP SHADOW
|
|
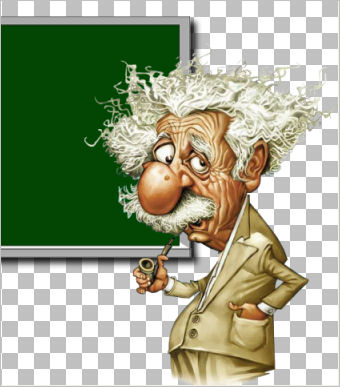
STEP 4
Open up the Einstein_caricature-adjusted image
in your PSP workspace
Right click on the Title Bar and select COPY from the options
Right click on the Title Bar of your tag image
and select PASTE AS NEW LAYER from the options
IMAGE >>> RESIZE = 70%
Ensure "Resize all layers" is UNCHECKED
Resample using WEIGHTED AVERAGE
Reposition with your MOVER tool
|
|
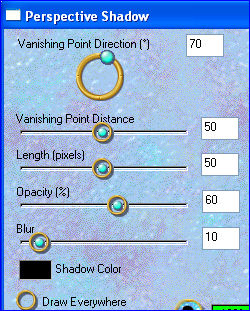
STEP 5
EFFECTS >>> PLUGINS >>> EYE CANDY 3 >>> PERSPECTIVE SHADOW |
|
STEP 6
ACTIVATE RASTER 1
Flood fill with WHITE
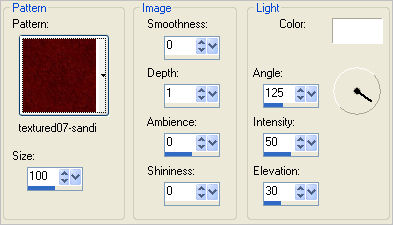
EFFECTS >>> TEXTURE EFFECTS >>> SCULPTURE
PATTERN =
textured07-sandi
|
STEP 7
ACTIVATE RASTER 3
Open up the JFfunnyWA6 image in your PSP workspace
Right click on the Title Bar and select COPY from the options
Right click on the Title Bar of your tag image
and select PASTE AS NEW LAYER from the options.
IMAGE >>> RESIZE = 70%
Ensure "Resize all layers" is UNCHECKED
Resample using WEIGHTED AVERAGE
ADJUST >>> COLOUR BALANCE >>> NEGATIVE IMAGE
PSPX - X3: IMAGE >>> NEGATIVE IMAGE
Reposition with your MOVER tool
|
|
STEP 8
Open up the theoryWA image in your PSP workspace
Right click on the Title Bar and select COPY from the options
Right click on the Title Bar of your tag image
and select PASTE AS NEW LAYER from the options.
IMAGE >>> RESIZE = 70%
Ensure "Resize all layers" is UNCHECKED
Resample using WEIGHTED AVERAGE
ADJUST >>> COLOUR BALANCE >>> NEGATIVE IMAGE
PSPX - X3: IMAGE >>> NEGATIVE IMAGE
Reposition with your MOVER tool |
|
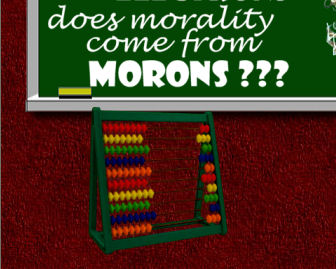
STEP 9
Open up the abacus78 image in your PSP workspace
Right click on the Title Bar and select COPY from the options
Right click on the Title Bar of your tag image
and select PASTE AS NEW LAYER from the options.
IMAGE >>> RESIZE = 35%
Ensure "Resize all layers" is UNCHECKED
Resample using WEIGHTED AVERAGE |
|
STEP 10
EFFECTS >>> PLUGINS >>> EYE CANDY 3 >>> PERSPECTIVE SHADOW
Same settings
Open up the HOOK image in your PSP workspace
Right click on the Title Bar and select COPY from the options
Right click on the Title Bar of your tag image
and select PASTE AS NEW LAYER from the options.
Reposition with your MOVER tool and move
the abacus up if necessary
|
|
STEP 11
Open up the frame image in your PSP workspace
Right click on the Title Bar and select COPY from the options
Right click on the Title Bar of your tag image
and select PASTE AS NEW LAYER from the options. |
STEP 12
LAYERS >> NEW RASTER LAYER
Select your TEXT TOOL
with font and settings of your choice and
add your name |
STEP 13
LAYERS >>> MERGE >>> MERGE VISIBLE
Right click on Title Bar and select
Copy from the options
In ANIMATION SHOP
Right click the workspace and select
'Paste As New Animation' from the options.
Depress your CTRL key and press the letter L 7 times
so that you now have 8 frames
|
STEP 14
FILE >>> OPEN
Locate the bowtie.mng file
and open
Edit >> Select All
Edit >> Copy
Edit >> Propagate Paste
ACTIVATE the background frames
Edit >> Select All
Edit >> Paste into selected frame
ZOOM in on the first frame (F:1)
and place the image as shown
then release your mouse button
|
STEP 15
View >> Animation
and while it is still running,
File >> Save As
Locate the folder in which you wish to save it.
Name your animation.
With the Gif Optimiser keep pressing NEXT
until you get to the last one... click FINISH
Close the Animation
Close the frames.
Close Animation Shop |
|
|
|
|
|
|