STEP 1
Open up the c 121111.png image in your PSP workspace
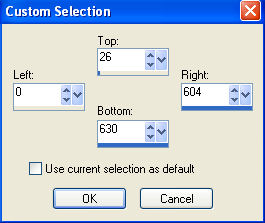
Choose your SELECTION TOOL then click on the
CUSTOM SELECTION symbol
and enter these coordinates.
Right click on the Title Bar and select COPY from the options |
|
STEP 2
Open a new image 600 x 600
Transparent background
PSP9: Colour Depth = 16 Million Colors (24bit)
PSPX-X6: Colour Depth RGB = 8bits/channel
SELECTIONS >>> SELECT ALL
Right click on the Title Bar of your tag image
and select PASTE INTO SELECTION from the options.
DESELECT
|
STEP 3
Open up the weihbil207.psp image in your PSP workspace
Right click on the Title Bar and select COPY from the options
Right click on the Title Bar of your tag image
and select PASTE AS NEW LAYER from the options.
|
|
STEP 4
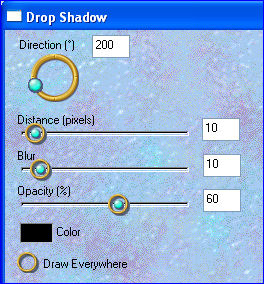
EFFECTS >>> PLUGINS >>> EYE CANDY 3 >>>
DROP SHADOW |
|
STEP 5
Open up the 48953142.png image in your PSP workspace
Right click on the Title Bar and select COPY from the options
Right click on the Title Bar of your tag image
and select PASTE AS NEW LAYER from the options.
EFFECTS >>> PLUGINS >>> EYE CANDY 3 >>>
DROP SHADOW
Same settings
Reposition down with your MOVER tool
|
|
STEP 6
Open up the frame image in your PSP workspace
Right click on the Title Bar and select COPY from the options
Right click on the Title Bar of your tag image
and select PASTE AS NEW LAYER from the options.
|
STEP 7
Open up the All-I-Want_WA image in your PSP workspace
Right click on the Title Bar and select COPY from the options
Right click on the Title Bar of your tag image
and select PASTE AS NEW LAYER from the options.
Reposition down with your MOVER tool
|
|
STEP 8
LAYERS >> NEW RASTER LAYER
Select your TEXT TOOL
with font and settings of your choice
add your name to the top right corner of the layer.
Save your work
|
|
STEP 9
Right click on Title Bar and select Copy merged from the options
In ANIMATION SHOP
Right click the workspace and select
'Paste As New Animation' from the options.
Depress your CTRL key and press the letter L 8 times
You should have 9 frames
|
STEP 10
Still in ANIMATION SHOP
FILE >>> OPEN
Locate the SantaHoliday.pspimage file
Click OPEN
Right click on the Title Bar and select COPY from the options
Right click top of frame image and select
'Paste After Current Frame' from the options.
Click inside frame 1 (F:1) to activate
|
STEP 11
Effects >> Insert Image Transition.
EFFECT = Twist
Click on the CUSTOMIZE button
Enter these settings
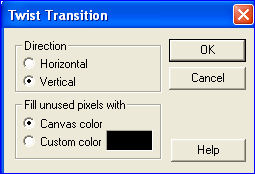
Click OK
Then enter these settings
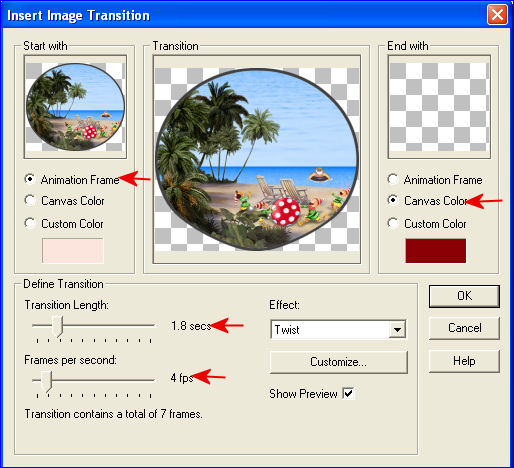
Click OK
|
STEP 12
Edit >> Select All
Edit >> Copy
Edit >> Propagate Paste
Activate the background frames
Edit >> Select All
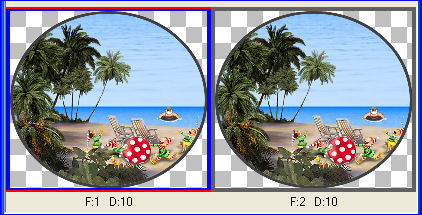
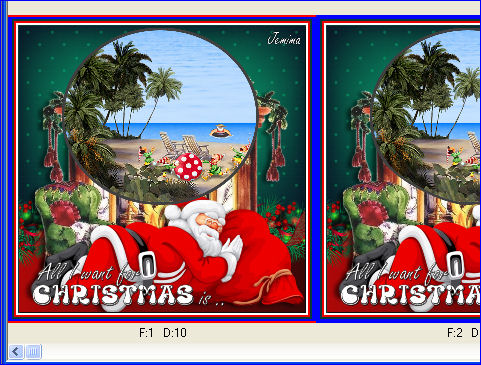
ZOOM in on the first frame (F:1)
Edit >> Paste into selected frame
and place the image as shown
then click your mouse button.
|
STEP 13
Animation >> Reverse frames
Hold down you shift key and click inside
frames 8 and 9 to select
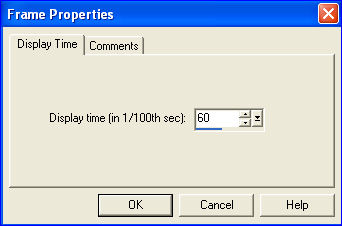
Right click on Title Bar of frames
Select 'Frame Properties' from the options
Display time = 60
|
|
STEP 14
Click inside frame 1 (F:1) to select
Hold down you shift key and click inside
frames 2 to 7 to select
Right click on Title Bar of frames
Select 'Frame Properties' from the options
Display time = 25 |
STEP 15
View >> Animation
and while it is still running,
File >> Save As
Locate the folder in which you wish to save it.
Name your animation.
With the Gif Optimiser keep pressing NEXT
until you get to the last one... click FINISH
Close the Animation
Close the frames.
Close Animation Shop |
|
|
|
|
|
|