STEP 1
Open up the downloaded images
in your PSP workspace and minimize.
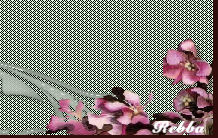
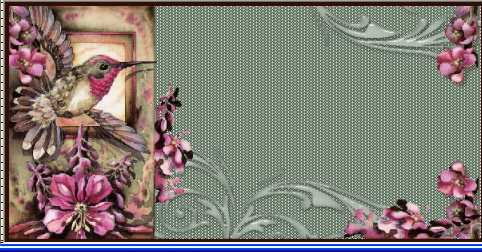
Open up the bg image in your PSP workspace
WINDOW >>> DUPLICATE
Close the original Image
Rename this layer bg |
STEP 2
Open up the scroll image in your PSP workspace
Right click on the Title Bar
and select COPY from the options.
Right click on the Title Bar of your 'working' image
and select PASTE AS NEW LAYER from the options.
Rename this layer scroll |
STEP 3
Open up the corner flowers image in your PSP workspace
Right click on the Title Bar
and select COPY from the options.
Right click on the Title Bar of your 'working' image
and select PASTE AS NEW LAYER from the options.
Rename this layer corner flowers
|
STEP 4
Open up the frame image in your PSP workspace
Right click on the Title Bar
and select COPY from the options.
Right click on the Title Bar of your 'working' image
and select PASTE AS NEW LAYER from the options.
Rename this layer frame |
STEP 5
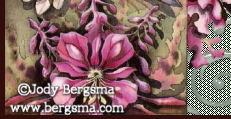
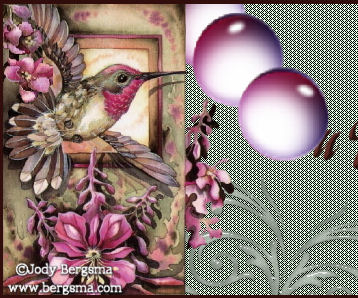
Open up the JBergsma_HoHum image
in your PSP workspace
Right click on the Title Bar
and select COPY from the options.
Right click on the Title Bar of your 'working' image
and select PASTE AS NEW LAYER from the options.
IMAGE >> RESIZE = 65%
Ensure "Resize all layers" is UNCHECKED
Rename this layer bird
|
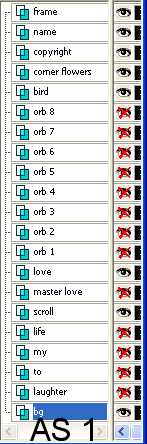
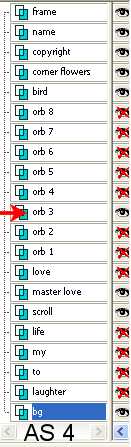
STEP 6
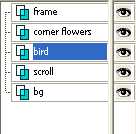
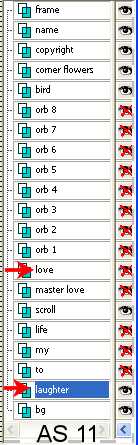
Set up LAYER PALETTE as shown
|
|
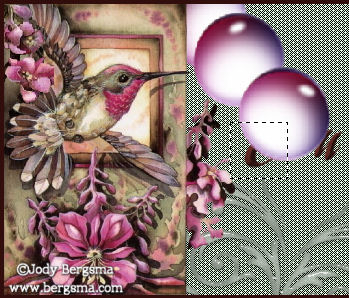
To this point all of the images should have been pasted where they need to be.
Line the bird up with the left side of our working image.
 |
STEP 7
Open up the JBergsma_HoHum
image in your PSP workspace
Activate copyright layer
Right click on the Title Bar
and select COPY from the options.
Right click on the Title Bar of your 'working' image
and select PASTE AS NEW LAYER from the options.
IMAGE >> RESIZE = 85%
Ensure "Resize all layers" is UNCHECKED
ADJUST >>> SHARPEN >>> SHARPEN
Reposition with your MOVER tool
|
STEP 8
ACTIVATE the TOP layer
LAYERS >> NEW RASTER LAYER
Select your TEXT TOOL
with font and settings of your choice
add your name to the bottom right corner of the layer.
Rename this layer name. |
|
STEP 9
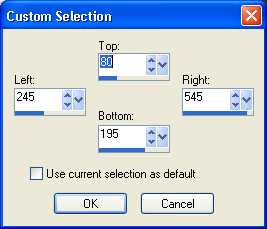
LAYERS >> NEW RASTER LAYER
Choose your SELECTION TOOL
then click on the CUSTOM SELECTION symbol
and enter these coordinates.
|
|
STEP 10
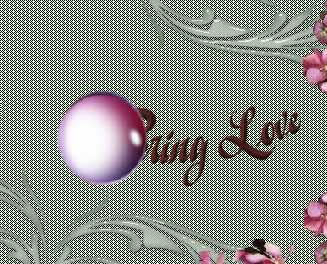
Open up the word art 48 image in your PSP workspace
Activate the love layer
Right click on the Title Bar
and select COPY from the options.
Right click on the Title Bar of your 'working' image
and select PASTE INTO SELECTION
from the options.
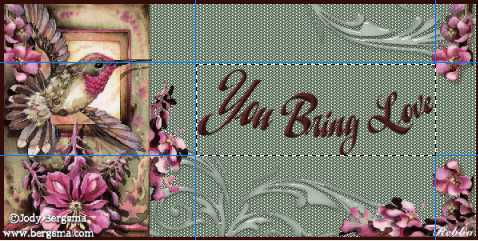
Rename this layer master love |
STEP 11
LAYERS >> DUPLICATE
Rename this layer love
Close master love
DESELECT
Activate the love layer
Open up the master orb image in your PSP workspace
Activate frame 1
Right click on the Title Bar
and select COPY from the options.
Right click on the Title Bar of your 'working' image
and select PASTE AS NEW LAYER from the options.
Place as shown

|
STEP 12
Activate the master orb image in your PSP workspace
Activate frame 2
Right click on the Title Bar
and select COPY from the options.
Right click on the Title Bar of your 'working' image
and select PASTE AS NEW LAYER from the options.
Place as shown

|
STEP 13
NOTE: there are 8 orb frames so activate the next frame and copy it
then paste it on the working image.
Rename each of the new orbs
layers in order orb 1-orb 8.
Your placement for the 8 orb layers is as shown.

Close the orb layers
Close the love layer |
STEP 14
Activate the bg layer
Open up the word art 48 image in your PSP workspace
Activate the laughter layer
Right click on the Title Bar
and select COPY from the options.
Right click on the Title Bar of your 'working' image
and select PASTE AS NEW LAYER from the options.
Place as shown

Rename this layer laughter
Close layer |
STEP 15
Open up the word art 48 image in your PSP workspace
Activate the to layer
Right click on the Title Bar
and select COPY from the options.
Right click on the Title Bar of your 'working' image
and select PASTE AS NEW LAYER from the options.
Rename this layer to
We will place in minute |
STEP 16
Open up the word art 48 image in your PSP workspace
Activate the my layer
Right click on the Title Bar
and select COPY from the options.
Right click on the Title Bar of your 'working' image
and select PASTE AS NEW LAYER from the options.
Rename this layer my |
STEP 17
Open up the word art 48 image in your PSP workspace
Activate the life layer
Right click on the Title Bar
and select COPY from the options.
Right click on the Title Bar of your 'working' image
and select PASTE AS NEW LAYER from the options.
Rename this layer life
Place these three layers as shown USE GUIDE IF NEEDED

............................................................................A9 |
SAVE YOU WORK AS A .pspimage and
WINDOW >>> DUPLICATE
Minimise your original image.
Work from your duplicated image just incase you make a mistake.
This way you won't have to do the work all over again.
|
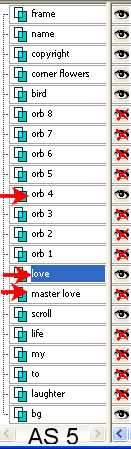
STEP 18
Set up LAYER PALETTE as shown
|
|
STEP 19
Right click on Title Bar and select
Copy merged from the options
In ANIMATION SHOP
Right click the workspace and select
'Paste As New Animation' from the options.
Back to PSP.
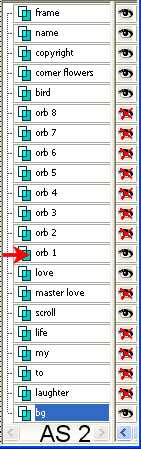
Set up LAYER PALETTE as shown
. |
|
STEP 20
Right click on Title Bar and select
Copy merged from the options
In ANIMATION SHOP
Right click top of frame image and select
'Paste After Current Frame' from the options.
Back to PSP.
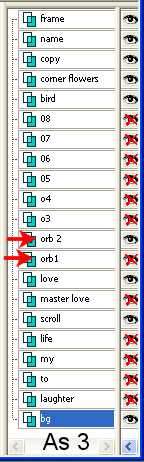
Set up LAYER PALETTE as shown
NOTE: from this point on each time you open the next orb layer
always close the previous one.
|
|
STEP 21
Right click on Title Bar and select
Copy merged from the options
In ANIMATION SHOP
Right click top of frame image and select
'Paste After Current Frame' from the options.
Back to PSP.
Close layer orb 2
Open layer orb 3
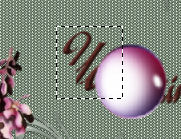
NOTE: depending on how your text is placed you may need to start erasing your text at orb 3 or orb 4.
If there is any text showing to the left
it needs to be erased to show the ball removing the text
|
|
STEP 22
To erase the visible part of the text
Activate the love layer
Choose your SELECTION TOOL
Selection Type = Rectangle
Mode = Replace
Feather = 0
Antialias = UNChecked
Select the visible part of the text
|
|
STEP 23
Hit your DELETE key
DESELECT
|
|
NOTE:
As the orb rolls across the text the letters should be erased to the left of each orb if there is text showing
(As we did in STEPS 22 and 23)
.
Always make sure that the love layer is activated
when doing the erasing
.
|
|
STEP 24
After any necessary erasing....
Set up LAYER PALETTE as shown
|
|
STEP 25
Right click on Title Bar and select
Copy merged from the options
In ANIMATION SHOP
Right click top of frame image and select
'Paste After Current Frame' from the options.
Back to PSP.
See how the text is on the left side of the orb we need to erase that text.
After erasing
Set up LAYER PALETTE as shown
|
|
STEP 26
Right click on Title Bar and select
Copy merged from the options
In ANIMATION SHOP
Right click top of frame image and select
'Paste After Current Frame' from the options.
Back to PSP
Continue opening the next orb, erase the text,
copy merge and paste after current frame in
ANIMATION SHOP
until all 8 frames are in ANIMATION SHOP.
You will have 9 frames on your
working image in ANIMATION SHOP the first frame has no orbs |
STEP 27
Back to PSP.
Close the orb 8 layer
Right click on Title Bar and select
Copy merged from the options
In ANIMATION SHOP
Right click top of frame image and select
'Paste After Current Frame' from the options
|
STEP 28
Back to PSP.
Set up LAYER PALETTE as shown
Close the love layer
Open the laughter layer
Activate the bg layer
Right click on Title Bar and select
Copy merged from the options
|
|
STEP 29
In ANIMATION SHOP
Right click top of frame image and select
'Paste After Current Frame' from the options.
Back to PSP.
Close the laughter layer
Open the to layer
Right click on Title Bar and select
Copy merged from the options
|
STEP 30
In ANIMATION SHOP
Right click top of frame image and select
'Paste After Current Frame' from the options
Back to PSP.
OPEN the my layer ( leave to layer open).
Right click on Title Bar and select
Copy merged from the options
In ANIMATION SHOP
Right click top of frame image and select
'Paste After Current Frame' from the options
|
STEP 31
Back to PSP.
OPEN the life layer (leave to and my layers open)
Right click on Title Bar and select
Copy merged from the options
In ANIMATION SHOP
Right click top of frame image and select
'Paste After Current Frame' from the options
Edit >> Select All
Right click on Title Bar of frames
Select 'Frame Properties' from the options
Display time =30 |
STEP 32
Scroll the arrow on the bottom of the frame to tenth frame
( F:10)
Click the gray rim around the picture to highlight it,
Right click on Title Bar of frames
Select 'Frame Properties' from the options
Display time = 75 |
STEP 33
Scroll the arrow on the bottom of the frame to eleventh frame
( F:11)
Click the gray rim around the picture to highlight it,
Hold down the CTRL KEY
Scroll the arrow on the bottom of the frame to
FOURTEENTH frame ( F:14)
Click the gray rim around the picture to highlight it,
Right click on Title Bar of frames
Select 'Frame Properties' from the options
Display time = 150
|
STEP 34
View >> Animation
and while it is still running,
File >> Save As
Locate the folder in which you wish to save it.
Name your animation.
With the Gif Optimiser keep pressing NEXT
until you get to the last one... click FINISH
Close the Animation
Close the frames.
Close Animation Shop
|
|
|
I hope you enjoyed this advanced tut.
Rebba |
. |
. |