STEP 1
Open up the downloaded images in your PSP workspace and minimize.
Open mask 1 tube in your PSP workspace
WINDOW >> DUPLICATE
Close the original image
Rename this layer mask 1 |
STEP 2
Open mask 2 tube in your PSP workspace
Right click on the Title Bar and select COPY from the options.
Right click on the Title Bar of your 'working' image
and select PASTE AS NEW LAYER from the options.
Rename this layer mask 2 |
STEP 3
Open frame tube in your PSP workspace
Right click on the Title Bar and select COPY from the options.
Right click on the Title Bar of your 'working' image
and select PASTE AS NEW LAYER from the options.
Rename this layer frame |
STEP 4
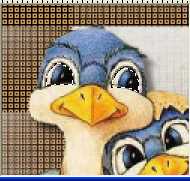
Open bird tube in your PSP workspace
Right click on the Title Bar and select
COPY from the options.
Right click on the Title Bar of your 'working' image
and select PASTE AS NEW LAYER from the options.
Rename this layer bird master
With your Mover Tool
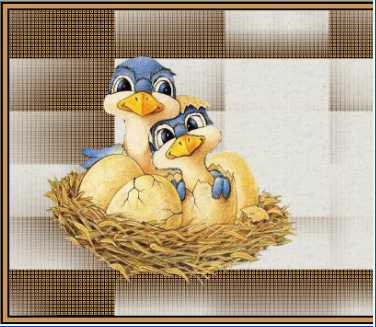
Place as shown
|
|
STEP 5
LAYERS >> DUPLICATE
Rename this layer as2
Close layer bird master |
|
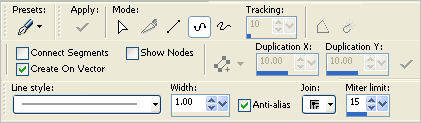
STEP 6
Select the Paint Brush Tool
Open your summer saying brush these settings

|
STEP 7
In your MATERIALS PALETTE
Load SOLID ' #295987 ' in your foreground
Load SOLID ' #000000 ' in your background
LAYERS >> NEW RASTER LAYER
Rename this layer Text
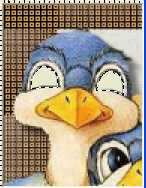
Left click the brush 3 times
Place text as shown

|
STEP 8
Give your text layer and bird master layer this shadow
Effects >> 3D Effects >> Drop Shadow
Vertical and Horizontal = 5
Opacity = 50
Blur = 5.00
Color = Black. |
STEP 9
Activate layer copy of bird as2
give it the same shadow
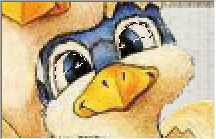
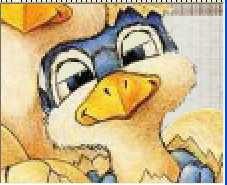
Zoom in on the eyes of the lower bird.
Select your Freehand Selection Tool
(Lasso)
 |
STEP 10
Hold down your SHIFT key and draw around the inside of the (lower) bird eyes
1/2 way down
Note: add new layer and fill if needed in your PSP version.
In your MATERIALS PALETTE
Load CREAM #e8e8cc in the foreground
Flood fill the selected areas with the CREAM
DESELECT |
|
| |
STEP 12
Activate layer bird master
LAYERS >> DUPLICATE
Rename this layer as3
Drag above the as2 layer
Select your Freehand Selection Tool
(Lasso) same setting
Depress your SHIFT key and
draw around the entire inside eye area
on lower bird
|
|
STEP 13
Fill it with background color CREAM #e8e8cc
no need to draw the line on it
DESELECT |
|
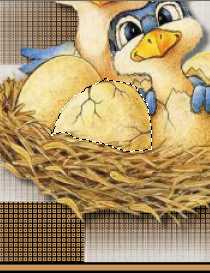
STEP 14
Still on as3
Select your Freehand Selection Tool
(Lasso) same setting
Draw around the egg
|
|
STEP 15
Effects >> Distortion Effects >> Punch
STRENGTH = 10
DESELECT
Activate layer bird master
LAYERS >> DUPLICATE
Rename this layer as4
Drag above the as3 layer
Select your Freehand Selection Tool
(Lasso) Draw around the wing
|
|
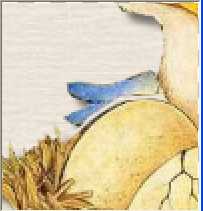
STEP 16
Selections >> Promote Selection to Layer
Activate layer as4
Keyboard DELETE
DESELECT
Activate the Promoted Selection layer
With your Mover Tool..
Move the wing up a little
|
|
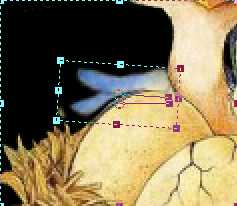
STEP 17
Select your DEFORMATION tool
Mode = SCALE
use default settings
PSPX-X3:Select your PICK tool
Rotate it just a little to the right
(
I used black bgd to show better )
Click the RESET RECTANGLE arrow
Select the MOVER tool to disengage the DEFORMATION tool (PICK tool)
|
|
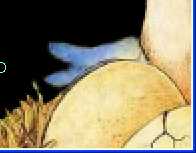
STEP 18
Select your WARP Brush
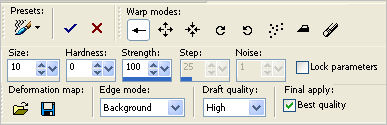
push just the bottom area of the wing down a little.
Click the APPLY tick
In Layer Palette move the Promoted Selection below as4
ACTIVATE as4
LAYERS >>> MERGE >>> MERGE DOWN
Rename the layer as4
|
STEP 19
Activate layer bird master
LAYERS >> DUPLICATE
Rename this layer AS 5
Drag above the AS 4 layer
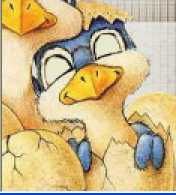
Select your Freehand Selection Tool
(Lasso) same setting
Depress your SHIFT key and
draw around the inside area of the eyes
1/2 way down on left bird.
..........................................................A17 |
|
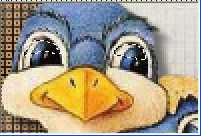
STEP 20
Fill it with background color CREAM #e8e8cc
DESELECT
Select your PEN TOOL same setting
Draw a line across the bottom of filled eyes.
Click the apply tick after each line
Right click on this vector layer and select
"Convert to Raster Layer " from the options
LAYERS >>> MERGE >>> MERGE DOWN
|
|
STEP 21
Activate layer master bird
LAYERS >> DUPLICATE
Rename this layer AS 6
Drag above the AS 5 layer
Select your Freehand Selection Tool
(Lasso) same setting
Depress your SHIFT key and
draw around the inside eye area on top bird
|
|
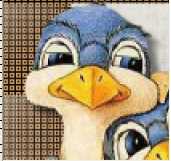
STEP 22
Fill it with background color CREAM #e8e8cc
|
|
STEP 23
DESELECT
LAYERS >>> MERGE >>> MERGE DOWN
Rename this layer as6 |
STEP 24
LAYERS >> NEW RASTER LAYER
Select your TEXT TOOL
with font and settings of your choice
add your name to the bottom left corner of the layer.
Rename this layer Name. |
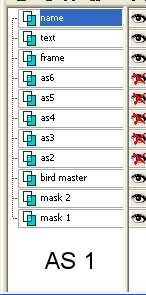
STEP 25
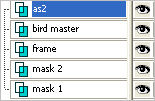
Set up LAYER PALETTE as shown
Right click on Title Bar and select
Copy merged from the options |
|
STEP 26
In ANIMATION SHOP
Right click the workspace and select
'Paste As New Animation' from the options.
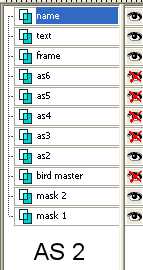
Back to PSP.
Set up LAYER PALETTE as shown
Right click on Title Bar and select
Copy merged from the options |
|
STEP 27
In ANIMATION SHOP
Right click top of frame image and select
'Paste After Current Frame' from the options.
Back to PSP.
Close as2 layer
Open as3 layer
Right click on Title Bar and select
Copy Merged from the options
|
STEP 28
In ANIMATION SHOP
Right click top of frame image and select
'Paste After Current Frame' from the options.
Back to PSP.
Close as3 layer
Open as4 layer
Right click on Title Bar and select Copy Merged from the options
|
STEP 29
In ANIMATION SHOP
Right click top of frame image and select
'Paste After Current Frame' from the options.
Back to PSP.
Close as4 layer
Open as5 layer
Right click on Title Bar and select Copy Merged from the options
|
STEP 30
In ANIMATION SHOP
Right click top of frame image and select
'Paste After Current Frame' from the options.
Back to PSP.
Close as5 layer
Open as6 layer
Right click on Title Bar and select Copy Merged from the options
|
|
|
After looking at the animation in AS I think we need
to add 2 more frames to make it smoother.
NOTE: I want to have a open eyes, 1/2 closed, closed, 1/2 open, open. |
STEP 31
Scroll arrow on bottom of frames to the left.
Select the gray edge around frame 2 (F:2) (1/2 open)
Right click on top of frames and copy
Select the gray edge around frame 3 (F:3)
Right click top of frame image and select
'Paste After Current Frame' from the options. |
STEP 32
Scroll arrow on bottom of frame to right.
Select the gray edge around frame 6 (F:6) (1/2 open)
Right click on top of frames and copy
Select the gray edge around frame 7 (F:7)
Right click top of frame image and select
'Paste After Current Frame' from the options. |
Now scroll to right and left to see if your frames shows
open eyes, 1/2 closed, closed, 1/2 open, open
|
STEP 33
Now we need to set the speed for each frame.
Click bottom of frame 1 (F:1)
hold CTRL key click frame 5 (F:5)
Right click on Title Bar of frames
Select 'Frame Properties' from the options
Display time =60
|
STEP 34
Click bottom of frame 2 (F:2)
hold CTRL key click frame 4, 6, 8
Right click on Title Bar of frames
Select 'Frame Properties' from the options
Display time =20
|
STEP 35
Click bottom of frame 3 (F:3)
hold CTRL key click frame 7 (F:7)
Right click on Title Bar of frames
Select 'Frame Properties' from the options
Display time =10
|
STEP 36
View >> Animation
and while it is still running,
File >> Save As
Locate the folder in which you wish to save it.
Name your animation.
With the Gif Optimiser keep pressing NEXT
until you get to the last one... click FINISH
Close the Animation
Close the frames.
Close Animation Shop |
I hope you have enjoyed the tutorial
Rebba
|
| .
|
. |