STEP 1
Open up the downloaded images in your PSP
workspace and minimize.
Open up the bg 1 image in your PSP workspace
WINDOW >>> DUPLICATE
Close the original Image
This will be the working image.
Rename this layer bg
VIEW >>> RULERS
|
STEP 2
Open check bg tube in your PSP workspace
Right click on the Title Bar
and select COPY from the options.
Right click on the Title Bar of your 'working' image
and select PASTE AS NEW LAYER from the options.
Rename this layer check bg
Change the Opacity to 86
|
STEP 3
Open filter bg tube in your PSP workspace
Right click on the Title Bar
and select COPY from the options.
Right click on the Title Bar of your 'working' image
and select PASTE AS NEW LAYER from the options.
Rename this layer filter bg |
STEP 4
Open frame tube in your PSP workspace
Right click on the Title Bar
and select COPY from the options.
Right click on the Title Bar of your 'working' image
and select PASTE AS NEW LAYER from the options.
Rename this layer frame |
STEP 5
LAYERS >> NEW RASTER LAYER
Select your TEXT TOOL
with font and settings of your choice
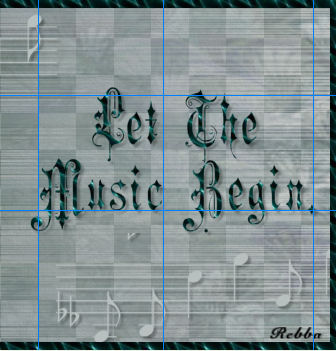
add your name to the bottom right corner of the layer.
Rename this layer name and close it. |
|
STEP 6
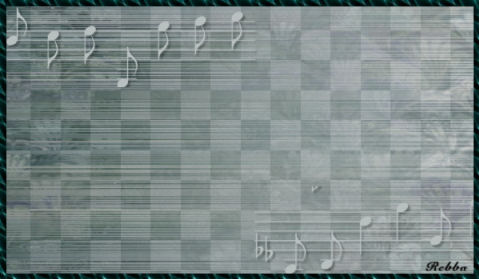
Open top notes tube in your PSP workspace
Right click on the Title Bar
and select COPY from the options.
Right click on the Title Bar of your 'working' image
and select PASTE AS NEW LAYER from the options.
LAYERS >>> ARRANGE >>> MOVE DOWN
EDIT >>> Repeat Move Layer Down
Reposition with your MOVER tool
Rename this layer top notes |
|
STEP 7
Open bottom notes tube in your PSP workspace
Right click on the Title Bar
and select COPY from the options.
Right click on the Title Bar of your 'working' image
and select PASTE AS NEW LAYER from the options.
Rename this layer bottom notes
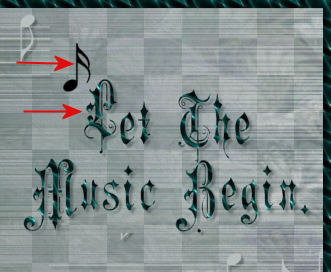
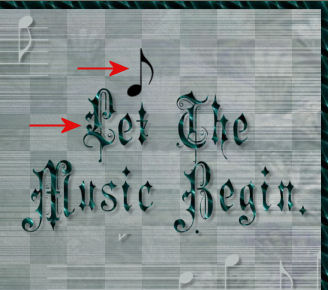
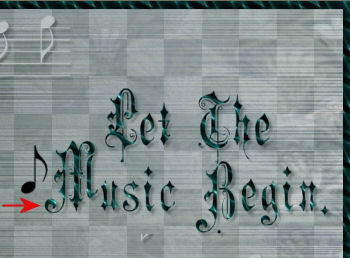
Place as shown note layers will go off the side.
|
STEP 8
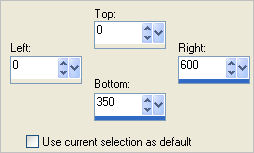
Choose your SELECTION TOOL then click on the CUSTOM SELECTION symbol
and enter these coordinates.
SELECTIONS >>> INVERT
EDIT >>> CLEAR
DESELECT
|
STEP 9
Open text tube in your PSP workspace
Right click on the Title Bar
and select COPY from the options.
Right click on the Title Bar of your 'working' image
and select PASTE AS NEW LAYER from the options.
Rename this layer text |
STEP 10
VIEW >>> GUIDES
Uncheck Snap to Guides
Place your cursor on top ruler and drag down to 95 on your left ruler
Place your cursor on top ruler and drag down to 210 on your left ruler
Place your cursor on left ruler and drag across to 575 on your top ruler
Place your cursor on left ruler and drag across to 425 on your top ruler
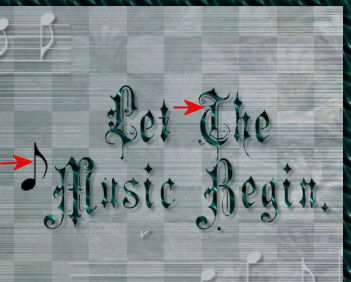
Place your cursor on left ruler and drag across to 300 on your top ruler
Reposition the text with your MOVER tool
|
NOTE: each of the following letters will be copied and
pasted and named as separate layer |
STEP 11
Open each text L- T -M -B tube in your PSP workspace
Right click on the Title Bar
and select COPY from the options.
Right click on the Title Bar of your 'working' image
and select PASTE AS NEW LAYER from the options.
Copy each letter onto working image.
Rename each layer L - T - M - B
|
STEP 12
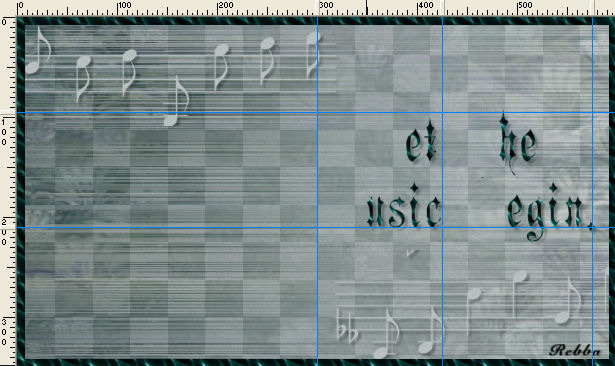
Using the guide lines set as shown move the text into place
|
|
STEP 13
Click VIEW >>> GUIDES
to disengage the Guides
Open all notes 1-2-3-4 tubes in your PSP workspace
Right click on the Title Bar
and select COPY from the options.
Right click on the Title Bar of your 'working' image
and select PASTE AS NEW LAYER from the options.
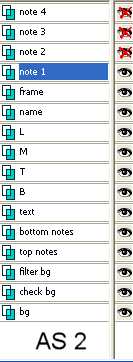
Rename these layers note1 to note 4
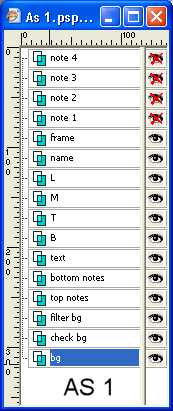
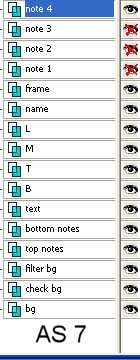
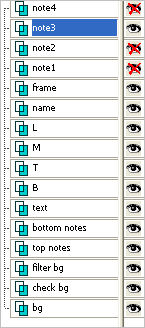
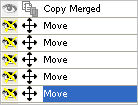
Set up LAYER PALETTE as shown
Right click on Title Bar and select
Copy merged from the options
|
|
STEP 14
In ANIMATION SHOP
Right click the workspace and select
'Paste As New Animation' from the options.
Back to PSP.
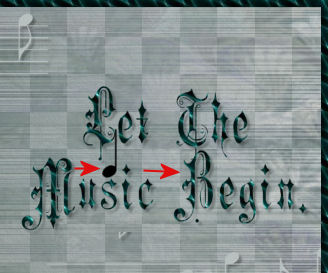
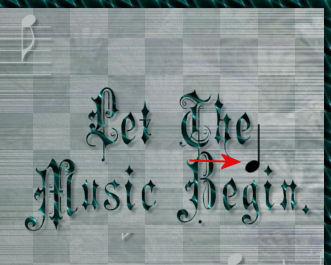
OPEN note1 and place as shown.
Move the L up a little
|
|
STEP 15
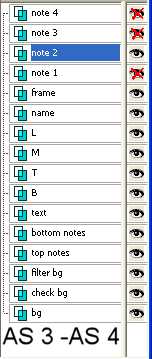
Set up LAYER PALETTE as shown
Right click on Title Bar and select
Copy merged from the options
|
|
STEP 16
In ANIMATION SHOP
Right click top of frame image and select
'Paste After Current Frame' from the options.
Back to PSP.
Move the L and the open note
back to their original positions
by cancelling the moves in your History
Close note1
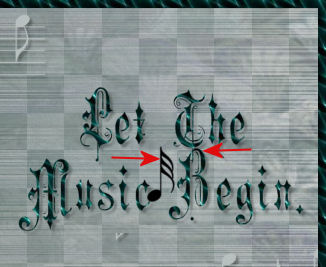
OPEN note2 and place as shown.
|
|
STEP 17
Set up LAYER PALETTE as shown
Right click on Title Bar and select
Copy merged from the options
|
|
STEP 18
In ANIMATION SHOP
Right click top of frame image and select
'Paste After Current Frame' from the options.
Back to PSP.
Still on note2 ... place as shown.
Move the T up a little
|
|
STEP 19
USE SAME LAYER SETUP
Right click on Title Bar and select
Copy merged from the options
In ANIMATION SHOP
Right click top of frame image and select
'Paste After Current Frame' from the options
Back to PSP.
Move the T and the open note
back to their original positions
by cancelling the moves in your History
Still on note2 place as shown.
|
|
STEP 20
Same Layer Palette setup
Right click on Title Bar and select
Copy merged from the options
In ANIMATION SHOP
Right click top of frame image and select
'Paste After Current Frame' from the options.
Back to PSP
Move the M up a little |
|
STEP 21
Same Layer Palette setup
Right click on Title Bar and select
Copy merged from the options
In ANIMATION SHOP
Right click top of frame image and select
'Paste After Current Frame' from the options
Back to PSP
Move the M and the open note
back to their original positions
by cancelling the moves in your History
Close note2 Open note 4
Place note4 as shown - Move B up a little |
|
STEP 22
Set up LAYER PALETTE as shown
.
Right click on Title Bar and select
Copy merged from the options |
|
STEP 23
In ANIMATION SHOP
Right click top of frame image and select
'Paste After Current Frame' from the options
Back to PSP
JUST MOVE NOTE OVER
|
|
STEP 24
Same Layer Palette setup.
Right click on Title Bar and select
Copy merged from the options
In ANIMATION SHOP
Right click top of frame image and select
'Paste After Current Frame' from the options
Back to PSP
CLOSE note4 and OPEN note3
Postition note3 as shown
and move the B up a little |
|
STEP 25
Set up LAYER PALETTE as shown
Right click on Title Bar and select
Copy merged from the options
In ANIMATION SHOP
Right click top of frame image and select
'Paste After Current Frame' from the options |
|
STEP 26
FILE >> OPEN tube.mng
Edit >> Select All
Edit >> Copy
Edit >> Propagate Paste
Activate working image
Edit >> Select All
Edit >> Paste into selected frame
The tube will be attached to the mouse place to the left side and left click to place the tube |
STEP 27
Right click on Title Bar of frames
Select 'Frame Properties' from the options
Display time = 15
|
STEP 28
View >> Animation
and while it is still running,
File >> Save As
Locate the folder in which you wish to save it.
Name your animation.
With the Gif Optimiser keep pressing NEXT
until you get to the last one... click FINISH
Close the Animation
Close the frames.
Close Animation Shop |
I hope you have enjoyed the tutorial and thanks for doing it.
Rebba |
. |
. |