STEP 1
Open up the downloaded images in your PSP workspace and minimize.
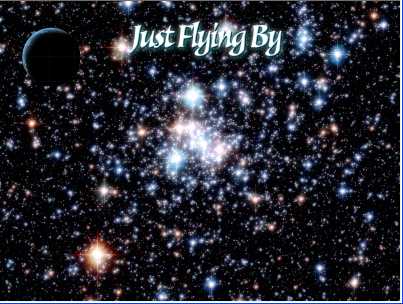
Open Stars 2 image in your PSP workspace
WINDOW >> DUPLICATE
Close the original image
LAYERS >>> Promote background Layer
Rename this layer bg1
VIEW >>> RULERS
|
STEP 2
Open planet tube in your PSP workspace
Right click on the Title Bar
and select COPY from the options.
Right click on the Title Bar of your 'working' image
and select PASTE AS NEW LAYER from the options.
IMAGE >> RESIZE = 25%
Ensure "Resize all layers" is UNCHECKED
Move to upper left side
Rename this layer planet |
|
STEP 3
Open text tube in your PSP workspace
Right click on the Title Bar
and select COPY from the options.
Right click on the Title Bar of your 'working' image
and select PASTE AS NEW LAYER from the options.
Place top center
Rename this layer text |
STEP 4
Open frame tube in your PSP workspace
Right click on the Title Bar
and select COPY from the options.
Right click on the Title Bar of your 'working' image
and select PASTE AS NEW LAYER from the options.
Rename this layer frame |
STEP 5
LAYERS >> NEW RASTER LAYER
Select your TEXT TOOL
with font and settings of your choice
add your name to the bottom left corner of the layer.
Rename this layer name.
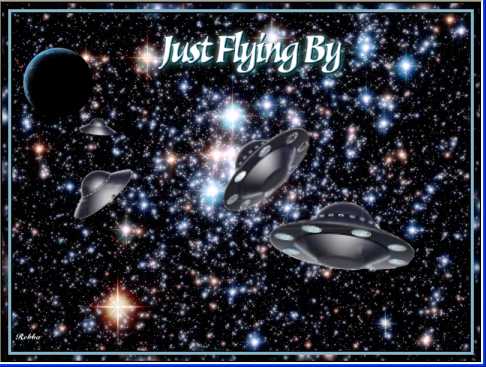
This is what we will have now

|
STEP 6
Activate layer bg1
LAYERS >> DUPLICATE >>TWICE
Rename these layers bg2 and bg3
Close bg3 layer
Activate layer bg2
EFFECTS >> PLUGINS >>Alien Skin 2 Constellation
use these settings.
|
|
STEP 7
Open & Activate layer bg3
EFFECTS >> PLUGINS >>Alien Skin 2 Constellation
Hit the Random Seed Once |
STEP 8
Open ship tube in your PSP workspace
Activate layer ship1
Right click on the Title Bar
and select COPY from the options.
Right click on the Title Bar of your 'working' image
and select PASTE AS NEW LAYER from the options.
IMAGE >> RESIZE = 25%
Ensure "Resize all layers" is UNCHECKED
ADJUST >>> SHARPNESS >>> SHARPEN
Rename this layer ship1
Place as shown
|
|
STEP 9
On ship image Activate layer ship2
Right click on the Title Bar
and select COPY from the options.
Right click on the Title Bar of your 'working' image
and select PASTE AS NEW LAYER from the options.
IMAGE >> RESIZE = 50%
Ensure "Resize all layers" is UNCHECKED
ADJUST >>> SHARPNESS >>> SHARPEN
Rename this layer ship2
Place as shown
|
|
STEP 10
On ship image Activate layer ship3
Right click on the Title Bar
and select COPY from the options.
Right click on the Title Bar of your 'working' image
and select PASTE AS NEW LAYER from the options.
IMAGE >> RESIZE = 75%
Ensure "Resize all layers" is UNCHECKED
ADJUST >>> SHARPNESS >>> SHARPEN
Rename this layer ship3
Place as shown
|
|
STEP 11
On ship image Activate layer ship4
Right click on the Title Bar
and select COPY from the options.
Right click on the Title Bar of your 'working' image
and select PASTE AS NEW LAYER from the options.
Rename this layer ship4
Place as shown
|
STEP 12
On ship image Activate layer ship5
Right click on the Title Bar
and select COPY from the options.
Right click on the Title Bar of your 'working' image
and select PASTE AS NEW LAYER from the options.
This will copy to center of image don't move it.
Rename this layer ship5
|
STEP 13
On ship image Activate layer ship6
Right click on the Title Bar
and select COPY from the options.
Right click on the Title Bar of your 'working' image
and select PASTE AS NEW LAYER from the options.
Rename this layer ship6
|
STEP 14
Activate layer ship5
LAYERS >> DUPLICATE
In your Layer Palette....move above ship6
Rename this layer ship7
|
STEP 15
Activate layer ship6
LAYERS >> DUPLICATE
In your Layer Palette....move above ship7
Rename this layer ship8
|
STEP 16
PSP8 - PSP9
On ship5,ship6,ship7,ship8 layers
in the Layer Palette the 'chains' will be active
Click on the "locks" on each of these layers
to lock the 4 layers together
|
|
STEP 16
PSPX and up.
On ship5,ship6,ship7,ship8 layers
Activate each layer and
click on the "lock"
to lock the 4 layers together
|
|
STEP 17
With your Mover Tool
move the locked layers right over
the top of the ship4 flying saucer.
Close layers ship6,ship7,ship8
Then in the layer palette
click the ship5 layer on
and off to see if it moves,
if it does line it up again and check.
Once you have it where there is no movement then
click on the chain on each layer until it shows "None"
Click on each of the locks to unlock
PSPX and up.
Click on each layer click on lockj to unlock
|
|
NOTE: we will be using the 3 bg layers
at different times so watch for this.
Check the top of the instruction
to help keep up with your frames
|
|
STEP 18
Set up LAYER PALETTE as shown
Right click on Title Bar and select
Copy merged from the options
|
|
STEP 19
In ANIMATION SHOP
Right click the workspace and select
'Paste As New Animation' from the options.
Back to PSP.
Empty Clipboard
Set up LAYER PALETTE as shown
Right click on Title Bar and select
Copy merged from the options
|
|
STEP 20
In ANIMATION SHOP
Right click top of frame image and select
'Paste After Current Frame' from the options.
Back to PSP.
Empty Clipboard
Set up LAYER PALETTE as shown
Right click on Title Bar and select
Copy merged from the options
|
|
STEP 21
In ANIMATION SHOP
Right click top of frame image and select
'Paste After Current Frame' from the options.
Back to PSP.
Empty Clipboard
Set up LAYER PALETTE as shown
Right click on Title Bar and select
Copy merged from the options
|
|
STEP 22
In ANIMATION SHOP
Right click top of frame image and select
'Paste After Current Frame' from the options.
Back to PSP.
Empty Clipboard
Set up LAYER PALETTE as shown
Right click on Title Bar and select
Copy merged from the options
|
|
STEP 23
In ANIMATION SHOP
Right click top of frame image and select
'Paste After Current Frame' from the options.
Back to PSP.
Empty Clipboard
Set up LAYER PALETTE as shown
Right click on Title Bar and select
Copy merged from the options
|
|
STEP 24
In ANIMATION SHOP
Right click top of frame image and select
'Paste After Current Frame' from the options.
Back to PSP.
Empty Clipboard
Set up LAYER PALETTE as shown
Right click on Title Bar and select
Copy merged from the options
|
|
STEP 25
In ANIMATION SHOP
Right click top of frame image and select
'Paste After Current Frame' from the options.
Back to PSP.
Empty Clipboard
Set up LAYER PALETTE as shown
Right click on Title Bar and select
Copy merged from the options
|
|
STEP 26
In ANIMATION SHOP
Right click top of frame image and select
'Paste After Current Frame' from the options.
Back to PSP.
Empty Clipboard
Set up LAYER PALETTE as shown
Right click on Title Bar and select
Copy merged from the options
|
|
STEP 27
In ANIMATION SHOP
Right click top of frame image and select
'Paste After Current Frame' from the options.
Edit >> Select All
Right click on Title Bar of frames
Select 'Frame Properties' from the options
Display time = 30
|
STEP 28
Click inside frame 9 (F:9) to select
Select 'Frame Properties' from the options
Display time = 50 |
STEP 29
RESIZING ANIMATIONS
Click on the Title Bar of the frames
Animation >> Resize animation
Select the width and height of your own choice
Click OK
|
STEP 30
View >> Animation
and while it is still running,
File >> Save As
Locate the folder in which you wish to save it.
Name your animation.
With the Gif Optimiser keep pressing NEXT
until you get to the last one... click FINISH
Close the Animation
Close the frames.
Close Animation Shop |
|
|
I hope you have enjoyed the tutorial.
Rebba |


