STEP 1
Open up the downloaded images in your PSP workspace and minimize.
Open up the bg paper image in your PSP workspace
WINDOW >>> DUPLICATE
Close the original Image
This will be our working image.
Rename this layer bg
|
STEP 2
Open up the mask image in your PSP workspace
Right click on the Title Bar
and select COPY from the options.
Right click on the Title Bar of your 'working' image
and select PASTE AS NEW LAYER from the options.
Rename this layer mask |
STEP 3
Open up the frame image in your PSP workspace
Right click on the Title Bar
and select COPY from the options.
Right click on the Title Bar of your 'working' image
and select PASTE AS NEW LAYER from the options.
Rename this layer frame |
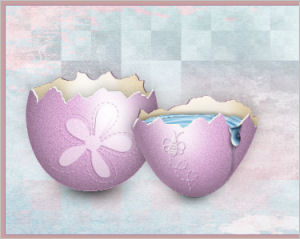
STEP 4
Open up the crackedegg2_mmarie_mirrored image in your PSP workspace
Marie has made different layer for us.
Activate big egg layer
Right click on the Title Bar
and select COPY from the options.
Right click on the Title Bar of your 'working' image
and select PASTE AS NEW LAYER from the options
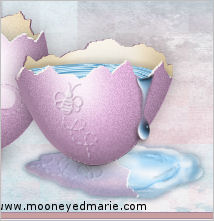
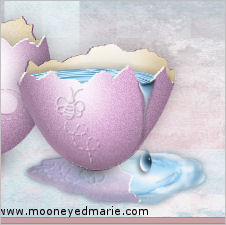
Place as shown
Rename this layer big egg
|
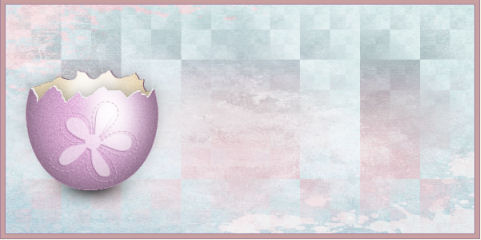
STEP 5
On egg image
Open & Activate back of little egg
Right click on the Title Bar
and select COPY from the options.
Right click on the Title Bar of your 'working' image
and select PASTE AS NEW LAYER from the options
Place as shown
Rename this layer back little egg |
|
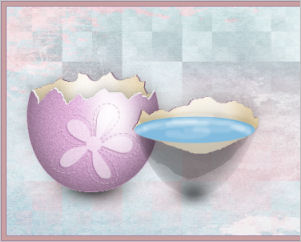
STEP 6
On egg image
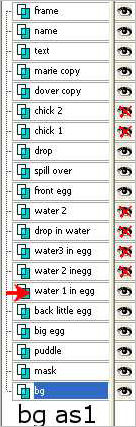
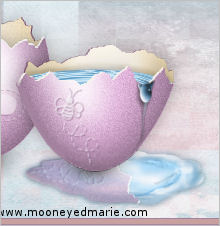
Open & Activate water 1 in egg
Right click on the Title Bar
and select COPY from the options.
Right click on the Title Bar of your 'working' image
and select PASTE AS NEW LAYER from the options
Place as shown right over the bg water
Rename this layer water 1 in egg |
|
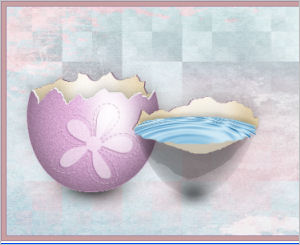
STEP 7
On egg image
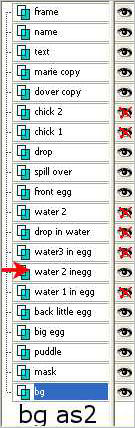
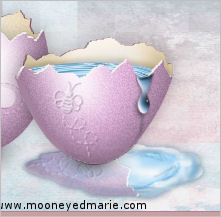
Open & Activate water 2 in egg
Right click on the Title Bar
and select COPY from the options.
Right click on the Title Bar of your 'working' image
and select PASTE AS NEW LAYER from the options
Place water 2 just two or 3 pixels highter but on top of water 1 in egg
Rename this layer water 2 in egg |
STEP 8
On egg image
Open & Activate water 3 in egg
Right click on the Title Bar
and select COPY from the options.
Right click on the Title Bar of your 'working' image
and select PASTE AS NEW LAYER from the options
Place water 3 just a pixel lower but on top of water 2 in egg
Rename this layer water 3 in egg |
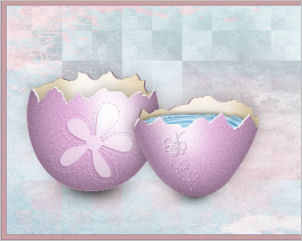
STEP 9
On egg image
Open & Activate front of little egg
Right click on the Title Bar
and select COPY from the options.
Right click on the Title Bar of your 'working' image
and select PASTE AS NEW LAYER from the options
Place as shown
Rename this layer front little egg |
|
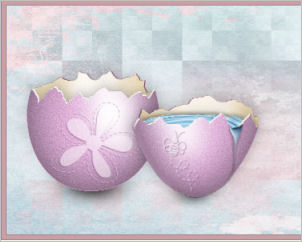
STEP 10
On egg image
Open & Activate spill over
Right click on the Title Bar
and select COPY from the options.
Right click on the Title Bar of your 'working' image
and select PASTE AS NEW LAYER from the options
Place as shown
Rename this layer spill over |
|
STEP 11
On egg image
Open & Activate drop
Right click on the Title Bar
and select COPY from the options.
Right click on the Title Bar of your 'working' image
and select PASTE AS NEW LAYER from the options
Place as shown
Rename this layer drop |
|
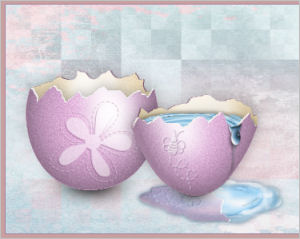
STEP 12
On egg image
Open & Activate puddle
Right click on the Title Bar
and select COPY from the options.
Right click on the Title Bar of your 'working' image
and select PASTE AS NEW LAYER from the options
In layer palette move puddle right above mask layer.
Place as shown
Rename this layer puddle |
|
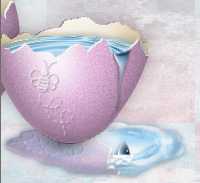
STEP 13
ACTIVATE drop layer
On egg image
Open & Activate drop in water
Right click on the Title Bar
and select COPY from the options.
Right click on the Title Bar of your 'working' image
and select PASTE AS NEW LAYER from the options
Place as shown
Rename this layer drop in water |
|
STEP 14
CLOSE drop in water layer
On egg image
Open & Activate water 2
Right click on the Title Bar
and select COPY from the options.
Right click on the Title Bar of your 'working' image
and select PASTE AS NEW LAYER from the options
Place as shown... line up with drop in water
Rename this layer water 2 |
|
STEP 15
On egg image
Open & Activate copyright
Right click on the Title Bar
and select COPY from the options.
Right click on the Title Bar of your 'working' image
and select PASTE AS NEW LAYER from the options
Place in bottom left corner
Rename this layer marie copy
Close the drop in water and water 2 layers.
Minimize the crackedegg image

|
STEP 16
Open up the master chick image in your PSP workspace
Open & Activate chick 1
Right click on the Title Bar
and select COPY from the options.
Right click on the Title Bar of your 'working' image
and select PASTE AS NEW LAYER from the options.
Place as shown
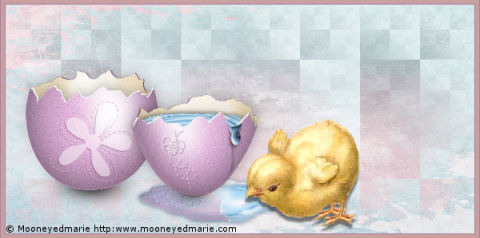
Rename this layer chick 1 |
STEP 17
On the master chick image
Open & Activate chick 2
Right click on the Title Bar
and select COPY from the options.
Right click on the Title Bar of your 'working' image
and select PASTE AS NEW LAYER from the options.
NOTE: to line up the chicks Zoom in on the area you are going to line up.
I use the bottom of the feet area and the back side of the chick.This one pixel in the circle is a good place to line up.
You can see the pixels on the bottom of feet then in the layer palette click the top chick layer off and on and you can see if it jumps around. When it is lined up you will see only the
shadow getting darker and lighter.
Rename this layer chick 2
|
|
STEP 18
Open copyright layer
Right click on the Title Bar
and select COPY from the options.
Right click on the Title Bar of your 'working' image
and select PASTE AS NEW LAYER from the options.
Place in bottom right corner
Rename this layer dover copy
|
STEP 19
Open up the text image in your PSP workspace
Right click on the Title Bar
and select COPY from the options.
Right click on the Title Bar of your 'working' image
and select PASTE AS NEW LAYER from the options.
Place center top.
Rename this layer text |
STEP 20
LAYERS >> NEW RASTER LAYER
Select your TEXT TOOL
with font and settings of your choice
add your name to the bottom left corner of the layer.
Rename this layer name
CLOSE chick 2 layer
|
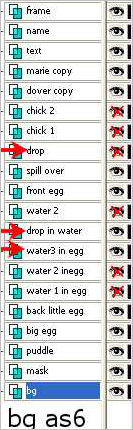
STEP 21
Now the animations.
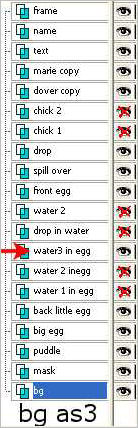
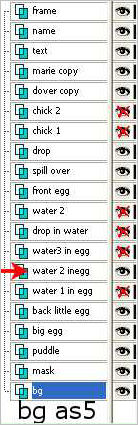
We will be going between water 1-water 3 so watch for this.
Set up LAYER PALETTE as shown
Right click on Title Bar and select
Copy merged from the options
|
|
STEP 22
In ANIMATION SHOP
Right click the workspace and select
'Paste As New Animation' from the options.
Back to PSP.
With your Mover Tool
Move the drop up a little
|
|
STEP 23
Set up LAYER PALETTE as shown
Right click on Title Bar and select
Copy merged from the options |
|
STEP 24
In ANIMATION SHOP
Right click top of frame image and select
'Paste After Current Frame' from the options.
Back to PSP.
With your Mover Tool
Move the drop as shown
|
|
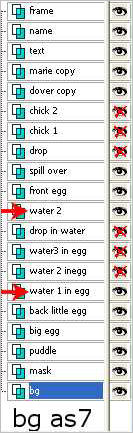
STEP 25
Set up LAYER PALETTE as shown
Right click on Title Bar and select
Copy merged from the options |
|
STEP 26
In ANIMATION SHOP
Right click top of frame image and select
'Paste After Current Frame' from the options.
Back to PSP.
With your Mover Tool
Move the drop as shown
|
|
STEP 27
Set up LAYER PALETTE as shown
Right click on Title Bar and select
Copy merged from the options |
|
STEP 28
In ANIMATION SHOP
Right click top of frame image and select
'Paste After Current Frame' from the options.
Back to PSP.
With your Mover Tool
Move the drop as shown
|
|
STEP 29
NOTE: I have to close the copyright layer to make
screen shot you should leave your layer open.
Set up LAYER PALETTE as shown
Right click on Title Bar and select
Copy merged from the options |
|
STEP 30
In ANIMATION SHOP
Right click top of frame image and select
'Paste After Current Frame' from the options.
Back to PSP.
CLOSE your Drop layer |
STEP 31
Open up the drop in water layer in your PSP workspace
Set up LAYER PALETTE as shown
Right click on Title Bar and select
Copy merged from the options |
|
STEP 32
In ANIMATION SHOP
Right click top of frame image and select
'Paste After Current Frame' from the options.
Back to PSP.
Set up LAYER PALETTE as shown
Right click on Title Bar and select
Copy merged from the options |
|
STEP 33
In ANIMATION SHOP
Right click top of frame image and select
'Paste After Current Frame' from the options.
Back to PSP.
Close the water 2 layer
Right click on Title Bar and select
Copy merged from the options |
STEP 34
In ANIMATION SHOP
Right click top of frame image and select
'Paste After Current Frame' from the options.
This gives you 8 frames.
Back to PSP.
Close every layer except for chick 1 and activate it.
Right click on Title Bar and select
Copy from the options |
STEP 35
In ANIMATION SHOP
Right click the workspace and select
'Paste As New Animation' from the options.
Back to PSP.
Close every layer except for chick 2 and activate it.
Right click on Title Bar and select Copy from the options |
STEP 36
In ANIMATION SHOP
Right click top of frame image and select
'Paste After Current Frame' from the options.
Activate the chick and we will work on the speed.
We need to make the speed for the chick compatible to
speed 10 for the working image.
Scroll the arrow on the bottom of the frame to first frame
( F:1)
Click the gray rim around the picture to highlight it,
Edit >> Copy
Edit >> Paste After Current Frame
Hold down the CTRL and hit the L key 8 times this gives you 10
frames at speed 10
|
STEP 37
Scroll the arrow on the bottom of the frame to eleventh frame ( F:11)
Click the gray rim around the picture to highlight it,
Edit >> Copy
Edit >> Paste After Current Frame
Hold down the CTRL and hit the L key 6 times this gives you 8
frames at speed 10
Edit >> Select All
|
STEP 38
View >> Animation
You will see we have the same movement with 18 frames.
Activate the working image this has 8 frames and we need
the same amount of frames as the chicks so we add frames. |
STEP 39
Activate the working image.
Scroll the arrow on the bottom of the frame to first frame
( F:1)
Click the gray rim around the picture to highlight it,
Edit >> Copy
Edit >> Paste After Current Frame |
NOTE
You now have 2 of the frame 1.
We need to do this for each frame.
As you paste frames the numbers changes so the numbers you
want to select edit copy, edit paste after current frame are these numbers
# 1 is done # 3, # 5, # 7, # 9, # 11, # 13 # 15. |
STEP 40
Select frame 3
Edit >> Copy
Edit >> Paste After Current Frame
Select frame 5
Edit >> Copy
Edit >> Paste After Current Frame
Select frame 7
Edit >> Copy
Edit >> Paste After Current Frame
Select frame 9
Edit >> Copy
Edit >> Paste After Current Frame
Continue until # 15 is done. We will have 16 frames so
Edit >> Paste After Current Frame 2 more times on frame # 15.
|
STEP 41
Activate the chick animation
Edit >> Select All
Edit >> Copy
Edit >> Propagate Paste
Activate the working image
Edit >> Select All
Edit >> Paste into selected frame
You will need to move the mouse around to see the image
then place and left click to set it down
|
STEP 42
Edit >> Select All
Right click on Title Bar of frames
Select 'Frame Properties' from the options
Display time = 20 as you wish |
STEP 43
View >> Animation
and while it is still running,
File >> Save As
Locate the folder in which you wish to save it.
Name your animation.
With the Gif Optimiser keep pressing NEXT
until you get to the last one... click FINISH
Close the Animation
Close the frames.
Close Animation Shop |
|
|
I hope you have enjoyed this tutorial and learned something new.
Rebba |