STEP 1
Open up the downloaded images in your PSP workspace and minimize.
Open up the lady master image in your PSP workspace
WINDOW >>> DUPLICATE
Close the original Image
This is your working image
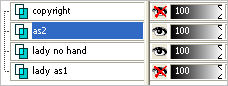
The bottom layer is already named lady as1
Close the copyright later for now |
STEP 2
With lady as1 active
LAYERS >> DUPLICATE
Rename this layer lady no hand
Choose your SELECTION TOOL
Selection Type = Rectangle
Mode = Replace
Feather = 0
Antialias = UNChecked
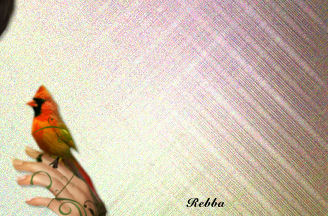
Select the bird and hand
|
|
STEP 3
Selections >> Promote Selection to Layer
Activate layer lady no hand
Keyboard DELETE
Activate Promoted Selection layer
Rename this layer as2
DESELECT
Close layer lady as1
|
|
STEP 4
Open bg master tube in your PSP workspace
Right click on the Title Bar
and select COPY from the options.
Right click on the Title Bar of your 'working' image
and select PASTE AS NEW LAYER from the options.
LAYERS >> ARRANGE >> SEND TO BOTTOM
Rename this layer bg |
|
STEP 5
LAYERS >> NEW RASTER LAYER
Select your TEXT TOOL
with font and settings of your choice
add your name towards the bottom right of the layer.
Rename this layer name |
|
STEP 6
Open frame tube in your PSP workspace
Right click on the Title Bar
and select COPY from the options.
Right click on the Title Bar of your 'working' image
and select PASTE AS NEW LAYER from the options.
LAYERS >> ARRANGE >> SEND TO TOP
Rename this layer frame |
|
STEP 7
Open accent tube in your PSP workspace
Right click on the Title Bar
and select COPY from the options.
Right click on the Title Bar of your 'working' image
and select PASTE AS NEW LAYER from the options.
LAYERS >>> ARRANGE >>> MOVE DOWN
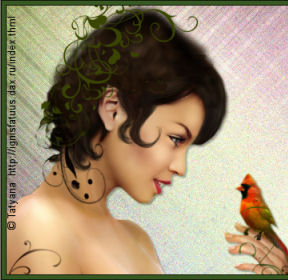
Place as shown
Rename this layer accent
|
|
STEP 8
OPEN the copyright layer
and
Reposition the copyright text with your MOVER TOOL
a little to the right of the frame
|
|
STEP 9
Open top flowers tube in your PSP workspace
Right click on the Title Bar
and select COPY from the options.
Right click on the Title Bar of your 'working' image
and select PASTE AS NEW LAYER from the options.
Reposition with your MOVER tool
Rename this layer top flowers |
|
STEP 10
Open bottom flowers tube in your PSP workspace
Right click on the Title Bar
and select COPY from the options.
Right click on the Title Bar of your 'working' image
and select PASTE AS NEW LAYER from the options.
Rename this layer bottom flowers
In your LAYER PALETTE move this layer beneath the copyright layer
Place as shown

|
STEP 11
Open text tube in your PSP workspace
Right click on the Title Bar
and select COPY from the options.
Right click on the Title Bar of your 'working' image
and select PASTE AS NEW LAYER from the options.
Rename this layer text
Place as shown
|
|
STEP 12
Open & Activate layer as2
LAYERS >> DUPLICATE
Click on the bird image in your tag with your MOVER TOOL
On the KEYBOARD hit the UP arrow 1 time.
Click the layer on and off in your Layer Palette to make sure the bird is moving up and down
Rename this layer as3 |
STEP 13
LAYERS >> DUPLICATE
On the KEYBOARD hit the UP arrow 1 time.
Rename this layer as4
|
|
STEP 14
OPEN & Activate layer lady as1
LAYERS >> DUPLICATE
Move above as4
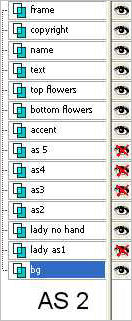
Rename this layer as5
Set up LAYER PALETTE as shown
|
|
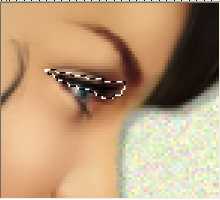
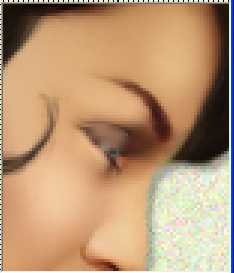
STEP 15
Working on layer as5
Zoom in on ladies eyes
Select your Freehand Selection Tool
(Lasso)

|
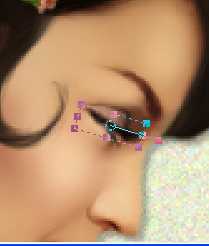
STEP 16
Select around the upper eyelid
Selections >> Promote Selection to Layer
DESELECT
and close the Promoted Selection layer |
|
STEP 17
Activate layer as5
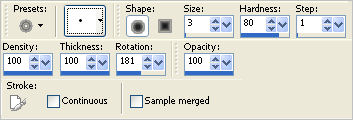
Select your Push Brush Tool using these setting
PRESET = + Round 05

..........................................A8
|
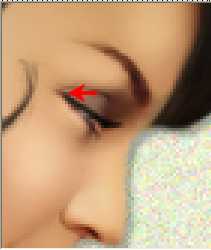
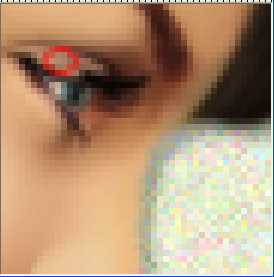
STEP 18
Working below the crease of the eye push down
Go across the eye like this pushing down
|
|
STEP 19
Then push the eyelash down too
it will look pretty bad at this point
|
|
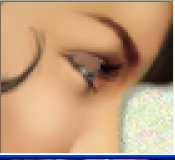
STEP 20
Select your Soften Brush
PRESET = + Round 05
Click a couple of times over the eyelid and try not to
soften the crease in eye then soften the dark area.
|
|
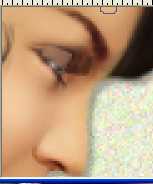
STEP 21
Open & Activate the Promoted Selection layer
Select the Deform Tool
Mode = SCALE
use default settings
PSPX-X3:Select your PICK tool
I don't show setting here because it will change
depending on where each person put their own lash.
Rotate it to the angle of her eye
and bring down to line up.
Click the RESET RECTANGLE arrow
|
|
STEP 22
Make sure this point is lined up.
|
|
STEP 23
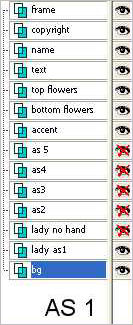
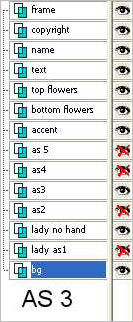
Merge Down the selection layer with the as5 layer
Set up LAYER PALETTE as shown
Right click on Title Bar and select
Copy merged from the options |
|
STEP 24
In ANIMATION SHOP
Right click the workspace and select
'Paste As New Animation' from the options.
Back to PSP.
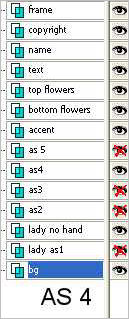
Set up LAYER PALETTE as shown
Right click on Title Bar and select
Copy merged from the options |
|
STEP 25
In ANIMATION SHOP
Right click top of frame image and select
'Paste After Current Frame' from the options.
Back to PSP.
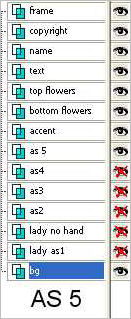
Set up LAYER PALETTE as shown
Right click on Title Bar and select
Copy merged from the options |
|
STEP 26
In ANIMATION SHOP
Right click top of frame image and select
'Paste After Current Frame' from the options.
Back to PSP.
Set up LAYER PALETTE as shown
Right click on Title Bar and select
Copy merged from the options |
|
STEP 27
In ANIMATION SHOP
Right click top of frame image and select
'Paste After Current Frame' from the options.
Back to PSP.
Set up LAYER PALETTE as shown
Right click on Title Bar and select
Copy merged from the options |
|
STEP 28
In ANIMATION SHOP
Right click top of frame image and select
'Paste After Current Frame' from the options.
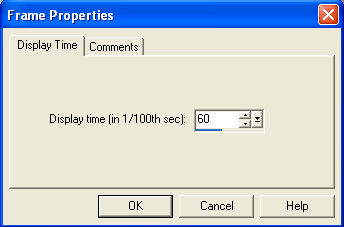
Edit >> Select All
Right click on Title Bar of frames
Select 'Frame Properties' from the options
Display time = 60 |
|
STEP 29
Scroll the arrow on the bottom of the frames
to last frame ( F:5)
Click the gray rim around the picture to highlight it,
Right click on Title Bar of frames
Select 'Frame Properties' from the options
Display time =20 |
STEP 30
View >> Animation
and while it is still running,
File >> Save As
Locate the folder in which you wish to save it.
Name your animation.
With the Gif Optimiser keep pressing NEXT
until you get to the last one... click FINISH
Close the Animation
Close the frames.
Close Animation Shop |
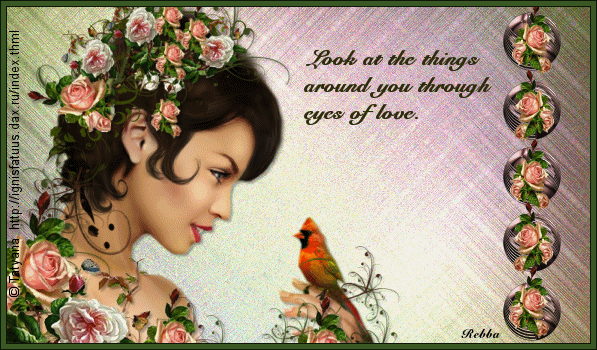
I hope you have enjoyed the tutorial.
Rebba
|