STEP 1
Open up the downloaded images in your PSP workspace and minimize.
Open 24 dingbat master tube in your PSP workspace
WINDOW >> DUPLICATE
Close the original image |
NOTE: We will do the animation first.
The images already has the 24 layers and each has been named.
The O (outer) and I (inner) layers will rotate to the right.
The C (center) layer will rotate to the left. |
Note: we will rotate all the Outer AS and the Inner AS layers to the
right first then we will rotate the Center AS layers to the left.
None of the AS1 layers will be rotated just AS2-AS8. |
STEP 2
All layers should be closed except bg (to help you see)
and OAS2
Activate OAS2
IMAGE >> ROTATE >> FREE ROTATE = RIGHT 45
Ensure "All layers" is UNCHECKED
PSPX - PSPX3: IMAGE >>> FREE ROTATE = RIGHT 45
Ensure "All layers" is UNCHECKED
Close layer OAS2
|
STEP 3
Open & Activate IAS2
IMAGE >> ROTATE >> FREE ROTATE = RIGHT 45
Ensure "All layers" is UNCHECKED
PSPX - PSPX3: IMAGE >>> FREE ROTATE = RIGHT 45
Ensure "All layers" is UNCHECKED
Close layer IAS2 |
STEP 4
Open & Activate OAS3
IMAGE >> ROTATE >> FREE ROTATE = RIGHT 90
Ensure "All layers" is UNCHECKED
PSPX - PSPX3: IMAGE >>> FREE ROTATE = RIGHT 90
Ensure "All layers" is UNCHECKED
Close layer OAS3 |
STEP 5
Open & Activate IAS3
IMAGE >> ROTATE >> FREE ROTATE = RIGHT 90
Ensure "All layers" is UNCHECKED
PSPX - PSPX3: IMAGE >>> FREE ROTATE = RIGHT 90
Ensure "All layers" is UNCHECKED
Close layer IAS3 |
STEP 6
Open & Activate OAS4
IMAGE >> ROTATE >> FREE ROTATE = RIGHT 135
Ensure "All layers" is UNCHECKED
PSPX - PSPX3: IMAGE >>> FREE ROTATE = RIGHT 135
Ensure "All layers" is UNCHECKED
Close layer OAS4 |
STEP 7
Open & Activate IAS4
IMAGE >> ROTATE >> FREE ROTATE = RIGHT 135
Ensure "All layers" is UNCHECKED
PSPX - PSPX3: IMAGE >>> FREE ROTATE = RIGHT 135
Ensure "All layers" is UNCHECKED
Close layer IAS4 |
STEP 8
Open & Activate OAS5
IMAGE >> ROTATE >> FREE ROTATE = RIGHT 180
Ensure "All layers" is UNCHECKED
PSPX - PSPX3: IMAGE >>> FREE ROTATE = RIGHT 180
Ensure "All layers" is UNCHECKED
Close layer OAS5 |
STEP 9
Open & Activate IAS5
IMAGE >> ROTATE >> FREE ROTATE = RIGHT 180
Ensure "All layers" is UNCHECKED
PSPX - PSPX3: IMAGE >>> FREE ROTATE = RIGHT 180
Ensure "All layers" is UNCHECKED
Close layer IAS5 |
STEP 10
Open & Activate OAS6
IMAGE >> ROTATE >> FREE ROTATE = RIGHT 225
Ensure "All layers" is UNCHECKED
PSPX - PSPX3: IMAGE >>> FREE ROTATE = RIGHT 225
Ensure "All layers" is UNCHECKED
Close layer OAS6 |
STEP 11
Open & Activate IAS6
IMAGE >> ROTATE >> FREE ROTATE = RIGHT 225
Ensure "All layers" is UNCHECKED
PSPX - PSPX3: IMAGE >>> FREE ROTATE = RIGHT 225
Ensure "All layers" is UNCHECKED
Close layer IAS6 |
STEP 12
Open & Activate OAS7
IMAGE >> ROTATE >> FREE ROTATE = RIGHT 270
Ensure "All layers" is UNCHECKED
PSPX - PSPX3: IMAGE >>> FREE ROTATE = RIGHT 270
Ensure "All layers" is UNCHECKED
Close layer OAS7 |
STEP 13
Open & Activate IAS7
IMAGE >> ROTATE >> FREE ROTATE = RIGHT 270
Ensure "All layers" is UNCHECKED
PSPX - PSPX3: IMAGE >>> FREE ROTATE = RIGHT 270
Ensure "All layers" is UNCHECKED
Close layer IAS7 |
STEP 14
Open & Activate OAS8
IMAGE >> ROTATE >> FREE ROTATE = RIGHT 315
Ensure "All layers" is UNCHECKED
PSPX - PSPX3: IMAGE >>> FREE ROTATE = RIGHT 315
Ensure "All layers" is UNCHECKED
Close layer OAS8 |
STEP 15
Open & Activate IAS8
IMAGE >> ROTATE >> FREE ROTATE = RIGHT 315
Ensure "All layers" is UNCHECKED
PSPX - PSPX3: IMAGE >>> FREE ROTATE = RIGHT 315
Ensure "All layers" is UNCHECKED
Close layer IAS8 |
STEP 16
Now lets rotate the Center layers to the left.
Open & Activate CAS2
IMAGE >> ROTATE >> FREE ROTATE = LEFT 45
Ensure "All layers" is UNCHECKED
PSPX - PSPX3: IMAGE >>> FREE ROTATE = LEFT 45
Ensure "All layers" is UNCHECKED
Close layer CAS2
|
STEP 17
Open & Activate CAS3
IMAGE >> ROTATE >> FREE ROTATE = LEFT 90
Ensure "All layers" is UNCHECKED
PSPX - PSPX3: IMAGE >>> FREE ROTATE = LEFT 90
Ensure "All layers" is UNCHECKED
Close layer CAS3 |
STEP 18
Open & Activate CAS4
IMAGE >> ROTATE >> FREE ROTATE = LEFT 135
Ensure "All layers" is UNCHECKED
PSPX - PSPX3: IMAGE >>> FREE ROTATE = LEFT 135
Ensure "All layers" is UNCHECKED
Close layer CAS4 |
STEP 19
Open & Activate CAS5
IMAGE >> ROTATE >> FREE ROTATE = LEFT 180
Ensure "All layers" is UNCHECKED
PSPX - PSPX3: IMAGE >>> FREE ROTATE = LEFT 180
Ensure "All layers" is UNCHECKED
Close layer CAS5 |
STEP 20
Open & Activate CAS6
IMAGE >> ROTATE >> FREE ROTATE = LEFT 225
Ensure "All layers" is UNCHECKED
PSPX - PSPX3: IMAGE >>> FREE ROTATE = LEFT 225
Ensure "All layers" is UNCHECKED
Close layer CAS6 |
STEP 21
Open & Activate CAS7
IMAGE >> ROTATE >> FREE ROTATE = LEFT 270
Ensure "All layers" is UNCHECKED
PSPX - PSPX3: IMAGE >>> FREE ROTATE = LEFT 270
Ensure "All layers" is UNCHECKED
Close layer CAS7 |
STEP 22
Open & Activate CAS8
IMAGE >> ROTATE >> FREE ROTATE = LEFT 315
Ensure "All layers" is UNCHECKED
PSPX - PSPX3: IMAGE >>> FREE ROTATE = LEFT 315
Ensure "All layers" is UNCHECKED
Close layer CAS8 |
STEP 23
Save this as a PSP image to reuse again
Close layer bg
And all other layers |
STEP 24
Open the three AS1 layers (OAS1, CAS1, IAS1)
Right click on Title Bar and select
Copy merged from the options
In ANIMATION SHOP
Right click the workspace and select
'Paste As New Animation' from the options. |
STEP 25
Back to PSP.
Close open layers
Open the three AS2 layers (OAS2, CAS2, IAS2)
Right click on Title Bar and select
Copy merged from the options
In ANIMATION SHOP
Right click top of frame image and select
'Paste After Current Frame' from the options
|
STEP 26
Back to PSP
Close open layers
Open the three AS3 layers (OAS3, CAS3, IAS3)
Right click on Title Bar and select
Copy merged from the options
In ANIMATION SHOP
Right click top of frame image and select
'Paste After Current Frame' from the options |
STEP 27
Back to PSP
Close open layers
Open the three AS4 layers (OAS4, CAS4, IAS4)
Right click on Title Bar and select
Copy merged from the options
In ANIMATION SHOP
Right click top of frame image and select
'Paste After Current Frame' from the options.
Continue this until all 8 layers are pasted into
ANIMATION SHOP.
View >> Animation ..... then minimize it for now. |
STEP 28
Back to PSP
OK lets make our tag.
Open a new image 600 x 600
Transparent background
PSPX - X2: Colour Depth = 8bits/channel
PSPX3: Colour Depth RGB = 8bits/channel
Flood fill with white
Rename this layer bg
|
STEP 29
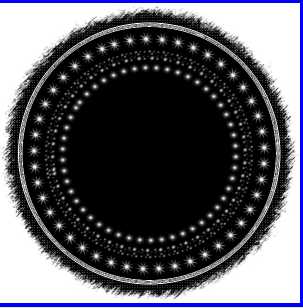
Open bg circle tube in your PSP workspace
Right click on the Title Bar and select
COPY from the options.
Right click on the Title Bar of your 'working' image
and select PASTE AS NEW LAYER from the options.
Rename this layer circle
|
STEP 30
Open Sorensen-designs tube jan 128-12 tube
in your PSP workspace
Right click on the Title Bar and select
COPY from the options.
Right click on the Title Bar of your 'working' image
and select PASTE AS NEW LAYER from the options.
IMAGE >> RESIZE = 50%
Ensure "Resize all layers" is UNCHECKED
Rename this layer tube
|
STEP 31
Open sd-firstlove-rose1 tube
in your PSP workspace
Right click on the Title Bar and select
COPY from the options.
Right click on the Title Bar of your 'working' image
and select PASTE AS NEW LAYER from the options.
IMAGE >> RESIZE = 65%
Ensure "Resize all layers" is UNCHECKED
Move to the lower center
Rename this layer flowers
|
STEP 32
LAYERS >> NEW RASTER LAYER
Select your TEXT TOOL
with font and settings of your choice
add your name to the bottom left corner of the layer.
Rename this layer name.
|
Placement of images
|
|
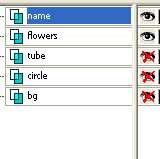
STEP 33
Set up LAYER PALETTE as shown
Right click on Title Bar and select
Copy merged from the options |
|
STEP 34
In ANIMATION SHOP
Right click the workspace and select
'Paste As New Animation' from the options.
Hold down the Ctrl key and Hit the L (Upper case) key 6 times
to give you 8 frames
|
STEP 35
Activate your animation
Edit >> Select All
Edit >> Copy
Edit >> Propagate Paste
Activate the bg working image.
Edit >> Select All
Edit >> Paste into selected frame
The image will be attached to the
mouse
center the image
and left click the mouse to place the image.
. |
|
STEP 36
Back to PSP.
Set up LAYER PALETTE as shown
Right click on the Title Bar and select
COPY from the options. |
|
STEP 37
In ANIMATION SHOP
Right click the workspace and select
'Paste As New Animation' from the options.
Edit >> Copy
Activate the working image
Edit >> Select All
Propagate Paste will still be activated
Edit >> Paste into selected frame
Place the image as shown and click
the left mouse button to place
|
|
STEP 38
Back to PSP.
Set up LAYER PALETTE as shown
Right click on Title Bar and select
Copy merged from the options |
|
STEP 39
In ANIMATION SHOP
Right click the workspace and select
'Paste As New Animation' from the options.
Edit >> Copy
Activate the working image
Edit >> Select All
Propagate Paste will still be activated
Edit >> Paste into selected frame
Place the image as shown and click
the left mouse button to place
Speed will stay the default setting of 10 |
|
STEP 40
View >> Animation
and while it is still running,
File >> Save As
Locate the folder in which you wish to save it.
Name your animation.
With the Gif Optimiser keep pressing NEXT
until you get to the last one... click FINISH
Close the Animation
Close the frames.
Close Animation Shop |
|
|
I hope you have enjoyed the tutorial
Rebba |