STEP 1
In your MATERIALS PALETTE
Load PURPLE ' #a4aff5 ' in your background
Open a new image 600 x 400
Transparent background
PSPX - X2: Colour Depth = 8bits/channel
PSPX3: Colour Depth RGB = 8bits/channel
VIEW >>> RULERS
|
STEP 2
NOTE: PSPX3 and up.. Hold down your SHIFT key to get the Text Box to show and you may need to adjust the text size.
Once text is 'Applied' centre the text.
Select your TEXT tool
FONT = Broadway BT

Place your cursor at 300 pixels across and 300 pixels down
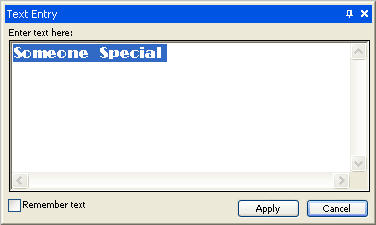
Enter the following text
' Someone.Special '
with 2 spaces between each word

Click APPLY
|
STEP 3
OBJECTS >>> Convert Text to Curves >>> As Character Shapes |
|
STEP 4
In your LAYER PALETTE
Click on the VECTOR 1 layer to open
Click on the SOMEONE SPECIAL layer to open
Select the bottom "S" layer
|
|
STEP 5
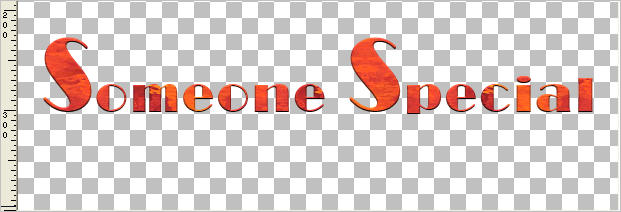
Drag the centre top node up level with the 225 pixel mark on the left ruler
and the centre left node.. left, level with the 20 pixel mark
on the top ruler
|
|
STEP 6
In your LAYER PALETTE
Select the top "S" layer
|
|
STEP 7
Drag the centre top node up level with the 225 pixel mark on the left ruler
and the centre left node.. left, level with the 320 pixel mark
on the top ruler
|
|
STEP 8
LAYERS >>> CONVERT TO RASTER LAYER
Rename this layer Text 1
EFFECTS >>> TEXTURE EFFECTS >>> SCULPTURE
COLOUR = #c0c0c0
PATTERN = 171w
|
|
STEP 9
Centre the text with your MOVER TOOL
 |
STEP 10
LAYERS >>> DUPLICATE
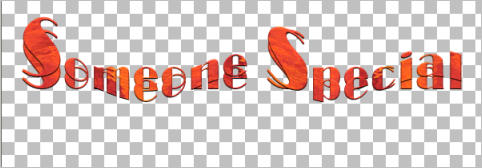
EFFECTS >>> DISTORTION EFFECTS >>> WAVE


Rename this layer Text 2
|
STEP 11
LAYERS >>> DUPLICATE
EFFECTS >>> DISTORTION EFFECTS >>> WAVE
Same settings
Rename this layer Text 3
|
|
STEP 12
LAYERS >>> DUPLICATE
EFFECTS >>> DISTORTION EFFECTS >>> WAVE
Same settings
Rename this layer Text 4
LAYERS >>> DUPLICATE
EFFECTS >>> DISTORTION EFFECTS >>> WAVE
Same settings
Rename this layer Text 5
|
|
STEP 13
ACTIVATE RASTER 1
Flood fill with PURPLE
SELECTIONS >>> SELECT ALL
SELECTIONS >>> MODIFY >>> CONTRACT = 10
SELECTIONS >>> INVERT
EFFECTS >>> 3D EFFECTS >>> INNER BEVEL
|
|
STEP 14
EFFECTS >>> PLUGINS >>> EYE CANDY 3 >>> DROP SHADOW |
|
STEP 15
SELECTIONS >>> INVERT
SELECTIONS >>> MODIFY >>> CONTRACT = 10
EFFECTS >>> 3D EFFECTS >>> INNER BEVEL |
|
STEP 16
EFFECTS >>> TEXTURE EFFECTS >>> TEXTURE
COLOUR = #c0c0c0
TEXTURE = Hatch fine
|
|
STEP 17
ADJUST >>> SHARPNESS >>> SHARPEN MORE
EFFECTS >>> 3D EFFECTS >>> DROP SHADOW
Vertical & Horizontal offsets = 1
Colour = Black
Opacity = 50
Blur = 0
Repeat Drop Shadow effect changing
Vertical & Horizontal Offsets to - ( minus ) 1
Click OK
DESELECT
Rename this layer bgd
|
|
STEP 18
Open up the 1v.pspimage in your PSP workspace
Choose your SELECTION TOOL
Selection Type = Rectangle
Mode = Replace
Feather = 0
Antialias = UNChecked
Select the hearts on the right hand side
|
|
STEP 19
Right click on the Title Bar and select COPY from the options
Right click on the Title Bar of your frame image
and select PASTE AS NEW LAYER from the options.
Right click in your PSP workspace
and select PASTE AS NEW IMAGE from the options.
EFFECTS >>> PLUGINS >>> EYE CANDY 3 >>> DROP SHADOW
Same settings
Reposition with your MOVER tool
Rename this layer hearts 1
|
|
STEP 20
Open up the 34.pspimage in your PSP workspace
Right click on the Title Bar and select COPY from the options
Right click on the Title Bar of your frame image
and select PASTE AS NEW LAYER from the options.
IMAGE >>> RESIZE = 15%
Ensure "Resize all layers" is UNCHECKED
Resample using WEIGHTED AVERAGE
ADJUST >>> SHARPNESS >>> SHARPEN
EFFECTS >>> PLUGINS >>> EYE CANDY 3 >>> DROP SHADOW
Same settings
Reposition with your MOVER tool
Rename this layer hearts 2
|
|
STEP 21
CLOSE layers text 2 to text 5
Still on the hearts 2 layer
Open up the 1v.pspimage in your PSP workspace
Choose your SELECTION TOOL
Same settings
Select the hearts on the left hand side
Right click on the Title Bar and select COPY from the options
Right click on the Title Bar of your frame image
and select PASTE AS NEW LAYER from the options.
IMAGE >>> RESIZE = 55%
Ensure "Resize all layers" is UNCHECKED
Resample using WEIGHTED AVERAGE
Reposition with your MOVER tool
Rename this layer hearts 3
|
|
STEP 22
ADJUST >>> SHARPNESS >>> SHARPEN
EFFECTS >>> 3D EFFECTS >>> DROP SHADOW
Vertical & Horizontal offsets = 1
Colour = Black
Opacity = 60
Blur = 0
EFFECTS >>> PLUGINS >>> EYE CANDY 3 >>> DROP SHADOW
Same settings
|
|
STEP 23
Open up the JER_parang09 image in your PSP workspace
Right click on the Title Bar and select COPY from the options
Right click on the Title Bar of your frame image
and select PASTE AS NEW LAYER from the options.
ADJUST >>> SHARPNESS >>> SHARPEN
EFFECTS >>> PLUGINS >>> EYE CANDY 3 >>> DROP SHADOW
Same settings
Rename this layer couple
|
|
STEP 24
LAYERS >> NEW RASTER LAYER
Select your TEXT TOOL
with font and settings of your choice
add your name to the bottom left corner of the layer.
Rename this layer name.
Save as .pspimage image
|
|
LET'S ANIMATE!!
|
STEP 25
Set up LAYER PALETTE as shown
Right click on Title Bar and select
Copy merged from the options
|
|
STEP 26
In ANIMATION SHOP
Right click the workspace and select
'Paste As New Animation' from the options. |
|
STEP 27
Back to PSP.
CLOSE text 1 layer
OPEN text 2 layer
Right click on Title Bar and select
Copy merged from the options
In ANIMATION SHOP
Right click top of frame image and select
'Paste After Current Frame' from the options.
|
|
STEP 28
Back to PSP.
EDIT >>> Empty Clipboard
CLOSE text 2 layer
OPEN text 3 layer
Right click on Title Bar and select
Copy merged from the options
In ANIMATION SHOP
Right click top of frame image and select
'Paste After Current Frame' from the options. |
|
STEP 29
Back to PSP.
EDIT >>> Empty Clipboard
CLOSE text 3 layer
OPEN text 4 layer
Right click on Title Bar and select Copy merged from the options
In ANIMATION SHOP
Right click top of frame image and select
'Paste After Current Frame' from the options. |
|
STEP 30
Back to PSP.
EDIT >>> Empty Clipboard
CLOSE text 4 layer
OPEN text 5 layer
Right click on Title Bar and select Copy merged from the options
In ANIMATION SHOP
Right click top of frame image and select
'Paste After Current Frame' from the options. |
|
STEP 31
Edit >> Select All
EDIT >> Copy
Right click top of frames image and select
'Paste After Current Frame' from the options.
Click inside frame 6 (F:6) to activate
Depress your SHIFT key
Click inside frame 10 (F: 10) to select last 5 frames
Animation >> Reverse frames
|
STEP 32
Edit >> Select All
Right click on Title Bar of frames
Select 'Frame Properties' from the options
Display time = 50
|
|
STEP 33
RIGHT Click inside frame 6 (F:6) and select CUT from the options
RIGHT Click inside frame 1 (F:1)
Select 'Frame Properties' from the options
Display time = 100
RIGHT Click inside frame 9 (F:9) and select CUT from the options
You should have 8 frames left
|
STEP 34
View >> Animation
and while it is still running,
File >> Save As
Locate the folder in which you wish to save it.
Name your animation.
With the Gif Optimiser keep pressing NEXT
until you get to the last one... click FINISH
Close the Animation
Close the frames.
Close Animation Shop |
.. |