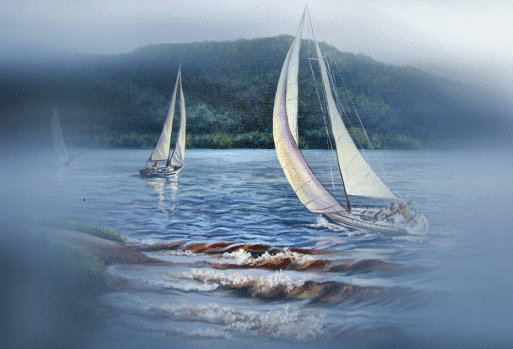
STEP 1
Open up the Voiliers image in your PSP workspace
WINDOW >>> DUPLICATE
Close the original Image
LAYERS >>> Promote background Layer
Rename this layer MERGED
LAYERS >>> DUPLICATE (4 times)
|
STEP 2
Choose your FREEHAND SELECTION TOOL

|
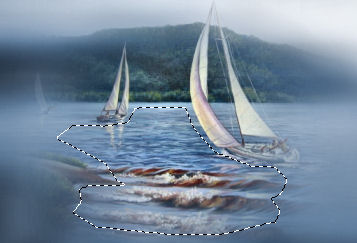
STEP 3
With Copy (4) of Merged active
Select the section of the water you wish to animate
|
|
STEP 4
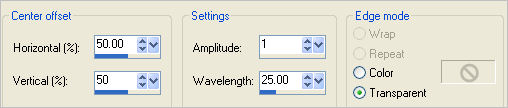
EFFECTS >>> DISTORTION EFFECTS >>> RIPPLE
|
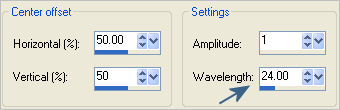
STEP 5
CLOSE Copy (4) of Merged
ACTIVATE Copy (3) of Merged
EFFECTS >>> DISTORTION EFFECTS >>> RIPPLE
CHANGE "Wavelength" to = 24
|
|
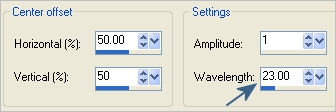
STEP 6
CLOSE Copy (3) of Merged
ACTIVATE Copy (2) of Merged
EFFECTS >>> DISTORTION EFFECTS >>> RIPPLE
CHANGE "Wavelength" to = 23 |
|
STEP 7
CLOSE Copy (2) of Merged
ACTIVATE Copy of Merged
EFFECTS >>> DISTORTION EFFECTS >>> RIPPLE
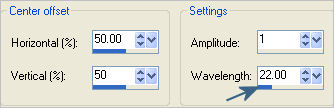
CHANGE "Wavelength" to = 22 |
|
STEP 8
CLOSE Copy of Merged
ACTIVATE the Merged layer
EFFECTS >>> DISTORTION EFFECTS >>> RIPPLE
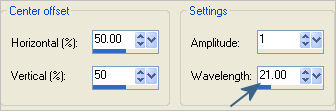
CHANGE "Wavelength" to = 21
DESELECT
|
|
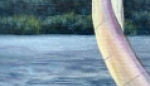
STEP 9
CLOSE all layers except the Merged layer
ZOOM in on the Merged layer
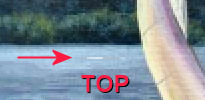
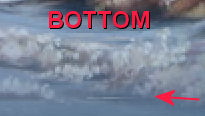
On my image there are 2 white lines visible,
one at the bottom and one at the top.
If this hasn't happened on yours...
go to STEP 13 |
|
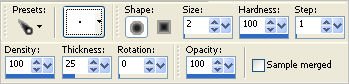
STEP 10
Select your PUSH BRUSH tool
PRESET = +Round 5 |
|
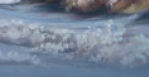
STEP 11
Drag your cursor from the sides of the white pixels
to colour them so they are invisible
|
|
STEP 12
CLOSE the Merged layer
Check the other layers one at a time to see if they need to be 'coloured in'
Close each layer after adjusting and before activating the next layer |
STEP 13
OPEN ALL LAYERS
Once all layers have been checked and adjusted if needed
|
STEP 14
Save as an Animation Shop compatible file
FILE >>> SAVE AS
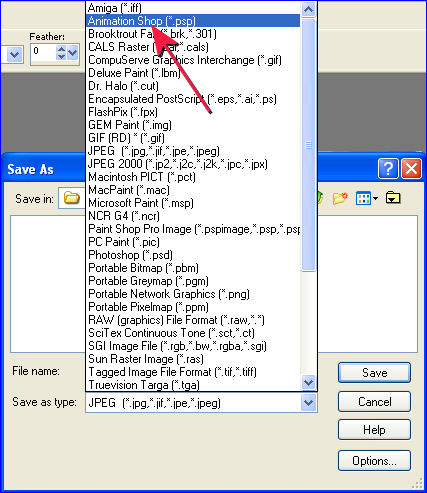
I named mine
example.psp
In later versions of PSP it appears as shown below.

|
STEP 15
Open up ANIMATION SHOP
1: Open Animation
2: Locate and select the file you saved
3: Click
OPEN
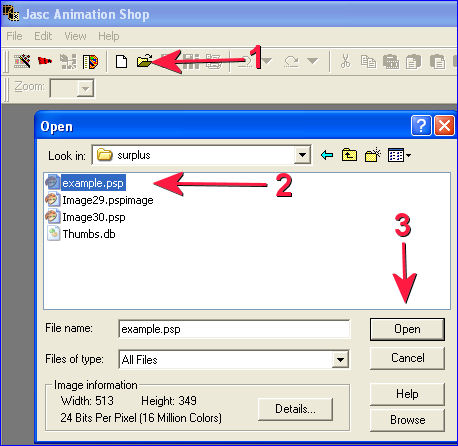
The frames will open in Animation Shop
|
STEP 16
Edit >> Select All
Edit >> Copy
Right click the workspace and select
'Paste As New Animation' from the options.
Edit >> Select All
Animation >> Reverse frames
Edit >> Select All
Edit >> Copy
Activate the first animation frames
Click inside frame 5 (F:5) to activate
Right click and select
'Paste After Current Frame' from the options.
You will now have 10 frames
. |
STEP 17
Click inside frame 6 (F:6) to activate
Right click and select "DELETE"
from the options.
|
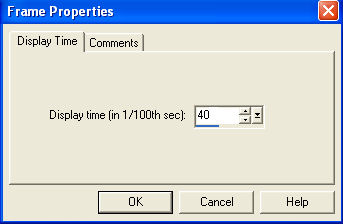
STEP 18
I adjusted the speed to 40
Edit >> Select All
Right click on Title Bar of frames
Select 'Frame Properties' from the options
Display time =40
You can leave the speed alone or adjust to something
that satisfies you. |
|
STEP 19
View >> Animation
and while it is still running,
File >> Save As
Locate the folder in which you wish to save it.
Name your animation.
With the Gif Optimiser keep pressing NEXT
until you get to the last one... click FINISH
Close the Animation
Close the frames.
Close Animation Shop |
.
|
. |