This tutorial will help you when creating tubes from .jpg images with WHITE backgrounds.
Inevitably the white backgrounds contain discoloured pixels that are not pure white.
If you have downloaded a large image
DO NOT resize it to a smaller, workable size.....
we will do this later when the tube has been created.
|
PART1/1
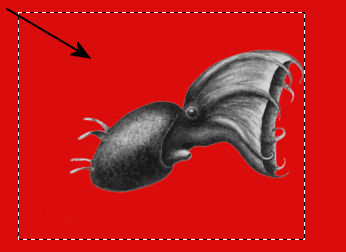
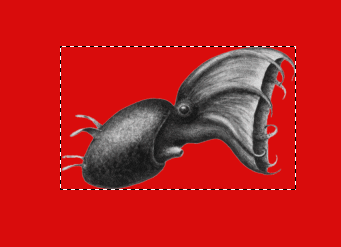
Open up the Vampyroteuthis_illustration_2 image in your PSP workspace
WINDOW >>> DUPLICATE
Close the original Image
LAYERS >>> Promote background Layer
This is a GREYSCALE image....
PSP9:
IMAGE >>> INCREASE COLOUR DEPTH >>> 16 MILLION COLOURS (24Bit)
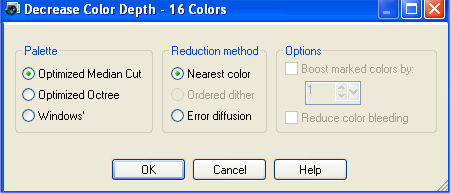
For some reason in the higher versions of PSP we need to DECREASE
instead of INCREASE the COLOUR DEPTH
... go figure!!!
PSPX- PSPX5: IMAGE >>> DECREASE COLOUR DEPTH >>> 16 BITS CHANNEL (24Bit)
|
PART1/2
LAYERS >>> NEW RASTER LAYER
Flood fill with WHITE
LAYERS >>> ARRANGE >>> MOVE DOWN
ACTIVATE RASTER 1
EFFECTS >>> TRANSPARENCY >>> Eliminate White
We lost some of the colour on the image... so....
LAYERS >>> DUPLICATE (Twice)
LAYERS >>> MERGE >>> MERGE VISIBLE
|
PART1/3
OK... the background still looks 'grey'... no problem..
Depending on your image background you
will have to adjust the "Tolerance".
This one needed a tolerance of 20.
With your MAGIC WAND
Mode = Replace
Match Mode = RGB Value
Tolerance = 10
Feather = 2
Antialias = UNchecked
Sample Merged = UNCHECKED
PSP9 - X3: Check CONTIGUOUS
PSPX - X3: There is no " Sample Merged"
PSPX - X3: Use all layers = UNChecked
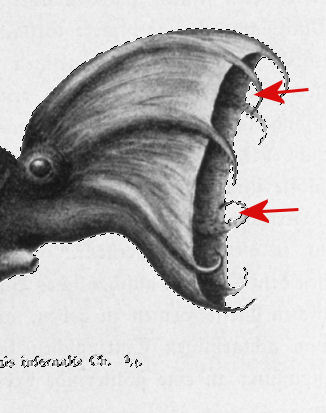
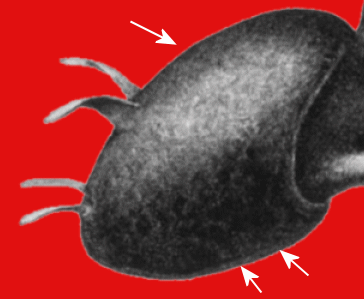
and while depressing your SHIFT KEY...
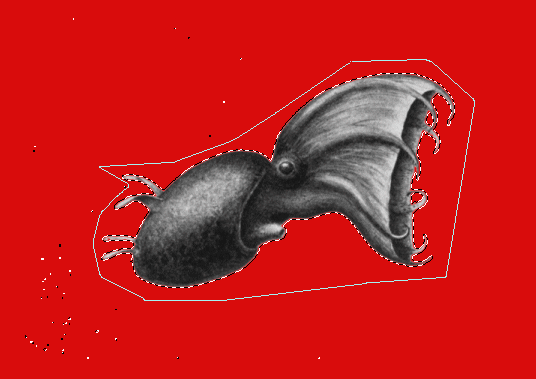
click on the 'grey' area including the 2 areas shown
at the right side of the image
|
|
PART1/4
Hit your DELETE key twice
DESELECT
LAYERS >>> NEW RASTER LAYER
Flood fill with RED
This is so you can see of there are any areas
that havent been deleted cleanly
LAYERS >>> ARRANGE >>> MOVE DOWN
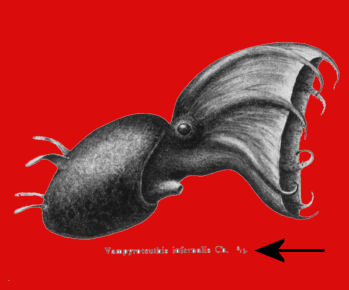
We need to remove the text
|
|
PART1/5
Activate Raster 2
Choose your SELECTION TOOL
Selection Type = Rectangle
Mode = Replace
Feather = 0
Antialias = UNChecked
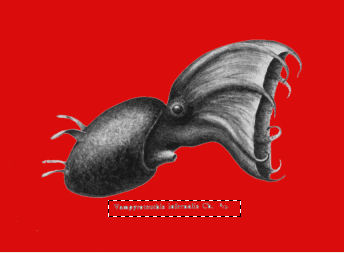
Select the text
|
|
PART1/6
Hit your DELETE key
DESELECT
IMAGE >>> RESIZE = 90%
Ensure "Resize all layers" is UNCHECKED
Resample using WEIGHTED AVERAGE
Select "Create selection from:" >>> Layer opaque

|
PART1/7
You will see there is a large area to the left of the image..
we need to eliminate this
|
|
PART1/8
Click inside the 'marching ants' ...
Oops.. there are stray pixels...
Choose your FREEHAND SELECTION TOOL
Selection Type = Point to Point
Mode = Replace
Feather = 0
Antialias = UNChecked
Select the area around the image making sure all stray pixels are outside your selection.
SELECTIONS >>> INVERT
EDIT >>> CLEAR
DESELECT
|
PART1/9
Now, if you zoom in on this image you will see
there
is still a white edge
|
|
PART1/10
With your MAGIC WAND
Mode = Replace
Match Mode = RGB Value
Tolerance = 10
Feather = 4
Antialias = UNchecked
Sample Merged = UNCHECKED
PSP9 - X3: Check CONTIGUOUS
PSPX - X3: There is no " Sample Merged"
PSPX - X3: Use all layers = UNChecked
Select the area outside the image
Hit your DELETE key 10 times
DESELECT
|
|
PART1/11
Select "Create selection from:" >>> Layer opaque
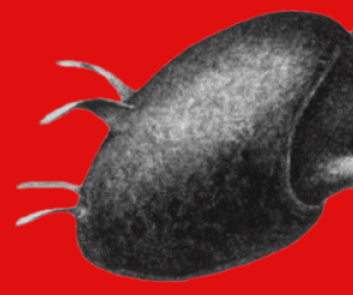
This should be your result
|
|
PART1/12
IMAGE >>> CROP TO SELECTION
Delete the bottom (red) layer
Save as .psp image
|
PART1/13
Now, let's do something with it...
Open a new image 600 x 600
Transparent background
PSPX - X2: Colour Depth = 8bits/channel
PSPX3: Colour Depth RGB = 8bits/channel
Flood fill with WHITE
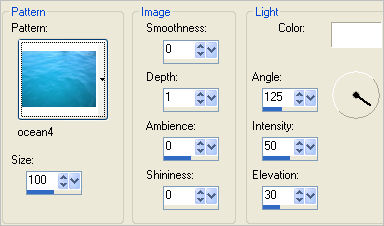
EFFECTS >>> TEXTURE EFFECTS >>> SCULPTURE
PATTERN = ocean4
|
PART1/14
Right click on theTitle Bar of the tube you just created
and select COPY from the options
Right click on the Title Bar of your ocean image
and select PASTE AS NEW LAYER from the options.
IMAGE >>> RESIZE = 75%
Ensure "Resize all layers" is UNCHECKED
Resample using WEIGHTED AVERAGE
In your LAYER PALETTE change the
BLEND MODE to LUMINANCE (L)
|
|
Now.... I'm sure you could expand on this to make a tag. *S*
|
|
|
|
|
|
|
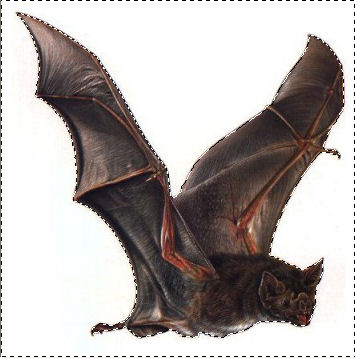
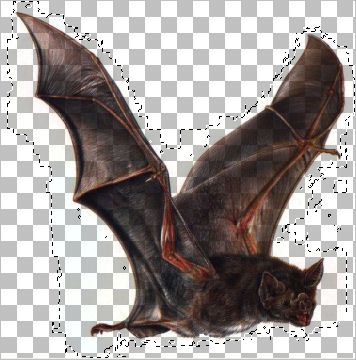
PART2/1
Now, let's try another image
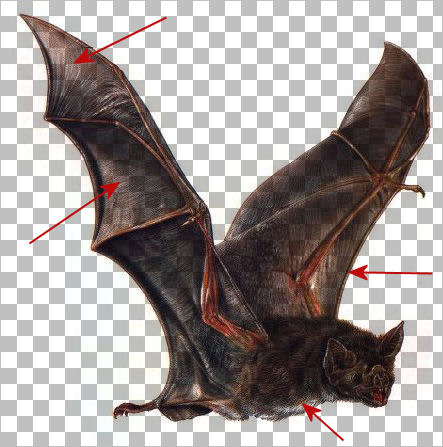
Open up the bat_500 image in your PSP workspace
WINDOW >>> DUPLICATE
Close the original Image
LAYERS >>> Promote background Layer
EFFECTS >>> TRANSPARENCY >>> Eliminate White
You will notice the wings and part of the body have become semi-transparent
|
PART2/2
If you...
Select "Create selection from:" >>> Layer opaque (same settings) now...
You will see it does NOT surround close to the extremities
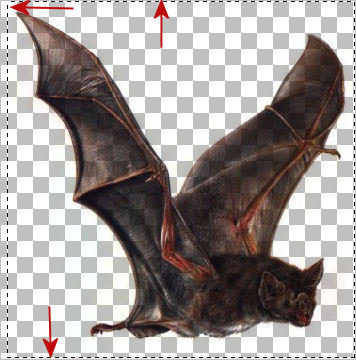
This means there are stray pixels
...
Click inside the marching ants
and they will become visible
DESELECT
|
PART2/3
LAYERS >>> NEW RASTER LAYER
Flood fill with WHITE
LAYERS >>> ARRANGE >>> MOVE DOWN
LAYERS >>> MERGE >>> MERGE VISIBLE
With your MAGIC WAND
Mode = Replace
Match Mode = RGB Value
Tolerance = 25
Feather = 4
Antialias = UNChecked
Sample Merged = UNCHECKED
PSP9 - X3: Check CONTIGUOUS
PSPX - X3: There is no " Sample Merged"
PSPX - X3: Use all layers = UNChecked
Select the white area
|
|
PART2/4
Hit your DELETE key 5 times
DESELECT
Select "Create selection from:" >>> Layer opaque
If it surrounds only the extremities of the image you can
just about
guarantee that the image is clean.
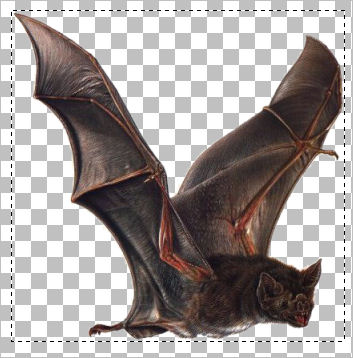
|
PART2/5
DELETE the red layer
and
Save as .pspimage
|
|
|
PART 3
Ever see an image you'd love to use in a tag but don't know quite how to go about it????
|
PART 3/1
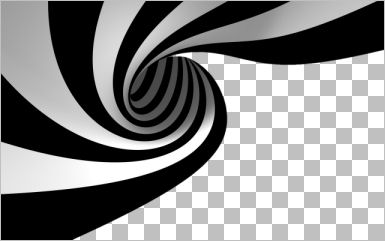
Open up the black-and-white-backgrounds image in your PSP workspace
WINDOW >>> DUPLICATE
Close the original Image
LAYERS >>> Promote background Layer |
PART 3/2
Now if you use your Magic Wand with the same settings and select the white area at the bottom right
while depressing your SHIFT key thus far....
As soon as you select the remaining area it will select more areas than required.

If you play around with reducing the TOLERANCE
you would eventually be able to select the required area.
|
PART 3/3
BUT... if you...
EFFECTS >>> PLUGINS >>> Mac's >>> Remove White
LAYERS >>> NEW RASTER LAYER
Flood fill with WHITE
LAYERS >>> ARRANGE >>> MOVE DOWN
LAYERS >>> MERGE >>> MERGE VISIBLE
Then with your MAGIC WAND... same settings BUT change
TOLERANCE to 20
FEATHER to 3
and while depressing your SHIFT key
Select the
bottom right area it shouldn't overlap into the striped area.

|
PART 3/4
Depress your DELETE key 3 times
DESELECT
 |
PART 3/5
Now, this image is huge ... so....
IMAGE >>> RESIZE = 50%
Ensure "Resize all layers" is UNCHECKED
Resample using WEIGHTED AVERAGE
 Select "Create selection from:" >>> Layer opaque
IMAGE >>> CROP TO SELECTION
and
Save as .pspimage
|
Now you can do all sorts of things with the image
For example
|
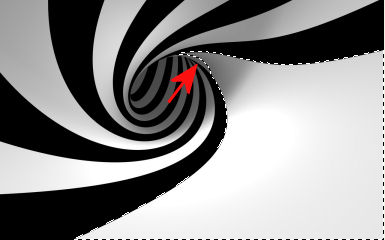
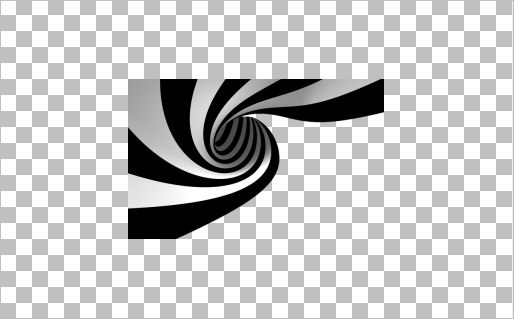
PART 3/6
Using
EFFECTS >>> DISTORTION EFFECTS >>>
POLAR COORDINATES
|
|
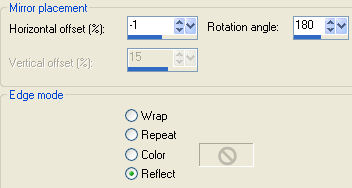
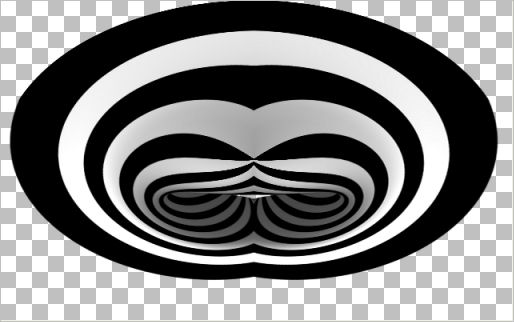
PART 3/7
Then if you
EFFECTS >>> REFLECTION EFFECTS >>>
ROTATING MIRROR
|
|
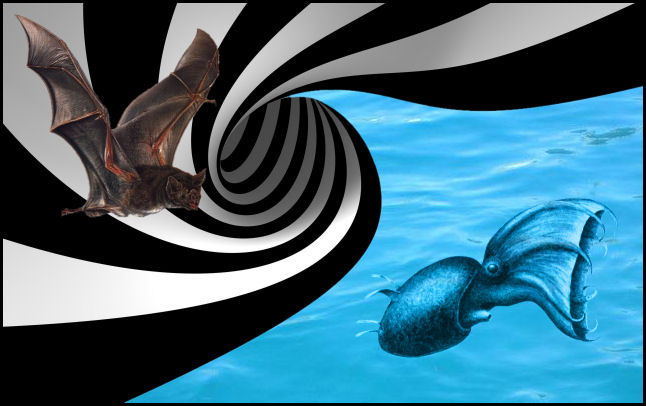
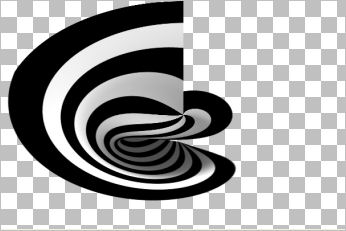
You end up with this
|
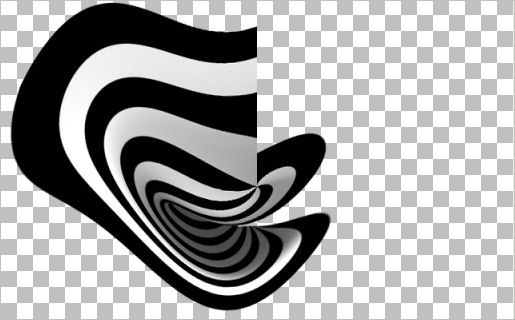
If you go back to the result you got in PART 3/6
Then...
EFFECTS >>> DISTORTION EFFECTS >>> WAVE
You end up with a new shape to work with..
|
I hope this has given you some ideas when creating tubes.
|
|
|
|
|
|
|