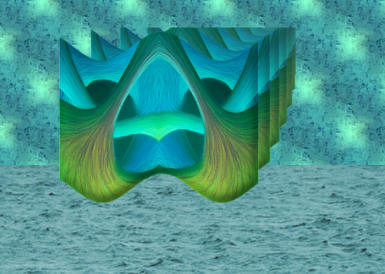
STEP 1
Open a new image 700 x 500
Transparent background
PSPX - X2: Colour Depth = 8bits/channel
PSPX3: Colour Depth RGB = 8bits/channel
Flood fill with GREEN #4e7763
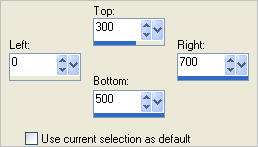
Choose your SELECTION TOOL then click on the
CUSTOM SELECTION symbol
and enter these coordinates.
|
|
STEP 2
LAYERS >>> NEW RASTER LAYER
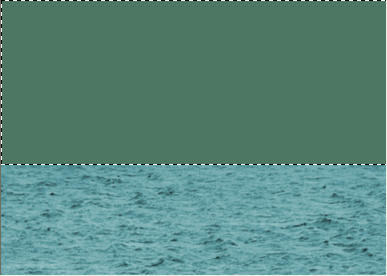
Open up the waterrippled image in your PSP workspace
Right click on the Title Bar and select COPY from the options
Right click on the Title Bar of your tag image
and select PASTE INTO SELECTION from the options.
SELECTIONS >>> INVERT
|
|
STEP 3
ACTIVATE RASTER 1
EFFECTS >>> TEXTURE EFFECTS >>> SCULPTURE
COLOUR = #89eda3
DESELECT
|
|
STEP 4
ACTIVATE RASTER 2
Open up the BGDImage7 image in your PSP workspace
Right click on the Title Bar and select COPY from the options
Right click on the Title Bar of your tag image
and select PASTE AS NEW LAYER from the options.
IMAGE >>> RESIZE = 80%
Ensure "Resize all layers" is UNCHECKED
Resample using WEIGHTED AVERAGE
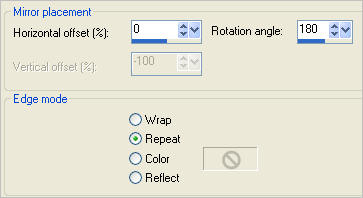
EFFECTS >>> REFLECTION EFFECTS >>> ROTATING MIRROR
|
|
STEP 5
IMAGE >>> RESIZE = 85%
Ensure "Resize all layers" is UNCHECKED
Resample using WEIGHTED AVERAGE |
|
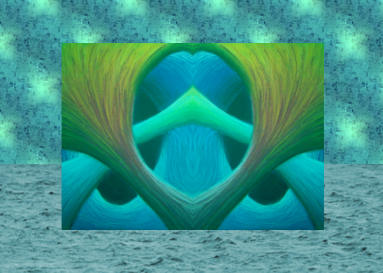
STEP 6
IMAGE >>> FLIP
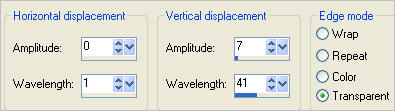
EFFECTS >>> DISTORTION EFFECTS >>> WAVE
ADJUST >>> SHARPNESS >>> SHARPEN
|
|
STEP 7
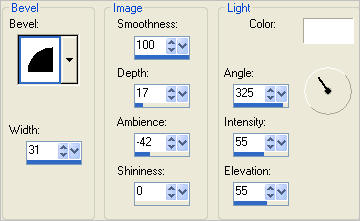
EFFECTS >>> 3D EFFECTS >>> INNER BEVEL |
|
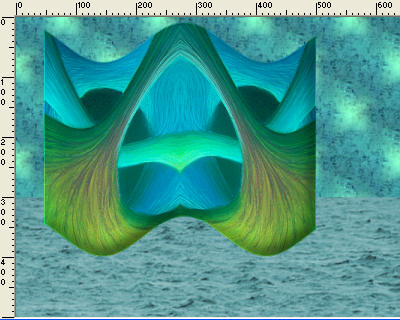
STEP 8
VIEW >>> RULERS
IMAGE >>> RESIZE = 95%
Ensure "Resize all layers" is UNCHECKED
Resample using WEIGHTED AVERAGE
ADJUST >>> SHARPNESS >>> SHARPEN MORE
Reposition with your MOVER tool
|
|
STEP 9
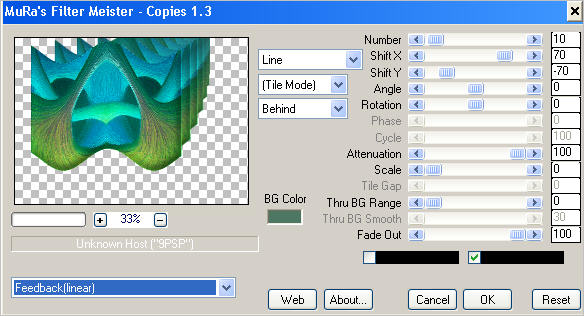
EFFECTS >>> PLUGINS >>> MuRa's Meister >>> Copies >>>Feedback (linear)
BG Color = GREEN #4e7763
|
STEP 10
IMAGE >>> RESIZE = 85%
Ensure "Resize all layers" is UNCHECKED
Resample using WEIGHTED AVERAGE
|
|
STEP 11
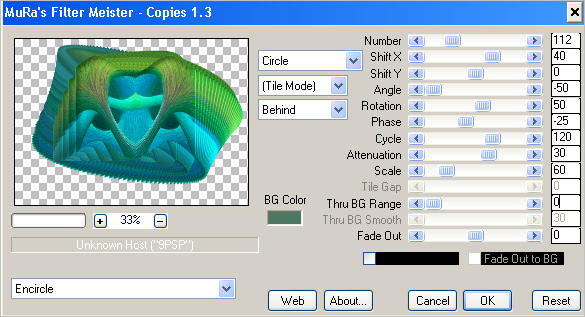
EFFECTS >>> PLUGINS >>> MuRa's Meister >>> Copies >>> Encircle
BG Color = GREEN #4e7763
|
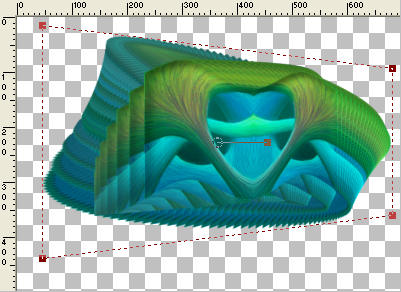
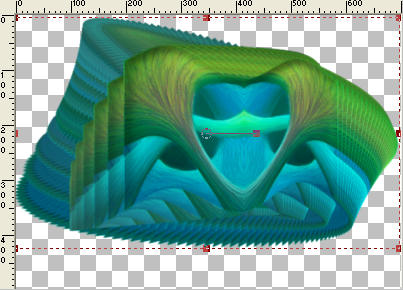
STEP 12
CLOSE RASTER 1 and RASTER 2
Select your DEFORMATION tool
Mode = PERSPECTIVE
use default settings
PSPX-X3:Select your PICK tool
Drag the bottom right node up to the 360 pixel mark on the left ruler
|
|
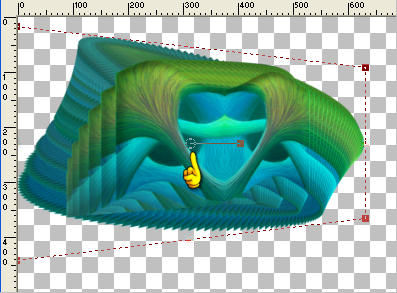
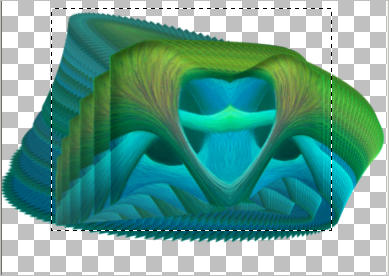
STEP 13
Drag the centre of the rotating arm to the left
|
|
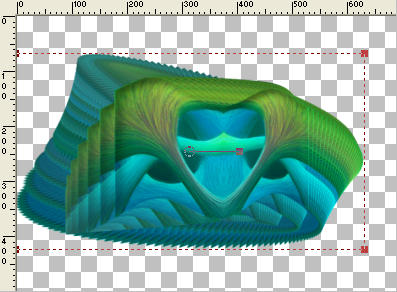
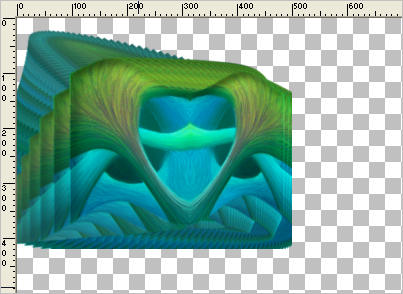
STEP 14
Click the RESET RECTANGLE arrow
Drag the centre of the rotating arm down so the centre bottom node
is level with the 420 pixel mark on the left ruler
|
|
STEP 15
Change the MODE to SCALE
Drag the centre top node UP and the centre right node RIGHT
as shown ------->>>>>>>
Click the RESET RECTANGLE arrow
Select the MOVER tool to disengage the
DEFORMATION tool (PICK tool)
|
|
STEP 16
Choose your SELECTION TOOL then click on the
CUSTOM SELECTION symbol
and enter these coordinates.
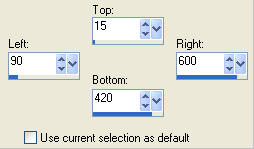
If the selection isn't placed as in the example
UNDO the selection and move the shape a little
until it lines up as shown
when you redo the
Custom Selection
|
|
STEP 17
SELECTIONS >>> INVERT
EDIT >>> CLEAR
DESELECT
Reposition with your MOVER tool as shown
|
|
STEP 18
EFFECTS >>> REFLECTION EFFECTS >>> ROTATING MIRROR
Same settings
EFFECTS >>> PLUGINS >>> EYE CANDY 3 >>> DROP SHADOW
ADJUST >>> SHARPNESS >>> SHARPEN MORE
|
|
STEP 19
OPEN RASTER 1 and RASTER 2
With Raster 3
active
Open up the jcw_elephant_Fracien image in your PSP workspace
Right click on the Title Bar and select COPY from the options
Right click on the Title Bar of your tag image
and select PASTE AS NEW LAYER from the options.
IMAGE >>> RESIZE = 75%
Ensure "Resize all layers" is UNCHECKED
Resample using WEIGHTED AVERAGE
ADJUST >>> SHARPNESS >>> SHARPEN
Reposition with your MOVER tool
|
|
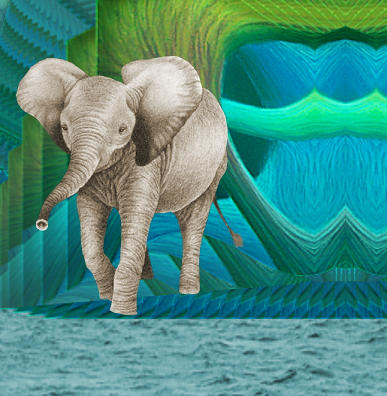
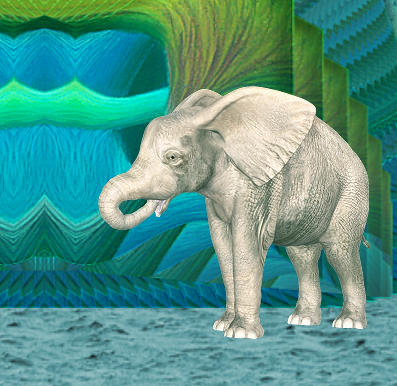
STEP 20
Open up the elephantBath_cheza image in your PSP workspace
Right click on the Title Bar and select COPY from the options
Right click on the Title Bar of your tag image
and select PASTE AS NEW LAYER from the options.
IMAGE >>> RESIZE = 40%
Ensure "Resize all layers" is UNCHECKED
Resample using WEIGHTED AVERAGE
ADJUST >>> SHARPNESS >>> SHARPEN
Reposition with your MOVER tool |
|
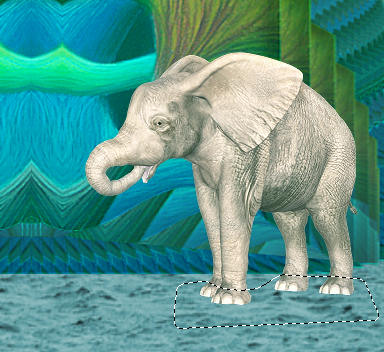
STEP 21
Choose your FREEHAND SELECTION TOOL
Selection Type = Point to Point
Mode = Replace
Feather = 2
Antialias = Checked
Select parts of the baby elephant's feet as shown
|
|
STEP 22
Hit your DELETE key
DESELECT
|
|
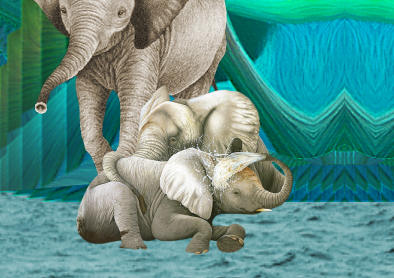
STEP 23
Open up the babyelephant image in your PSP workspace
Right click on the Title Bar and select COPY from the options
Right click on the Title Bar of your tag image
and select PASTE AS NEW LAYER from the options.
IMAGE >>> RESIZE = 50%
Ensure "Resize all layers" is UNCHECKED
Resample using WEIGHTED AVERAGE
ADJUST >>> SHARPNESS >>> SHARPEN
Reposition with your MOVER tool |
|
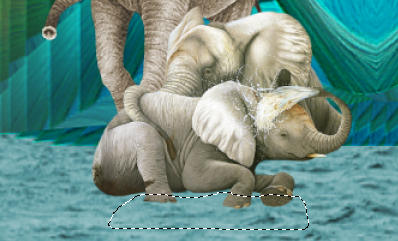
STEP 24
Choose your FREEHAND SELECTION TOOL
Same settings
Select parts of the elephant's feet as shown
|
|
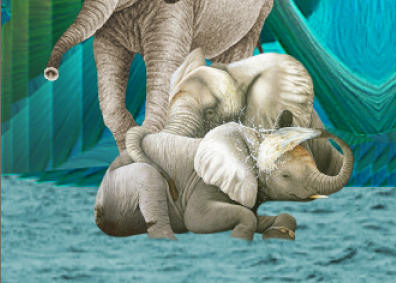
STEP 25
Hit your DELETE key
DESELECT
|
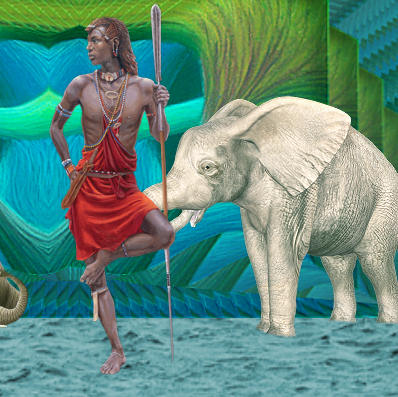
STEP 26
Open up the masai image in your PSP workspace
Right click on the Title Bar and select COPY from the options
Right click on the Title Bar of your tag image
and select PASTE AS NEW LAYER from the options.
IMAGE >>> RESIZE = 60%
Ensure "Resize all layers" is UNCHECKED
Resample using WEIGHTED AVERAGE
ADJUST >>> SHARPNESS >>> SHARPEN
Reposition with your MOVER tool |
|
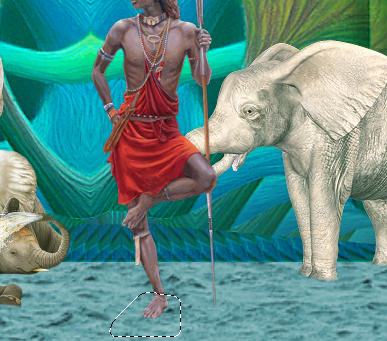
STEP 27
Choose your FREEHAND SELECTION TOOL
Same settings
Select part of the masai's foot as shown |
|
STEP 28
Hit your DELETE key
DESELECT
LAYERS >>> ARRANGE >>> MOVE DOWN
|
STEP 29
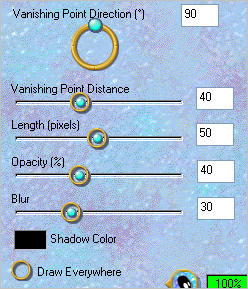
EFFECTS >>> PLUGINS >>> EYE CANDY 3 >>>
PERSPECTIVE SHADOW |
|
STEP 30
ACTIVATE RASTER 6
EDIT >>> Repeat Perspective Shadow.
ACTIVATE RASTER 5
EDIT >>> Repeat Perspective Shadow.
ACTIVATE RASTER 4
EDIT >>> Repeat Perspective Shadow.
LAYERS >>> MERGE >>> MERGE VISIBLE
|
STEP 31
SELECTIONS >>> SELECT ALL
SELECTIONS >>> MODIFY >>> CONTRACT = 6
SELECTIONS >>> INVERT
EFFECTS >>> 3D EFFECTS >>> OUTER BEVEL
|
|
STEP 32
DESELECT
LAYERS >>> MERGE >>> MERGE ALL (Flatten)
Save as .jpg image
|