STEP 1
Open a new image 700 x 500
Transparent background
RASTER BACKGROUND
PSPX - X2: Colour Depth = 8bits/channel
PSPX3: Colour Depth RGB = 8bits/channel
VIEW >>> RULERS
|
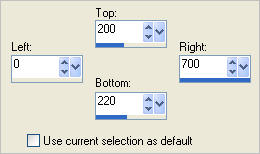
STEP 2
Choose your SELECTION TOOL then click on the
CUSTOM SELECTION symbol
and enter these coordinates. |
|
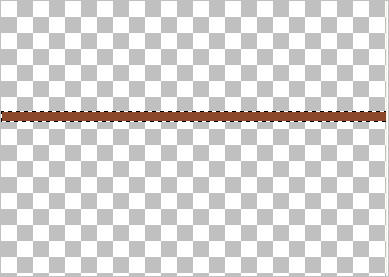
STEP 3
Flood fill selection with BROWN #8c482a |
|
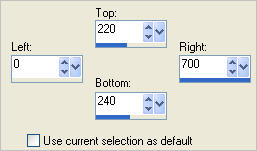
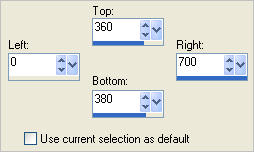
STEP 4
Choose your SELECTION TOOL then click on the
CUSTOM SELECTION symbol
and enter these coordinates. |
|
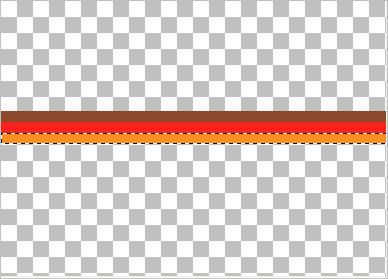
STEP 5
Flood fill selection with RED #fa221c |
|
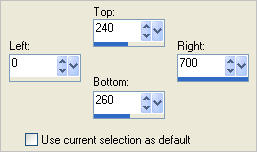
STEP 6
Choose your SELECTION TOOL then click on the
CUSTOM SELECTION symbol
and enter these coordinates. |
|
STEP 7
Flood fill selection with ORANGE #f88e1e |
|
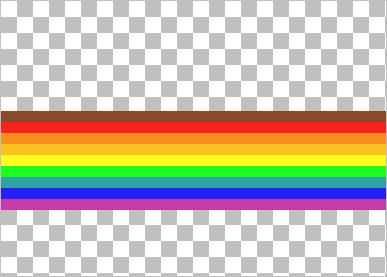
STEP 8
Continue in this manner, adding 20 pixels to the Top
and Bottom settings
in the CUSTOM SELECTION
Flood fill the selections in the following order
DARK YELLOW #fbc320
YELLOW #fafe1e
GREEN
#1bfd1c
AQUA
#30a2a5
BLUE #2520f7 |
|
STEP 9
Finally....
Choose your SELECTION TOOL then click on the
CUSTOM SELECTION symbol
and enter these coordinates. |
|
STEP 10
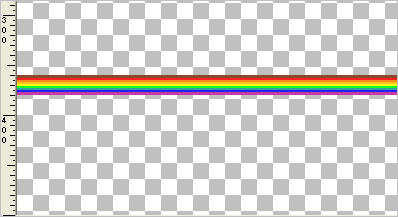
Flood fill selection with PURPLE #c53ca5
DESELECT
(I would suggest saving this as stripes.pspimage should you
want to use it for some other tag then duplicate it.
Use the duplicated image for the rest of this tutorial)
We will be using it to frame the tag.
|
|
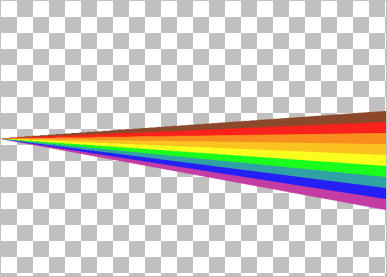
STEP 11
On your DUPLICATED image
EFFECTS>>> GEOMETRIC EFFECTS >>>
PERSPECTIVE - HORIZONTAL
 |
|
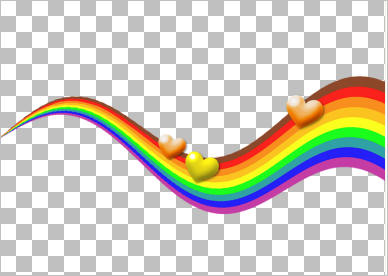
STEP 12
EFFECTS >>> DISTORTION EFFECTS >>> WAVE
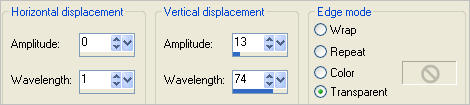
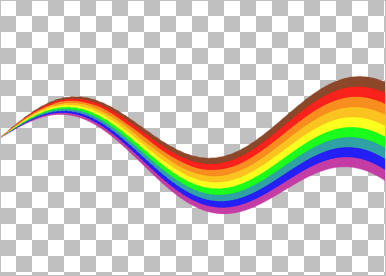
|
STEP 13
In your MATERIALS PALETTE
Load PURPLE " #c53ca5" in your foreground
Load PURPLE " #c53ca5 " in your background
LAYERS >>> NEW RASTER LAYER
Select your PRESET SHAPES tool
SHAPE = Heart 1

Place your cursor at 100 pixels across and 20 pixels down
and drag to 220 pixelsacross and 120 pixels down and release

|
STEP 14
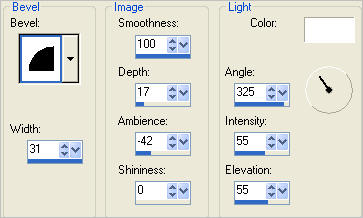
EFFECTS >>> 3D EFFECTS >>> INNER BEVEL |
|
STEP 15
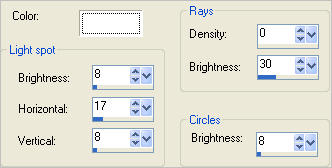
EFFECTS >>> ILLUMINATION EFFECTS >>> SUNBURST |
|
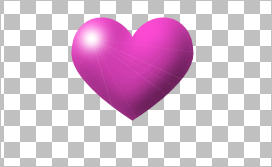
STEP 16
Name this layer purple heart |
|
NOTE
You can do as many or as few of the following hearts as you wish
it's totally up to you.
.
|
STEP 17
LAYERS >>> DUPLICATE
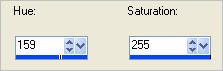
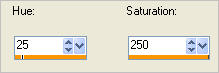
ADJUST >>> HUE & SATURATION >>> COLORIZE
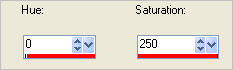 Name this layer red heart
|
|
STEP 18
LAYERS >>> DUPLICATE
ADJUST >>> HUE & SATURATION >>> COLORIZE
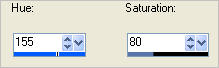 Name this layer blue heart
|
|
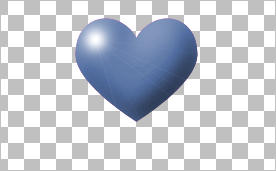
STEP 19
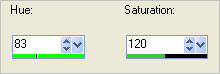
LAYERS >>> DUPLICATE
ADJUST >>> HUE & SATURATION >>> COLORIZE
 Name this layer dark blue heart
|
|
STEP 20
LAYERS >>> DUPLICATE
ADJUST >>> HUE & SATURATION >>> COLORIZE
 ADJUST >>> BRIGHTNESS and CONTRAST >>> BRIGHTNESS/CONTRAST
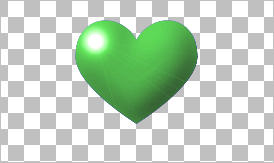
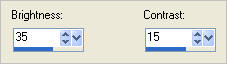 Name this layer green heart
|
|
STEP 21
LAYERS >>> DUPLICATE
ADJUST >>> HUE & SATURATION >>> COLORIZE
ADJUST >>> BRIGHTNESS and CONTRAST >>> BRIGHTNESS/CONTRAST
same settings
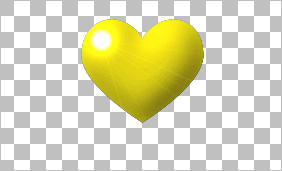
Name this layer yellow heart
|
|
STEP 22
LAYERS >>> DUPLICATE
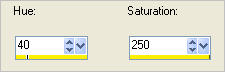
ADJUST >>> HUE & SATURATION >>> COLORIZE
ADJUST >>> BRIGHTNESS and CONTRAST >>> BRIGHTNESS/CONTRAST

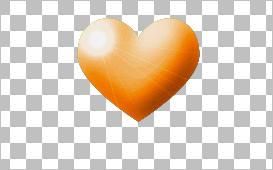
Name this layer orange heart
|
|
NOTE
Now we're going to place the hearts randomly around our tag.
You can choose where you place the hearts and the sizing and how many you wish to use of each colour.
This is how I did mine.
|
STEP 23
CLOSE all the heart layers except the orange heart
With the orange heart layer active
IMAGE >>> RESIZE = 55%
Ensure "Resize all layers" is UNCHECKED
Resample using WEIGHTED AVERAGE
PSP8 - PSP9:IMAGE >>> ROTATE >>> FREE ROTATE = RIGHT 15
Ensure "All layers" is UNCHECKED
PSPX - PSPX3: IMAGE >>> FREE ROTATE = RIGHT 15
Ensure "All layers" is UNCHECKED
ADJUST >>> SHARPNESS >>> SHARPEN
Reposition with your MOVER tool
|
|
STEP 24
EFFECTS >>> 3D EFFECTS >>> DROP SHADOW
Vertical & Horizontal offsets = 2
Colour = Black
Opacity = 50
Blur = 5.00
Right click on the Title Bar and select COPY from the options
Right click on the Title Bar of your tag image
and select PASTE AS NEW SELECTION from the options.
IMAGE >>> RESIZE = 55%
Ensure "Resize all layers" is UNCHECKED
Resample using WEIGHTED AVERAGE
ADJUST >>> SHARPNESS >>> SHARPEN
Set into position and DESELECT
|
|
STEP 25
OPEN and activate the yellow heart layer
IMAGE >>> RESIZE = 50%
Ensure "Resize all layers" is UNCHECKED
Resample using WEIGHTED AVERAGE
PSP8 - PSP9:IMAGE >>> ROTATE >>> FREE ROTATE = RIGHT 20
Ensure "All layers" is UNCHECKED
PSPX - PSPX3: IMAGE >>> FREE ROTATE = RIGHT 20
Ensure "All layers" is UNCHECKED
ADJUST >>> SHARPNESS >>> SHARPEN
Repeat Drop Shadow
Reposition with your MOVER tool |
|
STEP 26
Right click on the Title Bar and select COPY from the options
Right click on the Title Bar of your tag image
and select PASTE AS NEW SELECTION from the options.
IMAGE >>> RESIZE = 55%
Ensure "Resize all layers" is UNCHECKED
Resample using WEIGHTED AVERAGE
PSP8 - PSP9:IMAGE >>> ROTATE >>> FREE ROTATE = LEFT 40
Ensure "All layers" is UNCHECKED
PSPX - PSPX3: IMAGE >>> FREE ROTATE = LEFT 40
Ensure "All layers" is UNCHECKED
ADJUST >>> SHARPNESS >>> SHARPEN
Set into position and DESELECT |
|
STEP 27
OPEN and activate the green heart layer
IMAGE >>> RESIZE = 60%
Ensure "Resize all layers" is UNCHECKED
Resample using WEIGHTED AVERAGE
ADJUST >>> SHARPNESS >>> SHARPEN
Repeat Drop Shadow
Reposition with your MOVER tool |
|
STEP 28
Right click on the Title Bar and select COPY from the options
Right click on the Title Bar of your tag image
and select PASTE AS NEW SELECTION from the options.
IMAGE >>> RESIZE = 70%
Ensure "Resize all layers" is UNCHECKED
Resample using WEIGHTED AVERAGE
ADJUST >>> SHARPNESS >>> SHARPEN
Set into position and
DO NOT
DESELECT |
|
STEP 29
Right click on the Title Bar and select COPY from the options
SELECTIONS >>> SELECT NONE
Right click on the Title Bar of your tag image
and select PASTE AS NEW SELECTION from the options.
IMAGE >>> RESIZE = 70%
Ensure "Resize all layers" is UNCHECKED
Resample using WEIGHTED AVERAGE
PSP8 - PSP9:IMAGE >>> ROTATE >>> FREE ROTATE = LEFT 40
Ensure "All layers" is UNCHECKED
PSPX - PSPX3: IMAGE >>> FREE ROTATE = LEFT 40
Ensure "All layers" is UNCHECKED
ADJUST >>> SHARPNESS >>> SHARPEN
Set into position and DESELECT |
|
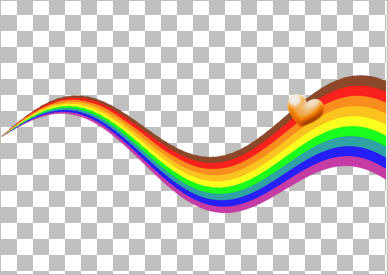
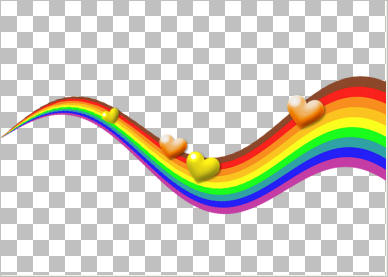
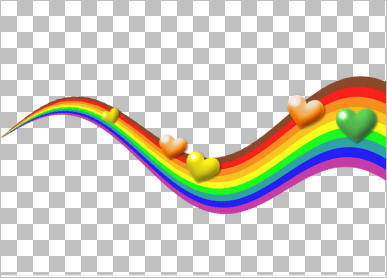
Continue adding hearts using the above effects...
resizing, rotating, sharpening and mirror and flip...
until you are happy with the result
This is my finished effort

|
STEP 30
CLOSE all layers EXCEPT the hearts layers
Activate one of the heart layers
LAYERS >>> MERGE >>> MERGE VISIBLE |
STEP 31
LAYERS >>> NEW RASTER LAYER
Flood fill with RED #b00202
LAYERS >>> ARRANGE >>> SEND TO BOTTOM
Open up the GINATUBES DIVERS 287 image in your PSP workspace
Right click on the Title Bar and select COPY from the options
Right click on the Title Bar of your tag image
and select PASTE AS NEW LAYER from the options.
IMAGE >>> RESIZE = 85%
Ensure "Resize all layers" is UNCHECKED
Resample using WEIGHTED AVERAGE
In your LAYER PALETTE change the OPACITY to 70%
Change the BLEND MODE to HARD LIGHT
|
|
STEP 32
OPEN your stripes.pspimage that you saved earlier
WINDOW >>> DUPLICATE
Close the original Image
Select your DEFORMATION tool
Mode = SCALE
use default settings
PSPX-X3:Select your PICK tool
Drag the centre top node down to the 360 pixel mark
on your left ruler
Click the RESET RECTANGLE arrow
Select the MOVER tool to disengage the
DEFORMATION tool (PICK tool)
|
|
STEP 33
Right click on the Title Bar and select COPY from the options
Right click on the Title Bar of your tag image
and select PASTE AS NEW LAYER from the options.
LAYERS >>> ARRANGE >>> BRING TO TOP
Reposition with your MOVER tool
to the TOP EDGE of your tag
LAYERS >>> DUPLICATE
PSP8 - PSP9:IMAGE >>> ROTATE >>> FREE ROTATE = RIGHT 90
Ensure "All layers" is UNCHECKED
PSPX - PSPX3: IMAGE >>> FREE ROTATE = RIGHT 90
Ensure "All layers" is UNCHECKED
Reposition with your MOVER tool
to the RIGHT EDGE of your tag
|
|
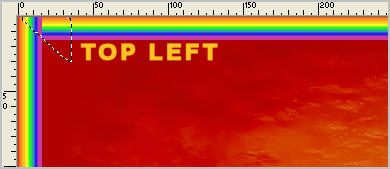
STEP 34
Choose your FREEHAND SELECTION TOOL
Selection Type = Point to Point
Mode = Replace
Feather = 0
Antialias = UNChecked
Select the top right corner |
|
STEP 35
Hit your DELETE key
DESELECT
LAYERS >>> MERGE >>> MERGE DOWN
|
|
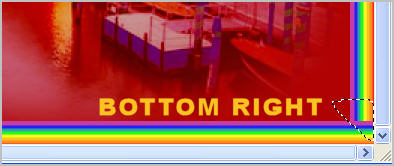
STEP 36
LAYERS >>> DUPLICATE
IMAGE >>> FLIP
IMAGE >>> MIRROR
Choose your FREEHAND SELECTION TOOL
Same settings
Select the top left corner
Depress your SHIFT key
Select the bottom right corner |
|
STEP 37
Hit your DELETE key
DESELECT
LAYERS >>> MERGE >>> MERGE DOWN
EFFECTS >>> 3D EFFECTS >>> DROP SHADOW
Vertical & Horizontal offsets = 2
Colour = Black
Opacity = 70
Blur = 5.00
Repeat Drop Shadow effect changing
Vertical & Horizontal Offsets to - ( minus ) 2
Click OK
|
|
STEP 38
Open up the DB Vaybs Love wa05 image in your PSP workspace
Right click on the Title Bar and select COPY from the options
Right click on the Title Bar of your tag image
and select PASTE AS NEW LAYER from the options.
Repeat both Drop Shadows
Reposition with your MOVER tool |
|
STEP 39
Open up the TReagen_3068 image in your PSP workspace
Right click on the Title Bar and select COPY from the options
Right click on the Title Bar of your tag image
and select PASTE AS NEW LAYER from the options.
IMAGE >>> MIRROR
IMAGE >>> RESIZE = 73%
Ensure "Resize all layers" is UNCHECKED
Resample using WEIGHTED AVERAGE
ADJUST >>> SHARPNESS >>> SHARPEN
Choose your SELECTION TOOL
Selection Type = Rectangle
Mode = Replace
Feather = 0
Antialias = Checked
Select the text
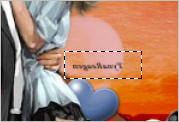
Hit your DELETE key
DESELECT
Reposition with your MOVER tool
|
|
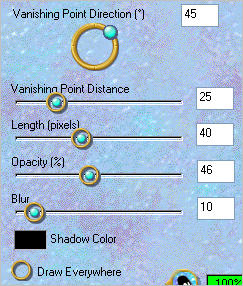
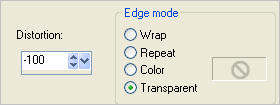
STEP 40
EFFECTS >>> PLUGINS >>> EYE CANDY 3 >>>
PERSPECTIVE SHADOW |
|
STEP 41
LAYERS >>> MERGE >>> MERGE ALL (Flatten)
Save as .jpg image
|