STEP 1
Open a new image 650 x 500
Transparent background
RASTER BACKGROUND
PSPX - X2: Colour Depth = 8bits/channel
PSPX3-X6: Colour Depth RGB = 8bits/channel
SELECTIONS >>> SELECT ALL
|
STEP 2
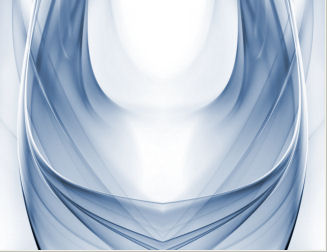
Open up the Abstract-Art-027 image
in your PSP workspace
Right click on the Title Bar and select
COPY from the options
Right click on the Title Bar of your tag image
and select PASTE INTO SELECTION from the options.
DESELECT
EFFECTS >>> REFLECTION EFFECTS >>> ROTATING MIRROR

|
STEP 3
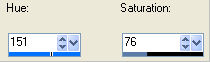
ADJUST >>> HUE & SATURATION >>> COLORIZE
|
|
STEP 4
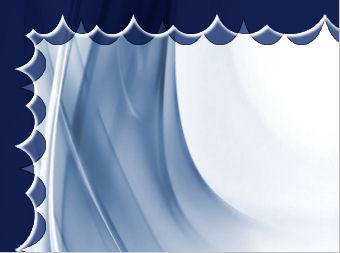
Open up the T_Border image in your PSP workspace
Right click on the Title Bar and select
COPY from the options
Right click on the Title Bar of your tag image
and select PASTE AS NEW LAYER from the options.
SELECTIONS >>> SELECT ALL
SELECTIONS >>> FLOAT
SELECTIONS >>> DEFLOAT
Flood fill with BLUE #232e48
(You may need to change the Match Mode to "NONE"
in some higher versions so you can "Flood Fill)
In your LAYER PALETTE change the
BLEND MODE to HARD LIGHT
DESELECT |
|
STEP 5
LAYERS >>> DUPLICATE
EFFECTS >>> DISTORTION EFFECTS >>> PUNCH
Strength = 50%
EFFECTS >>> 3D EFFECTS >>> DROP SHADOW
Vertical & Horizontal offsets = 2
Colour = WHITE
Opacity = 100
Blur = 4.00
Repeat Drop Shadow effect changing
Vertical & Horizontal Offsets to - ( minus ) 2
Click OK
|
|
STEP 6
ACTIVATE Raster 2
Repeat both drop shadows
|
|
STEP 7
LAYERS >>> NEW RASTER LAYER
LAYERS >>> ARRANGE >>> MOVE UP
SELECTIONS >>> SELECT ALL
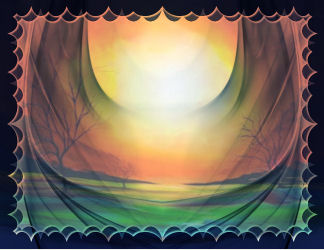
Open up the Colorful-Abstract-Paintings image
in your PSP workspace
Right click on the Title Bar and select
COPY from the options
Right click on the Title Bar of your tag image
and select PASTE INTO SELECTION from the options.
In your LAYER PALETTE change the OPACITY to 60%
Change the BLEND MODE to MULTIPLY
DESELECT
|
|
STEP 8
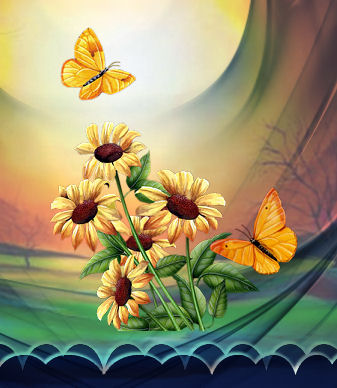
Open up the Sunflowers & Butterflies_3-05~pjs image
in your PSP workspace
Right click on the Title Bar and select
COPY from the options
Right click on the Title Bar of your tag image
and select PASTE AS NEW LAYER from the options.
IMAGE >>> RESIZE = 60%
Ensure "Resize all layers" is UNCHECKED
Resample using WEIGHTED AVERAGE
ADJUST >>> SHARPNESS >>> SHARPEN
EFFECTS >>> IMAGE EFFECTS >>> OFFSET
HORIZONTAL = 70
VERTICAL = - (Minus) 40
EDGE MODE = Transparent
|
|
STEP 9
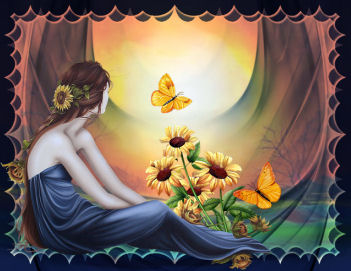
Open up the nicole-femme66-2013 image
in your PSP workspace
Right click on the Title Bar and select
COPY from the options
Right click on the Title Bar of your tag image
and select PASTE AS NEW LAYER from the options.
IMAGE >>> RESIZE = 60%
Ensure "Resize all layers" is UNCHECKED
Resample using WEIGHTED AVERAGE
ADJUST >>> SHARPNESS >>> SHARPEN
EFFECTS >>> IMAGE EFFECTS >>> OFFSET
HORIZONTAL = - (Minus) 70
VERTICAL = - (Minus) 55
EDGE MODE = Transparent
|
|
STEP 10
EFFECTS >>> PLUGINS >>> EYE CANDY 3 >>>
DROP SHADOW |
|
STEP 11
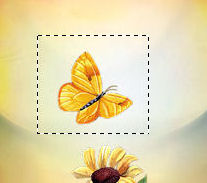
ACTIVATE Raster 4
Choose your SELECTION TOOL
Selection Type = Rectangle
Mode = Replace
Feather = 0
Antialias = Checked
Select the butterfly shown
Hit your DELETE key
DESELECT
|
|
STEP 12
On Copy of Raster 2 layer
In your LAYER PALETTE change the
BLEND MODE to OVERLAY
ACTIVATE the TOP layer
LAYERS >> NEW RASTER LAYER
Select your TEXT TOOL
with font and settings of your choice
and add your name
|
|
STEP 13
LAYERS >>> MERGE >>> MERGE VISIBLE
Right click on Title Bar and select
Copy from the options
In ANIMATION SHOP
Right click the workspace and select
'Paste As New Animation' from the options.
Depress your CTRL key and press the letter L 3 times
|
STEP 14
FILE >>> OPEN
Locate the "
Butterfly_ani.psp "
and select. (Open)
Activate the " Butterfly_ani " frames
Edit >> Select All
Edit >> Copy
Edit >> Propagate Paste
Activate the background frames
Edit >> Select All
Edit >> Paste into selected frame
Zoom in on frame 1 (F:1) and place the butterfly as shown

|
STEP 15
View >> Animation
and while it is still running,
File >> Save As
Locate the folder in which you wish to save it.
Name your animation.
With the Gif Optimiser keep pressing NEXT
until you get to the last one... click FINISH
Close the Animation
Close the frames.
Close Animation Shop
|
|
|
|
|
|
|