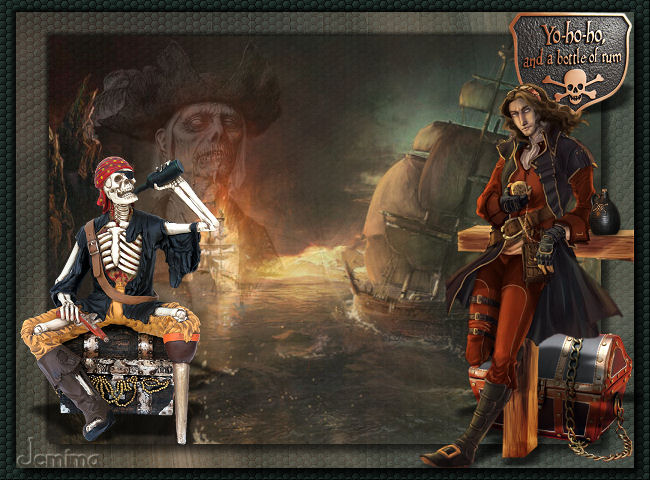
STEP 1
Open a new image 650 x 480
Transparent background
PSP9: Colour Depth = 16 Million Colors (24bit)
PSPX-X6: Colour Depth RGB = 8bits/channel
Flood fill with GREEN #2c403a
SELECTIONS >>> SELECT ALL
|
STEP 2
LAYERS >>> NEW RASTER LAYER
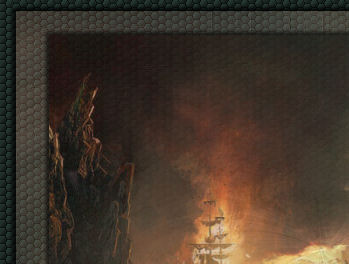
Open up the pirate-ship-art image in your PSP workspace
Right click on the Title Bar and select
COPY from the options
Right click on the Title Bar of your tag image
and select PASTE INTO SELECTION from the options.
DESELECT
LAYERS >>> DUPLICATE
CLOSE Copy of Raster 2
ACTIVATE Raster 2
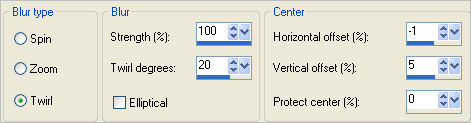
ADJUST >>> BLUR >>> RADIAL BLUR
|
STEP 3
PSP9 - PSPX2:ADJUST >>> BRIGHTNESS and CONTRAST >>> CLARIFY
Strength of effect = 5
PSPX3-PSPX6: ADJUST >>> BRIGHTNESS and CONTRAST >>> LOCAL TONE
Mapping strength = 5
PSP X4 - X6: Block size 8
PSP9 - PSPX2: EDIT >>> Repeat CLARIFY (TWICE)
PSPX3-PSPX6: EDIT >>> Repeat LOCAL TONE (TWICE)
PSP X4 - X6: Block size 8
|
STEP 4
EFFECTS >>> EDGE EFFECTS >>> ENHANCE MORE
IMAGE >>> RESIZE = 95%
Ensure "Resize all layers" is UNCHECKED
Resample using WEIGHTED AVERAGE
In your LAYER PALETTE change the
BLEND MODE to EXCLUSION
|
|
STEP 5
ACTIVATE Raster 1
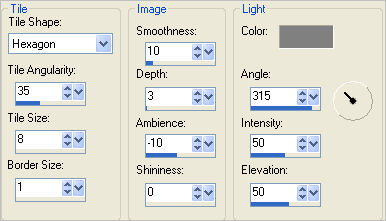
EFFECTS >>> TEXTURE EFFECTS >>> TILES
COLOUR = #808080

|
STEP 6
OPEN & ACTIVATE Copy of Raster 2
IMAGE >>> RESIZE = 85%
Ensure "Resize all layers" is UNCHECKED
Resample using WEIGHTED AVERAGE
In your LAYER PALETTE change the OPACITY to 75%
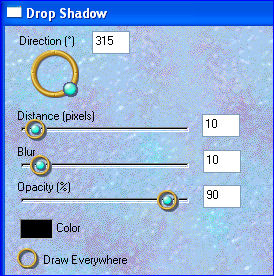
EFFECTS >>> PLUGINS >>> EYE CANDY 3 >>>
DROP SHADOW
|
|
STEP 7
ACTIVATE Raster 2
SELECTIONS >>> SELECT ALL
SELECTIONS >>> FLOAT
SELECTIONS >>> DEFLOAT
LAYERS >>> NEW RASTER LAYER
EFFECTS >>> PLUGINS >>> EYE CANDY 3 >>>
DROP SHADOW
Same settings
EDIT >>> Repeat Drop Shadow..
change DIRECTION to 135
CHANGE Distance to 5
CHANGE Blur to 5
DESELECT
|
|
STEP 8
ACTIVATE Copy of Raster 2
EFFECTS >>> PLUGINS >>> EYE CANDY 3 >>>
DROP SHADOW
Same settings
|
|
STEP 9
Open up the piratezombie5.png image
in your PSP workspace
Right click on the Title Bar and select
COPY from the options
Right click on the Title Bar of your tag image
and select PASTE AS NEW LAYER from the options.
IMAGE >>> RESIZE = 50%
Ensure "Resize all layers" is UNCHECKED
Resample using WEIGHTED AVERAGE
Reposition with your MOVER tool
|
|
STEP 10
LAYERS >>> ARRANGE >>> MOVE DOWN
In your LAYER PALETTE change the
BLEND MODE to LUMINANCE (L)
ADJUST >>> SHARPNESS >>> SHARPEN
|
|
STEP 11
ACTIVATE Copy of Raster 2
Open up the made-by-atlassigns image
in your PSP workspace
Right click on the Title Bar and select
COPY from the options
Right click on the Title Bar of your tag image
and select PASTE AS NEW LAYER from the options.
IMAGE >>> RESIZE = 40%
Ensure "Resize all layers" is UNCHECKED
Resample using WEIGHTED AVERAGE
ADJUST >>> SHARPNESS >>> SHARPEN
Reposition with your MOVER tool
|
|
STEP 12
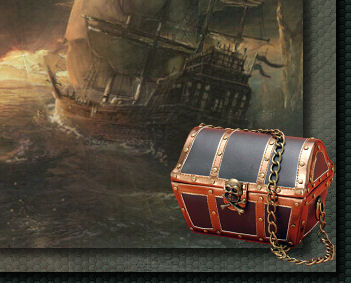
Open up the chest.png image
in your PSP workspace
Right click on the Title Bar and select
COPY from the options
Right click on the Title Bar of your tag image
and select PASTE AS NEW LAYER from the options.
IMAGE >>> RESIZE = 42%
Ensure "Resize all layers" is UNCHECKED
Resample using WEIGHTED AVERAGE
ADJUST >>> SHARPNESS >>> SHARPEN
Reposition with your MOVER tool |
|
STEP 13
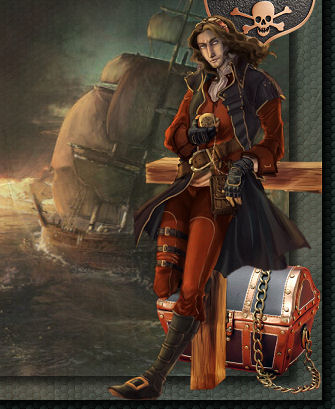
Open up the pirate_captain_by_sicilianvalkyrie.png image
in your PSP workspace
Right click on the Title Bar and select
COPY from the options
Right click on the Title Bar of your tag image
and select PASTE AS NEW LAYER from the options.
IMAGE >>> RESIZE = 60%
Ensure "Resize all layers" is UNCHECKED
Resample using WEIGHTED AVERAGE
ADJUST >>> SHARPNESS >>> SHARPEN
Reposition with your MOVER tool |
|
STEP 14
EFFECTS >>> PLUGINS >>> EYE CANDY 3 >>> PERSPECTIVE SHADOW
|
|
STEP 15
ACTIVATE Raster 5
EDIT >>> Repeat Perspective Shadow.
|
|
STEP 16
ACTIVATE Raster 7
Open up the piratepots_jug.png image
in your PSP workspace
Right click on the Title Bar and select
COPY from the options
Right click on the Title Bar of your tag image
and select PASTE AS NEW LAYER from the options.
IMAGE >>> RESIZE = 15%
Ensure "Resize all layers" is UNCHECKED
Resample using WEIGHTED AVERAGE
ADJUST >>> SHARPNESS >>> SHARPEN
Reposition onto the bench with your MOVER tool
Repeat Perspective Shadow.
|
|
STEP 17
Open up the FJ.png image
in your PSP workspace
Right click on the Title Bar and select
COPY from the options
Right click on the Title Bar of your tag image
and select PASTE AS NEW LAYER from the options.
IMAGE >>> RESIZE = 50%
Ensure "Resize all layers" is UNCHECKED
Resample using WEIGHTED AVERAGE
ADJUST >>> SHARPNESS >>> SHARPEN
Reposition with your MOVER tool
Repeat Perspective Shadow. |
|
STEP 18
LAYERS >>> NEW RASTER LAYER
ADD YOUR NAME |
|
STEP 19
LAYERS >>> MERGE >>> MERGE ALL (Flatten)
Save as .jpg image
|
|
|
|
|
|
|