STEP 1
Open a new image 600 x 600
Transparent background
RASTER BACKGROUND
PSPX - X2: Colour Depth = 8bits/channel
PSPX3: Colour Depth RGB = 8bits/channel
VIEW >>> RULERS
|
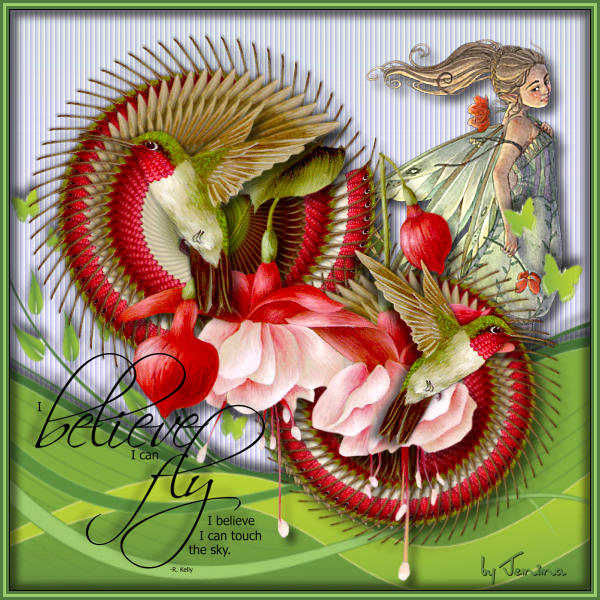
STEP 2
Open up the CherSwitz~Nelson07-sj image in your PSP workspace
Activate Layer 2
Right click on the Title Bar and select COPY from the options
Right click on the Title Bar of your tag image
and select PASTE AS NEW LAYER from the options.
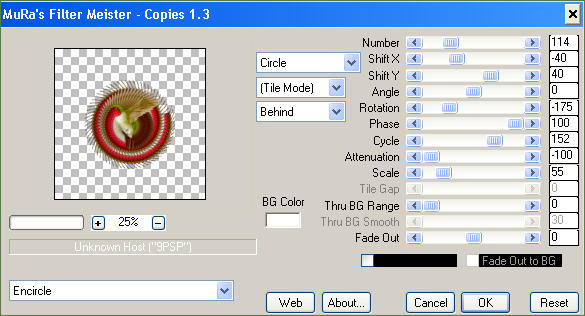
EFFECTS >>> PLUGINS >>> MuRa's Meister >>> Copies >>> Encircle
|
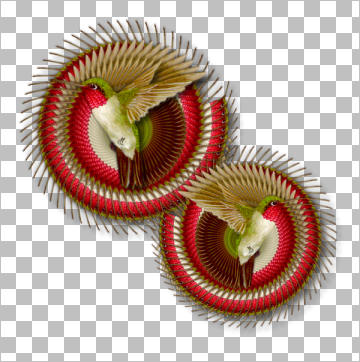
STEP 3
Reposition with your MOVER tool
to top left corner |
|
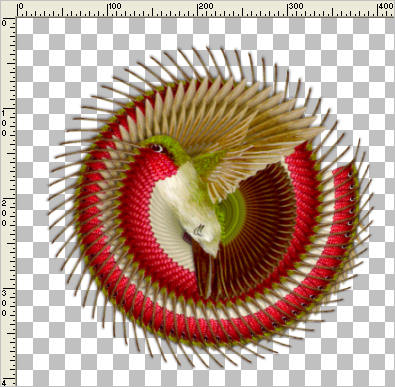
STEP 4
LAYERS >>> DUPLICATE
IMAGE >>> MIRROR
IMAGE >>> RESIZE = 85%
Ensure "Resize all layers" is UNCHECKED
Resample using WEIGHTED AVERAGE
ADJUST >>> SHARPNESS >>> SHARPEN
Reposition with your MOVER tool
to bottom right corner
(Example shown at 100%)
|
|
STEP 5
Back to the CherSwitz~Nelson07-sj image in your PSP workspace
Activate Layer 2
Right click on the Title Bar and select COPY from the options
Right click on the Title Bar of your tag image
and select PASTE AS NEW LAYER from the options.
Reposition with your MOVER tool over the top left bird
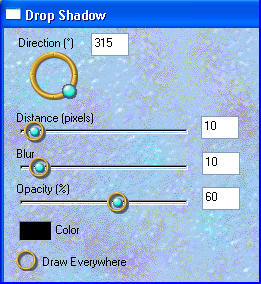
EFFECTS >>> PLUGINS >>> EYE CANDY 3 >>> DROP SHADOW
|
|
STEP 6
ACTIVATE Copy of Raster 2
EDIT >>> Repeat Drop Shadow.
ACTIVATE Raster 2
EDIT >>> Repeat Drop Shadow.
|
|
STEP 7
ACTIVATE Copy of Raster 2
Back to the CherSwitz~Nelson07-sj image in your PSP workspace
Activate Layer 1
Right click on the Title Bar and select COPY from the options
Right click on the Title Bar of your tag image
and select PASTE AS NEW LAYER from the options.
EFFECTS >>> PLUGINS >>> EYE CANDY 3 >>> DROP SHADOW
Same settings
Reposition with your MOVER tool |
|
STEP 8
ACTIVATE RASTER 1
CLOSE ALL OTHER LAYERS
SELECTIONS >>> SELECT ALL
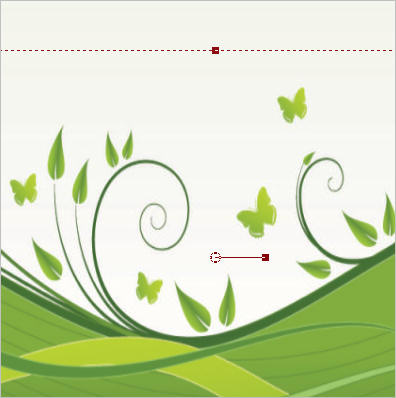
Open up the Abstract Design 2 image in your PSP workspace
Right click on the Title Bar and select COPY from the options
Right click on the Title Bar of your tag image
and select PASTE INTO SELECTION from the options.
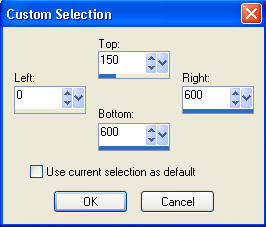
DESELECT
Choose your SELECTION TOOL then click on the
CUSTOM SELECTION symbol
and enter these coordinates. |
|
STEP 9
LAYERS >>> NEW RASTER LAYER
Open up the Transparent_Abstract Design 2 image
in your PSP workspace
Right click on the Title Bar and select COPY from the options
Right click on the Title Bar of your tag image
and select PASTE INTO SELECTION from the options.
DESELECT
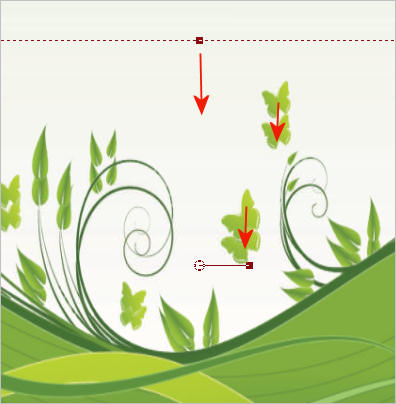
Select your DEFORMATION tool
Mode = SCALE
use default settings
PSPX-X3:Select your PICK tool
Drag the centre top node down so this lyer is exactly
positioned over the layer below
|
|
STEP 10
Click the RESET RECTANGLE arrow
|
|
STEP 11
Select the MOVER tool to disengage the
DEFORMATION tool (PICK tool)
EFFECTS >>> PLUGINS >>> EYE CANDY 3 >>> DROP SHADOW
Change the direction to 90
|
|
STEP 12
ACTIVATE RASTER 1
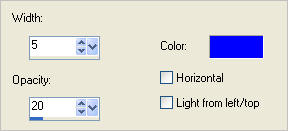
EFFECTS >>> TEXTURE EFFECTS >>> BLINDS
COLOUR = #3300FF |
|
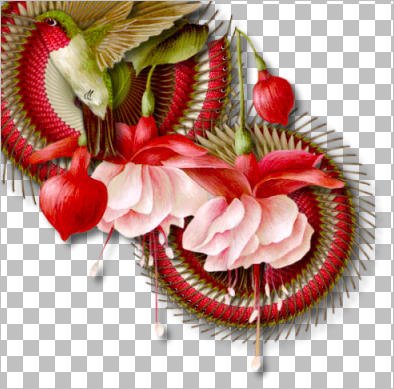
STEP 13
Open up the 13-3-SaraButcher_poppy image in your PSP workspace
Right click on the Title Bar and select COPY from the options
Right click on the Title Bar of your tag image
and select PASTE AS NEW LAYER from the options.
IMAGE >>> MIRROR
IMAGE >>> RESIZE = 75%
Ensure "Resize all layers" is UNCHECKED
Resample using WEIGHTED AVERAGE
ADJUST >>> SHARPNESS >>> SHARPEN MORE
ADJUST >>> BRIGHTNESS and CONTRAST >>> BRIGHTNESS/CONTRAST

EFFECTS >>> PLUGINS >>> EYE CANDY 3 >>> DROP SHADOW
Change the direction to 315
Reposition with your MOVER tool |
|
STEP 14
OPEN ALL LAYERS
ACTIVATE RASTER 3
LAYERS >>> DUPLICATE
IMAGE >>> MIRROR
IMAGE >>> RESIZE = 85%
Ensure "Resize all layers" is UNCHECKED
Resample using WEIGHTED AVERAGE
ADJUST >>> SHARPNESS >>> SHARPEN
PSP8 - PSP9:IMAGE >>> ROTATE >>> FREE ROTATE = RIGHT 22.50
Ensure "All layers" is UNCHECKED
PSPX - PSPX3: IMAGE >>> FREE ROTATE = RIGHT 22.50
Ensure "All layers" is UNCHECKED
ADJUST >>> SHARPNESS >>> SHARPEN
Reposition with your MOVER tool
|
|
STEP 15
In your MATERIALS PALETTE
Load DARK GREEN " #517a41" in your foreground
Load LIGHT GREEN " #9eca6c" in your background
LAYERS >>> NEW RASTER LAYER
Flood fill with DARK GREEN
SELECTIONS >>> SELECT ALL
SELECTIONS >>> MODIFY >>> CONTRACT = 3
EDIT >>> CLEAR
Flood fill with LIGHT GREEN
SELECTIONS >>> MODIFY >>> CONTRACT = 3
EDIT >>> CLEAR
Flood fill with DARK GREEN
SELECTIONS >>> MODIFY >>> CONTRACT = 3
EDIT >>> CLEAR
DESELECT
EFFECTS >>> 3D EFFECTS >>> DROP SHADOW
Vertical & Horizontal offsets = 1
Colour = Black
Opacity = 100
Blur = 0
Repeat Drop Shadow effect changing
Vertical & Horizontal Offsets to - ( minus ) 1
Click OK
|
|
STEP 16
EFFECTS >>> PLUGINS >>> EYE CANDY 3 >>> DROP SHADOW
Same settings
EDIT >>> Repeat Drop Shadow.. change DIRECTION to 135
Open up the elegant WA believe fly and sky image
in your PSP workspace
Right click on the Title Bar and select COPY from the options
Right click on the Title Bar of your tag image
and select PASTE AS NEW LAYER from the options.
IMAGE >>> RESIZE = 50%
Ensure "Resize all layers" is UNCHECKED
Resample using WEIGHTED AVERAGE
Reposition with your MOVER tool
|
|
STEP 17
EFFECTS >>> PLUGINS >>> EYE CANDY 3 >>> DROP SHADOW
Same settings
LAYERS >>> MERGE >>> MERGE ALL (Flatten)
Save as .jpg image
|
| ..
|