STEP 1
Open a new image 640 x 480
Transparent background
PSPX - X2: Colour Depth = 8bits/channel
PSPX3: Colour Depth RGB = 8bits/channel
Flood fill with PINK #eeacac
LAYERS >>> NEW RASTER LAYER
Flood fill with WHITE
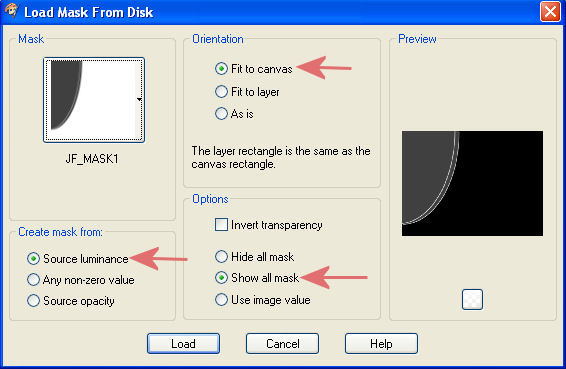
LAYERS >>> LOAD/SAVE MASK >>> LOAD MASK FROM DISK
|
STEP 2
LAYERS >>> MERGE >>> MERGE GROUP
IMAGE >>> RESIZE = 85%
Ensure "Resize all layers" is UNCHECKED
Resample using WEIGHTED AVERAGE
Reposition with your MOVER tool to top left corner |
|
STEP 3
LAYERS >>> DUPLICATE
IMAGE >>> MIRROR
LAYERS >>> MERGE >>> MERGE DOWN
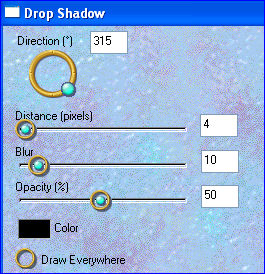
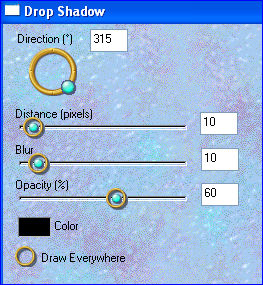
EFFECTS >>> PLUGINS >>> EYE CANDY 3 >>>
DROP SHADOW
|
|
STEP 4
EDIT >>> Repeat Drop Shadow..
change DIRECTION to 135 |
|
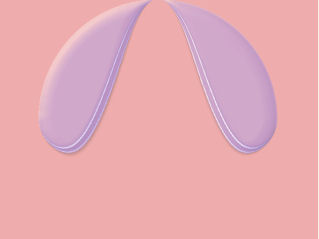
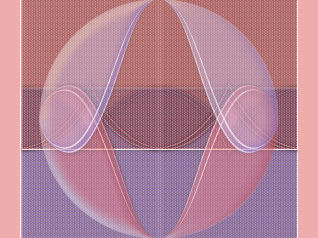
STEP 5
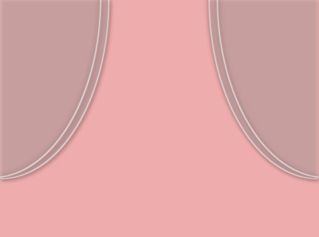
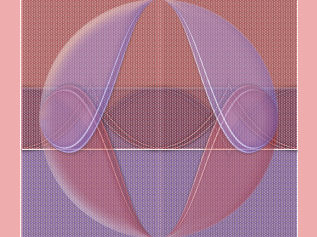
EFFECTS>>> GEOMETRIC EFFECTS >>> CIRCLE
EDGE MODE - Transparent
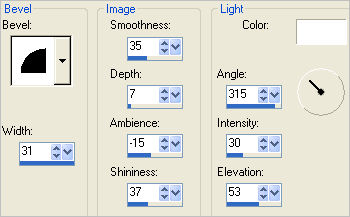
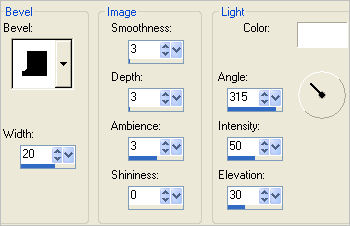
EFFECTS >>> 3D EFFECTS >>> INNER BEVEL
|
|
STEP 6
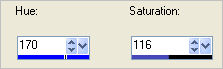
ADJUST >>> HUE & SATURATION >>> COLORIZE
|
|
STEP 7
LAYERS >>> DUPLICATE
IMAGE >>> FLIP
ADJUST >>> HUE & SATURATION >>> COLORIZE

|
|
OK.. I spent hours trying to recreate the next 2 layers from scratch...
that didn't happen, which proves it pays to keep notes when creating tutorials!
So you have it easy... all you'll have to do is copy and paste the layers.
|
STEP 8
Open up the pinhole_pink image in your PSP workspace
Right click on the Title Bar and
select COPY from the options
Right click on the Title Bar of your tag image
and select PASTE AS NEW LAYER from the options.
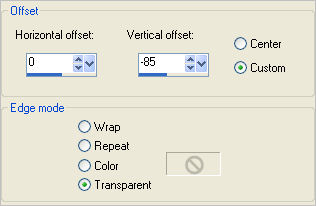
EFFECTS >>> IMAGE EFFECTS >>> OFFSET
|
|
STEP 9
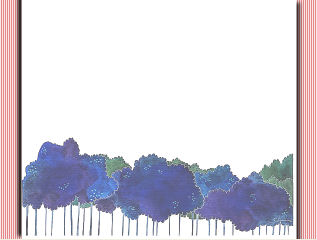
Open up the pinhole_blue image in your PSP workspace
Right click on the Title Bar and
select COPY from the options
Right click on the Title Bar of your tag image
and select PASTE AS NEW LAYER from the options.
EFFECTS >>> IMAGE EFFECTS >>> OFFSET |
|
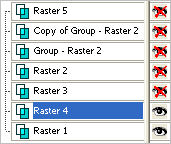
STEP 10
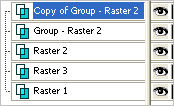
Set up LAYER PALETTE as shown
|
|
STEP 11
With Copy of Group - Raster 2 active
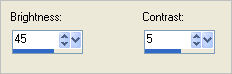
ADJUST >>> BRIGHTNESS and CONTRAST >>> BRIGHTNESS/CONTRAST |
|
STEP 12
ACTIVATE Group - Raster 2
EDIT >>> Repeat Color Adjust Brightness Contrast
|
|
STEP 13
ACTIVATE Raster 1
LAYERS >>> NEW RASTER LAYER
Flood fill with WHITE
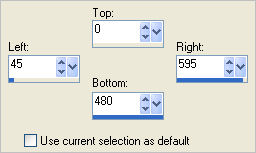
Choose your SELECTION TOOL then click on the
CUSTOM SELECTION symbol
and enter these coordinates.
|
|
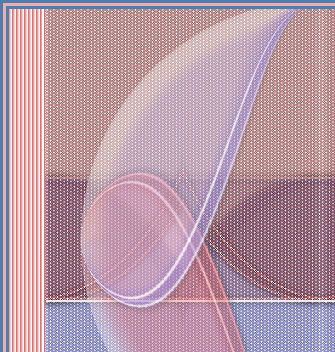
STEP 14
SELECTIONS >>> INVERT
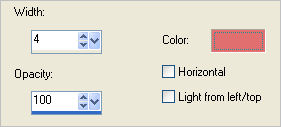
EFFECTS >>> TEXTURE EFFECTS >>> BLINDS
COLOUR = #e16f6f
DESELECT
|
|
STEP 15
ACTIVATE Copy of Group - Raster 2
LAYERS >>> NEW RASTER LAYER
Flood fill with BLUE #4b7fb1
SELECTIONS >>> SELECT ALL
SELECTIONS >>> MODIFY >>> CONTRACT = 3
Flood fill with PINK #eeacac
SELECTIONS >>> MODIFY >>> CONTRACT = 3
Flood fill with BLUE #4b7fb1
SELECTIONS >>> MODIFY >>> CONTRACT = 3
EDIT >>> CLEAR
|
|
STEP 16
SELECTIONS >>> INVERT
EFFECTS >>> 3D EFFECTS >>> INNER BEVEL
DESELECT
|
|
STEP 17
EFFECTS >>> 3D EFFECTS >>> DROP SHADOW
Vertical & Horizontal offsets = 1
Colour = Black
Opacity = 70
Blur = 0
Repeat Drop Shadow effect changing
Vertical & Horizontal Offsets to - ( minus ) 1
Click OK
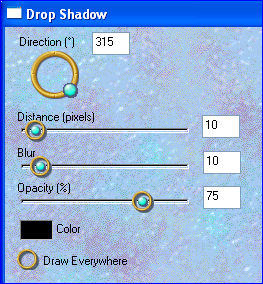
EFFECTS >>> PLUGINS >>> EYE CANDY 3 >>>
DROP SHADOW |
|
STEP 18
EDIT >>> Repeat Drop Shadow..
change DIRECTION to 135
|
|
STEP 19
ACTIVATE RASTER 4
Choose your SELECTION TOOL then click on the
CUSTOM SELECTION symbol
and enter the coordinates, which will not have changed.
EFFECTS >>> PLUGINS >>> EYE CANDY 3 >>>
DROP SHADOW
|
|
STEP 20
EDIT >>> Repeat Drop Shadow..
change DIRECTION to 135
DESELECT
|
|
STEP 21
Set up LAYER PALETTE as shown
and
ACTIVATE Raster 4
|
|
STEP 22
Open up the leeloo_claire_stoner2010_01a image
in your PSP workspace
Right click on the Title Bar and
select COPY from the options
Right click on the Title Bar of your tag image
and select PASTE AS NEW LAYER from the options
Select your DEFORMATION tool
Mode = SCALE
use default settings
PSPX-X3:Select your PICK tool
and adjust sides as shown
and drag to bottom of tag
|
|
STEP 23
Click the RESET RECTANGLE arrow
Select the MOVER tool to disengage
the DEFORMATION tool (PICK tool)
In your LAYER PALETTE change the OPACITY to 65%
Change the BLEND MODE to DIFFERENCE
EFFECTS >>> EDGE EFFECTS >>> ENHANCE |
|
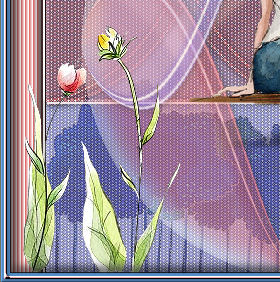
STEP 24
OPEN ALL LAYERS
ACTIVATE Copy of Group - Raster 2
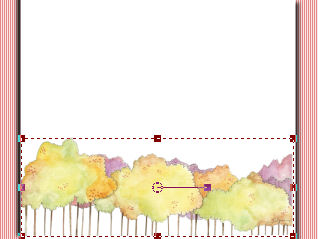
Open up the fo1_500 image
in your PSP workspace
Right click on the Title Bar and
select COPY from the options
Right click on the Title Bar of your tag image
and select PASTE AS NEW LAYER from the options
IMAGE >>> RESIZE = 80%
Ensure "Resize all layers" is UNCHECKED
Resample using WEIGHTED AVERAGE
ADJUST >>> SHARPNESS >>> SHARPEN
Reposition with your MOVER tool
|
|
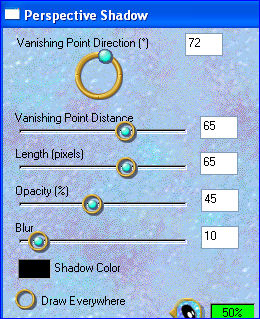
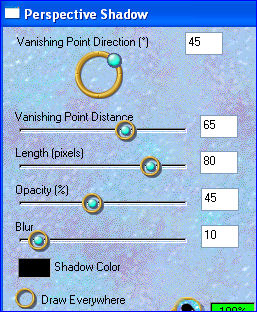
STEP 25
EFFECTS >>> PLUGINS >>> EYE CANDY 3 >>> PERSPECTIVE SHADOW |
|
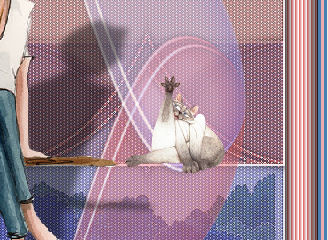
STEP 26
Open up the cat_jazzl_53 image in your PSP workspace
Right click on the Title Bar and
select COPY from the options
Right click on the Title Bar of your tag image
and select PASTE AS NEW LAYER from the options
IMAGE >>> MIRROR
IMAGE >>> RESIZE = 50%
Ensure "Resize all layers" is UNCHECKED
Resample using WEIGHTED AVERAGE
Reposition with your MOVER tool |
|
STEP 27
PSP8 - PSPX2:ADJUST >>> BRIGHTNESS and CONTRAST >>> CLARIFY
Strength of effect = 5
PSPX3: ADJUST >>> BRIGHTNESS and CONTRAST >>> LOCAL TONE
Mapping strength = 5
EDIT >>> Repeat Clarify
EFFECTS >>> PLUGINS >>> EYE CANDY 3 >>> PERSPECTIVE SHADOW |
|
STEP 28
With Raster 8 still active
Open up the leeloo_romantic-stylish-art-drawing-08 image
in your PSP workspace
Right click on the Title Bar and
select COPY from the options
Right click on the Title Bar of your tag image
and select PASTE AS NEW LAYER from the options
IMAGE >>> RESIZE = 50%
Ensure "Resize all layers" is UNCHECKED
Resample using WEIGHTED AVERAGE
ADJUST >>> SHARPNESS >>> SHARPEN
Reposition with your MOVER tool
|
|
STEP 29
LAYERS >>> DUPLICATE
IMAGE >>> MIRROR
LAYERS >>> MERGE >>> MERGE DOWN
|
|
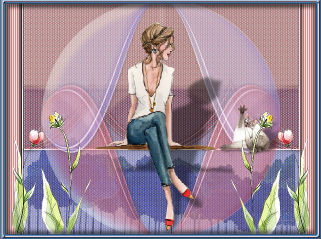
STEP 30
EFFECTS >>> 3D EFFECTS >>> DROP SHADOW
Vertical & Horizontal offsets = 3
Colour = Black
Opacity = 85
Blur = 5.00
LAYERS >>> MERGE >>> MERGE ALL (Flatten)
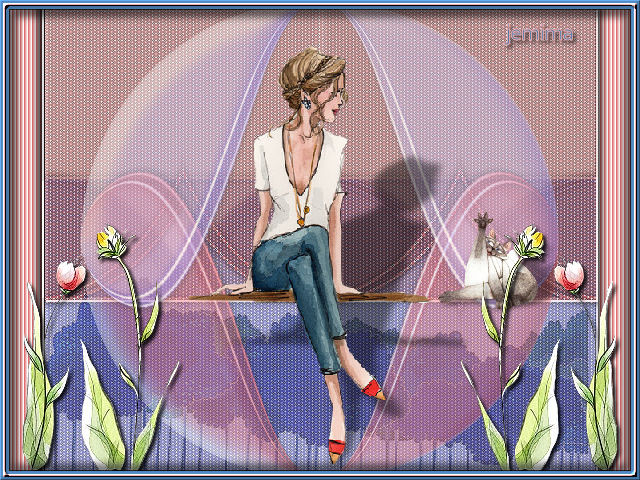
Save as .jpg image
|
. |
. |