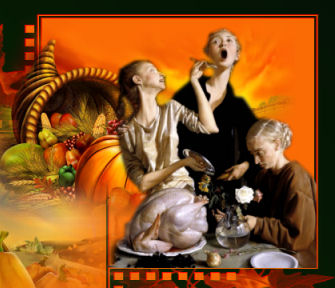
A quick and easy, uncompicated tut for a change *S*
STEP 1
In your MATERIALS PALETTE
Load YELLOW ' #f8b002 ' in your foreground
Load ORANGE ' #fb6b05 ' in your background
Open a new image 650 x 500
Transparent background
PSPX - X2: Colour Depth = 8bits/channel
PSPX3- X6 : Colour Depth RGB = 8bits/channel
Flood fill with ORANGE #fb6b05
|
STEP 2
In your MATERIALS PALETTE
Click on the GRADIENT option in your foreground palette.
Locate the "Foreground-background" gradient
|
|
STEP 3
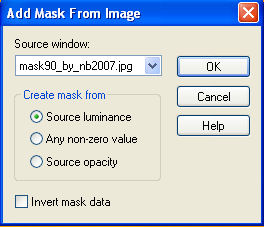
Open up the mask90_by_nb2007 image
in your PSP workspace
and minimize
LAYERS >>> NEW RASTER LAYER
Flood fill with GRADIENT
LAYERS >>> NEW MASK LAYER >>> FROM IMAGE
LAYERS >>> MERGE >>> MERGE GROUP
|
|
STEP 4
EFFECTS >>> 3D EFFECTS >>> DROP SHADOW
Vertical & Horizontal offsets = 1
Colour = Black
Opacity = 90
Blur = 0
In your LAYER PALETTE change the
BLEND MODE to OVERLAY
|
|
STEP 5
LAYERS >>> DUPLICATE
In your LAYER PALETTE change the
BLEND MODE to DIFFERENCE
|
|
STEP 6
Open up the
k@rine_ dreams _Misted_Pumpkin_2044_Octobre_2011
image
in your PSP workspace
Right click on the Title Bar and select
COPY from the options
Right click on the Title Bar of your tag image
and select PASTE AS NEW LAYER from the options.
IMAGE >>> RESIZE = 50%
Ensure "Resize all layers" is UNCHECKED
Resample using WEIGHTED AVERAGE
Reposition with your MOVER tool
|
|
STEP 7
Open up the
scenery3
image in your PSP workspace
Right click on the Title Bar and select
COPY from the options
Right click on the Title Bar of your tag image
and select PASTE AS NEW LAYER from the options.
IMAGE >>> RESIZE = 60%
Ensure "Resize all layers" is UNCHECKED
Resample using WEIGHTED AVERAGE
Reposition with your MOVER tool
|
|
STEP 8
Open up the feasting image in your PSP workspace
Right click on the Title Bar and select
COPY from the options
Right click on the Title Bar of your tag image
and select PASTE AS NEW LAYER from the options.
IMAGE >>> RESIZE = 65%
Ensure "Resize all layers" is UNCHECKED
Resample using WEIGHTED AVERAGE
Reposition with your MOVER tool
|
|
STEP 9
Open up the ThanksgivingWordart_DesinzbySuzy image
in your PSP workspace
Activate the 'Feast' layer
Right click on the Title Bar and select
COPY from the options
Right click on the Title Bar of your tag image
and select PASTE AS NEW LAYER from the options.
Reposition with your MOVER tool |
|
STEP 10
LAYERS >>> NEW RASTER LAYER
SELECTIONS >>> SELECT ALL
SELECTIONS >>> MODIFY >>> CONTRACT = 3
Flood fill with ORANGE
SELECTIONS >>> MODIFY >>> CONTRACT = 3
EDIT >>> CLEAR
EFFECTS >>> 3D EFFECTS >>> DROP SHADOW
Vertical & Horizontal offsets = 1
Colour = Black
Opacity = 90
Blur = 0
Repeat Drop Shadow effect changing
Vertical & Horizontal Offsets to - ( minus ) 1
Click OK
DESELECT
|
|
STEP 11
LAYERS >>> NEW RASTER LAYER
ADD your name
LAYERS >>> MERGE >>> MERGE ALL (Flatten)
Save as .jpg image
|
|
|
|
|
|
|