THIS TUT IS DEAD EASY FOR A CHANGE *S*
|
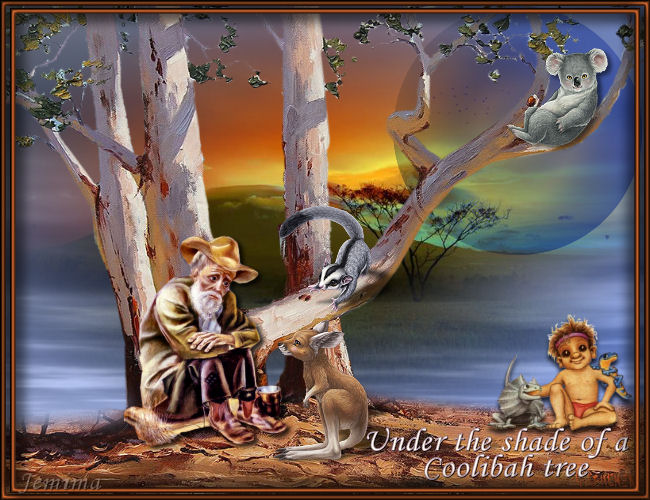
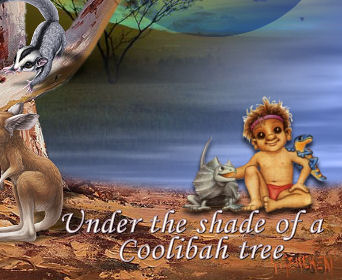
Once a jolly swagman camped by a billabong,
Under the shade of a Coolibah tree,
And he sang as he watched and waited till his billy boil,
You'll come a Waltzing Matilda with me.
|
STEP 1
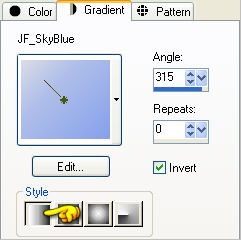
In your MATERIALS PALETTE
Load the ' JF_SkyBlue ' gradient in your foreground
using these settings
|
|
STEP 2
Open a new image 650 x 500
Transparent background
RASTER BACKGROUND
PSPX - X2: Colour Depth = 8bits/channel
PSPX3: Colour Depth RGB = 8bits/channel
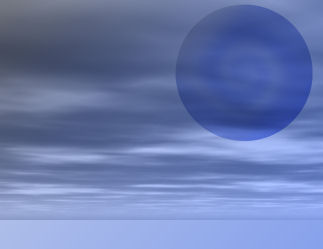
Flood fill with the gradient
|
STEP 3
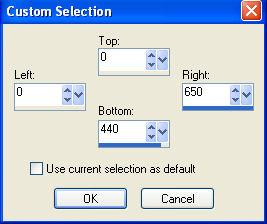
LAYERS >>> NEW RASTER LAYER
Choose your SELECTION TOOL then click on the
CUSTOM SELECTION symbol
and enter these coordinates.
|
|
STEP 4
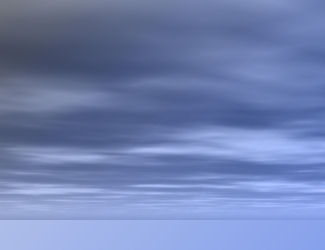
Open up the darksky6 image in your PSP workspace
Right click on the Title Bar and select
COPY from the options
Right click on the Title Bar of your tag image
and select PASTE INTO SELECTION from the options.
DESELECT
In your LAYER PALETTE
Change the BLEND MODE to LUMINANCE (L)
|
|
STEP 5
ACTIVATE RASTER 1
LAYERS >>> DUPLICATE
LAYERS >>> ARRANGE >>> BRING TO TOP
EFFECTS >>> DISTORTION EFFECTS >>> TWIRL
DEGREES = - (minus) 720
EFFECTS>>> GEOMETRIC EFFECTS >>> CIRCLE
EDGE MODE = Transparent
IMAGE >>> RESIZE = 50%
Ensure "Resize all layers" is UNCHECKED
Resample using WEIGHTED AVERAGE
In your LAYER PALETTE
Change the BLEND MODE to MULTIPLY
Reposition with your MOVER tool |
|
STEP 6
Choose your SELECTION TOOL then click on the
CUSTOM SELECTION symbol
and enter the same coordinates.
LAYERS >>> NEW RASTER LAYER
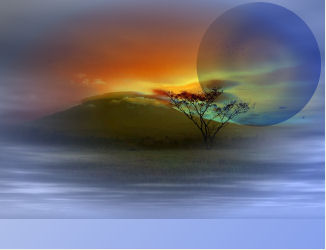
Open up the manzara tubes 5-HaZaL image
in your PSP workspace
Right click on the Title Bar and select
COPY from the options
Right click on the Title Bar of your tag image
and select PASTE INTO SELECTION from the options.
DESELECT
LAYERS >>> ARRANGE >>> MOVE DOWN
|
|
STEP 7
ACTIVATE Copy of Raster 1
LAYERS >>> NEW RASTER LAYER
SELECTIONS >>> SELECT ALL
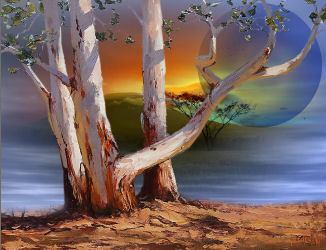
Open up the BLUEGUMS image
in your PSP workspace
Right click on the Title Bar and select
COPY from the options
Right click on the Title Bar of your tag image
and select PASTE INTO SELECTION from the options.
DESELECT
|
|
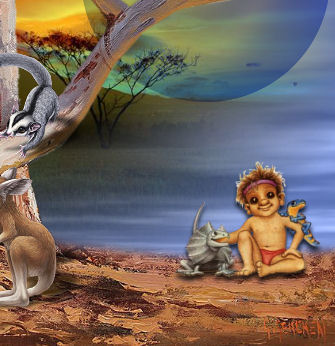
STEP 8
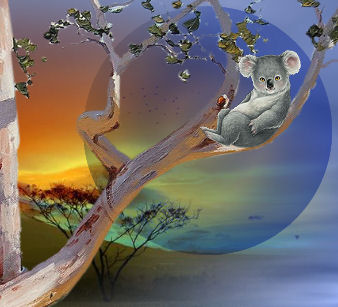
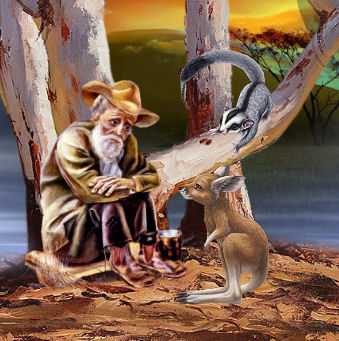
Open up the bushbaby2 image
in your PSP workspace
Right click on the Title Bar and select
COPY from the options
Right click on the Title Bar of your tag image
and select PASTE AS NEW LAYER from the options.
IMAGE >>> MIRROR
IMAGE >>> RESIZE = 20%
Ensure "Resize all layers" is UNCHECKED
Resample using WEIGHTED AVERAGE
ADJUST >>> SHARPNESS >>> SHARPEN
Reposition with your MOVER tool
|
|
STEP 9
Open up the bushbaby3 image
in your PSP workspace
Right click on the Title Bar and select
COPY from the options
Right click on the Title Bar of your tag image
and select PASTE AS NEW LAYER from the options.
IMAGE >>> MIRROR
IMAGE >>> RESIZE = 20%
Ensure "Resize all layers" is UNCHECKED
Resample using WEIGHTED AVERAGE
ADJUST >>> SHARPNESS >>> SHARPEN
Reposition with your MOVER tool |
|
STEP 10
Open up the JFAbor image
in your PSP workspace
Right click on the Title Bar and select
COPY from the options
Right click on the Title Bar of your tag image
and select PASTE AS NEW LAYER from the options.
IMAGE >>> RESIZE = 45%
Ensure "Resize all layers" is UNCHECKED
Resample using WEIGHTED AVERAGE
ADJUST >>> SHARPNESS >>> SHARPEN
Reposition with your MOVER tool |
|
STEP 11
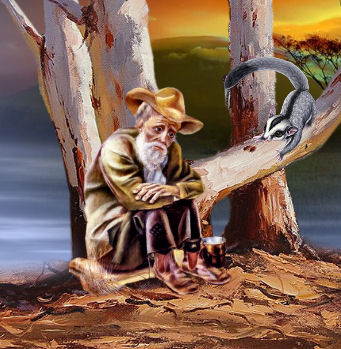
Open up the lonely-swagmen-ludmila-clark image
in your PSP workspace
Right click on the Title Bar and select
COPY from the options
Right click on the Title Bar of your tag image
and select PASTE AS NEW LAYER from the options.
IMAGE >>> RESIZE = 40%
Ensure "Resize all layers" is UNCHECKED
Resample using WEIGHTED AVERAGE
ADJUST >>> SHARPNESS >>> SHARPEN
Reposition with your MOVER tool |
|
STEP 12
Open up the bushbaby1 image
in your PSP workspace
Right click on the Title Bar and select
COPY from the options
Right click on the Title Bar of your tag image
and select PASTE AS NEW LAYER from the options.
IMAGE >>> MIRROR
IMAGE >>> RESIZE = 25%
Ensure "Resize all layers" is UNCHECKED
Resample using WEIGHTED AVERAGE
ADJUST >>> SHARPNESS >>> SHARPEN
Reposition with your MOVER tool |
|
STEP 13
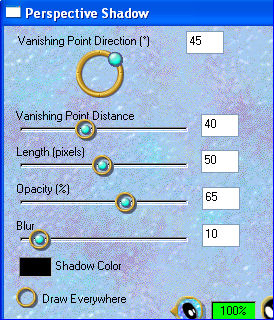
EFFECTS >>> PLUGINS >>> EYE CANDY 3 >>> PERSPECTIVE SHADOW |
|
STEP 14
ACTIVATE RASTER 6
EDIT >>> Repeat Perspective Shadow.
ACTIVATE RASTER 5
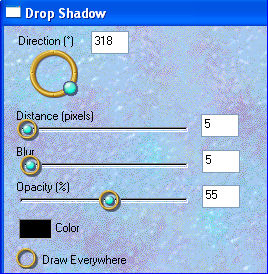
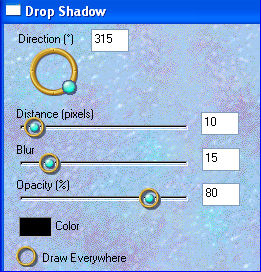
EFFECTS >>> PLUGINS >>> EYE CANDY 3 >>>
DROP SHADOW
|
|
STEP 15
ACTIVATE RASTER 8
EFFECTS >>> PLUGINS >>> EYE CANDY 3 >>>
DROP SHADOW
Same settings BUT change
OPACITY to 80%
ACTIVATE RASTER 7
EFFECTS >>> PLUGINS >>> EYE CANDY 3 >>>
DROP SHADOW
Same settings BUT change
DIRECTION to 270
|
|
STEP 16
ACTIVATE the TOP layer
Open up the Coolibah_WA image
in your PSP workspace
Right click on the Title Bar and select
COPY from the options
Right click on the Title Bar of your tag image
and select PASTE AS NEW LAYER from the options.
IMAGE >>> RESIZE = 50%
Ensure "Resize all layers" is UNCHECKED
Resample using WEIGHTED AVERAGE
ADJUST >>> SHARPNESS >>> SHARPEN
Reposition with your MOVER tool |
|
STEP 17
LAYERS >>> MERGE >>> MERGE VISIBLE
LAYERS >>> NEW RASTER LAYER
SELECTIONS >>> SELECT ALL
SELECTIONS >>> MODIFY >>> CONTRACT = 6
SELECTIONS >>> INVERT
Flood fill with #a85428
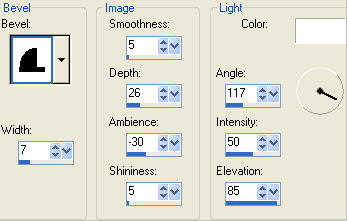
EFFECTS >>> 3D EFFECTS >>> INNER BEVEL
DESELECT
|
|
STEP 18
LAYERS >>> DUPLICATE
IMAGE >>> RESIZE = 97%
Ensure "Resize all layers" is UNCHECKED
Resample using WEIGHTED AVERAGE
EFFECTS >>> PLUGINS >>> EYE CANDY 3 >>>
DROP SHADOW
|
|
STEP 19
EDIT >>> Repeat Drop Shadow..
change DIRECTION to 135
ACTIVATE RASTER 1
EDIT >>> Repeat Drop Shadow..
EDIT >>> Repeat Drop Shadow..
change DIRECTION to 315
|
|
STEP 20
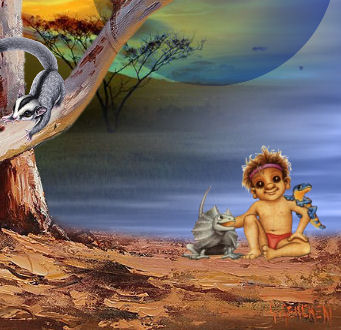
Add you name
LAYERS >>> MERGE >>> MERGE ALL (Flatten)
Save as .jpg image
|
|
|
|
|
|
|