STEP 27
DUPLICATE your saved template frame
so you can use the original at some other time. |
STEP 28
With your MAGIC WAND.... Same settings.
and while depressing your SHIFT KEY...
Select all the transparent areas
SELECTIONS >>> INVERT
EFFECTS >>> PLUGINS >>> EYE CANDY 3 >>>
DROP SHADOW
DESELECT
|
|
STEP 29
LAYERS >>> NEW RASTER LAYER
Flood fill with WHITE
LAYERS >>> ARRANGE >>> MOVE DOWN
Choose your SELECTION TOOL
Selection Type = Rectangle
Mode = Replace
Feather = 0
Antialias = UNChecked
Select an area about 2/3rd down from the top...as shown.... doesn't have to be exact.

|
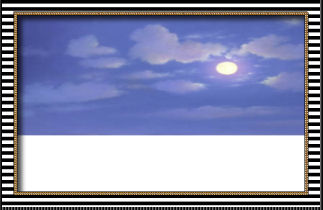
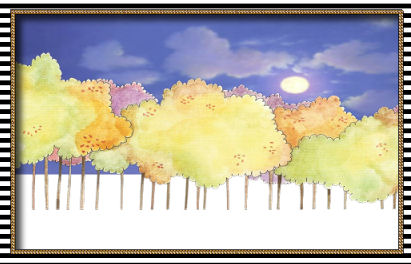
STEP 30
Open up the v_sky14_blue image in your PSP workspace
Right click on the Title Bar and select COPY from the options
Right click on the Title Bar of your frame image
and select PASTE INTO SELECTION from the options.
DESELECT
|
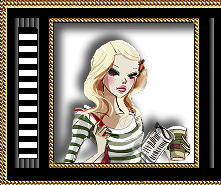
|
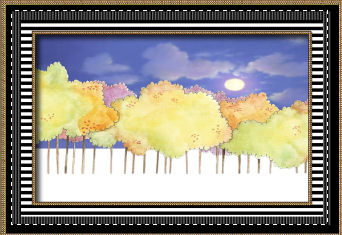
STEP 31
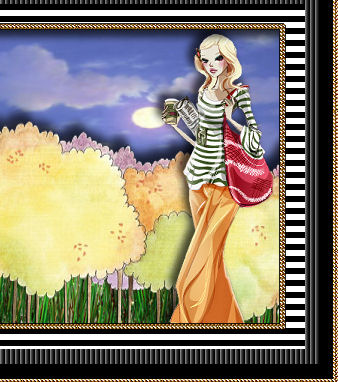
Open up the leeloo_claire_stoner2010_01a image
in your PSP workspace
Activate Raster 1
Right click on the Title Bar and select COPY from the options
Right click on the Title Bar of your frame image
and select PASTE AS NEW LAYER from the options.
Reposition with your MOVER tool
|
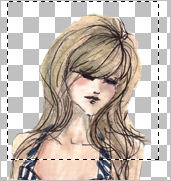
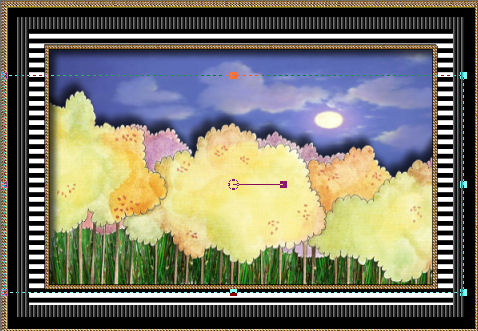
STEP 32
Choose your SELECTION TOOL
Same settings
Select the area shown |
|
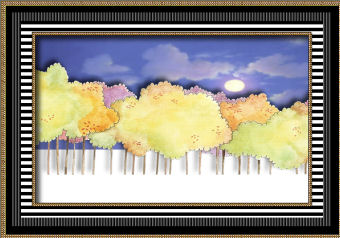
STEP 33
SELECTIONS >>> INVERT
EDIT >>> CLEAR
DESELECT
EFFECTS >>> PLUGINS >>> EYE CANDY 3 >>>
DROP SHADOW
Same settings BUT change DIRECTION to 135
|
|
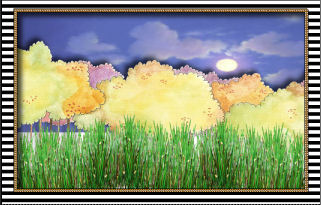
STEP 34
Open up the gras image
in your PSP workspace
Right click on the Title Bar and select COPY from the options
Right click on the Title Bar of your frame image
and select PASTE AS NEW LAYER from the options.
LAYERS >>> DUPLICATE
Reposition to the right with your MOVER tool
LAYERS >>> DUPLICATE
IMAGE >>> MIRROR
LAYERS >>> MERGE >>> MERGE DOWN (Twice)
Reposition down a little with your MOVER tool
|
|
STEP 35
LAYERS >>> ARRANGE >>> MOVE DOWN
ACTIVATE RASTER 2
EFFECTS >>> 3D EFFECTS >>> DROP SHADOW
Vertical & Horizontal offsets = - ( minus ) 1
Colour = Black
Opacity = 85
Blur = 0
Select your RASTER DEFORM tool
Mode = SCALE
use default settings
PSPX - X3:Select your PICK tool
Drag the centre bottom node down as shown
Click the RESET RECTANGLE arrow
Select another tool to disengage the DEFORMATION / PICK TOOL
|
STEP 36
Open up the gd~VectorGirlz62 image
in your PSP workspace
Right click on the Title Bar and select COPY from the options
Minimize the image for now.
Right click on the Title Bar of your frame image
and select PASTE AS NEW LAYER from the options.
IMAGE >>> MIRROR
IMAGE >>> RESIZE = 75%
Ensure "Resize all layers" is UNCHECKED
Resample using WEIGHTED AVERAGE
ADJUST >>> SHARPNESS >>> SHARPEN
EFFECTS >>> PLUGINS >>> EYE CANDY 3 >>>
DROP SHADOW
Same settings
Reposition with your MOVER tool
|
|
STEP 37
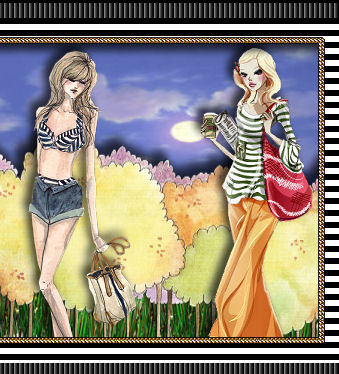
Open up the bikini20 image
in your PSP workspace
Right click on the Title Bar and select COPY from the options
Minimize the image for now.
Right click on the Title Bar of your frame image
and select PASTE AS NEW LAYER from the options.
IMAGE >>> RESIZE = 47%
Ensure "Resize all layers" is UNCHECKED
Resample using WEIGHTED AVERAGE
ADJUST >>> SHARPNESS >>> SHARPEN
EFFECTS >>> PLUGINS >>> EYE CANDY 3 >>>
DROP SHADOW
Same settings
Reposition up with your MOVER tool
|
|
STEP 38
Open up the gd~VectorGirlz41 image
in your PSP workspace
Right click on the Title Bar and select COPY from the options
Minimize the image for now.
Right click on the Title Bar of your frame image
and select PASTE AS NEW LAYER from the options.
IMAGE >>> RESIZE = 65%
Ensure "Resize all layers" is UNCHECKED
Resample using WEIGHTED AVERAGE
ADJUST >>> SHARPNESS >>> SHARPEN
EFFECTS >>> PLUGINS >>> EYE CANDY 3 >>>
DROP SHADOW
Same settings
Reposition with your MOVER tool
Save your image
ACTIVATE THE MERGED LAYER
|
|
STEP 39
Maximize up the gd~VectorGirlz62 image
in your PSP workspace
Choose your SELECTION TOOL
Selection Type = Rectangle
Mode = Replace
Feather = 0
Antialias = UNChecked
Select the area shown
Right click on the Title Bar and select COPY from the options
|
|
STEP 40
Right click on the Title Bar of your frame image
and select PASTE AS NEW LAYER from the options.
ADJUST >>> SHARPNESS >>> SHARPEN
EFFECTS >>> PLUGINS >>> EYE CANDY 3 >>>
DROP SHADOW
Same settings
Reposition with your MOVER tool over the
bottom left square
LAYERS >>> ARRANGE >>> MOVE DOWN
CLOSE
the gd~VectorGirlz62 image
|
|
STEP 41
ACTIVATE THE MERGED LAYER
Maximize up the bikini20 image
in your PSP workspace
Choose your SELECTION TOOL
Selection Type = Rectangle
Mode = Replace
Feather = 0
Antialias = UNChecked
Select the area shown
Right click on the Title Bar and select COPY from the options |
|
STEP 42
Right click on the Title Bar of your frame image
and select PASTE AS NEW LAYER from the options.
ADJUST >>> SHARPNESS >>> SHARPEN
IMAGE >>> MIRROR
EFFECTS >>> PLUGINS >>> EYE CANDY 3 >>>
DROP SHADOW
Same settings
Reposition with your MOVER tool over the
bottom centre square
LAYERS >>> ARRANGE >>> MOVE DOWN
CLOSE the bikini20 image |
|
STEP 43
ACTIVATE THE MERGED LAYER
Maximize up the gd~VectorGirlz41image
in your PSP workspace
Choose your SELECTION TOOL
Selection Type = Rectangle
Mode = Replace
Feather = 0
Antialias = UNChecked
Select the area shown
Right click on the Title Bar and select COPY from the options |
|
STEP 44
Right click on the Title Bar of your frame image
and select PASTE AS NEW LAYER from the options.
ADJUST >>> SHARPNESS >>> SHARPEN
IMAGE >>> MIRROR
EFFECTS >>> PLUGINS >>> EYE CANDY 3 >>>
DROP SHADOW
Same settings
Reposition with your MOVER tool over the
bottom right square
LAYERS >>> ARRANGE >>> MOVE DOWN
CLOSE the gd~VectorGirlz41 image |
|
STEP 45
LAYERS >>> MERGE >>> MERGE ALL (Flatten)
Save as .jpg image
|
|
|
|
|
|
|