STEP 1
Open a new image 600 x 500
Transparent background
PSPX - X2: Colour Depth = 8bits/channel
PSPX3: Colour Depth RGB = 8bits/channel
Flood fill with #d0dbff |
STEP 2
EFFECTS >>> TEXTURE EFFECTS >>> BLINDS
COLOUR = #808080
|
|
STEP 3
EFFECTS >>> REFLECTION EFFECTS >>> ROTATING MIRROR
(Set the 'Rotation angle' first)
|
|
STEP 4
EDIT >>> Repeat Rotating Mirror
EDIT >>> Repeat Rotating Mirror
EDIT >>> Repeat Rotating Mirror
EFFECTS >>> IMAGE EFFECTS >>> OFFSET
|
|
STEP 5
With your MAGIC WAND
Mode = Replace
Match Mode = RGB Value
Tolerance = 0
Feather = 0
Antialias = UNchecked
Sample Merged = UNCHECKED
PSP9 - X3: Check CONTIGUOUS
PSPX - X3: There is no " Sample Merged"
PSPX - X3: Use all layers = UNChecked
Select the left grey area
|
|
STEP 6
EDIT >>> CLEAR
DESELECT
LAYERS >>> DUPLICATE
IMAGE >>> MIRROR
LAYERS >>> MERGE >>> MERGE DOWN
LAYERS >>> NEW RASTER LAYER
Flood fill with #d0dbff
LAYERS >>> ARRANGE >>> MOVE DOWN
LAYERS >>> MERGE >>> MERGE VISIBLE
|
|
STEP 7
SELECTIONS >>> SELECT ALL
SELECTIONS >>> MODIFY >>> CONTRACT = 10
EDIT >>> CUT
EDIT >>> PASTE >>> PASTE AS NEW LAYER
IMAGE >>> FLIP
|
|
STEP 8
SELECTIONS >>> DEFLOAT
SELECTIONS >>> MODIFY >>> CONTRACT = 10
EDIT >>> CUT
EDIT >>> PASTE >>> PASTE AS NEW LAYER
IMAGE >>> FLIP
SELECTIONS >>> DEFLOAT
SELECTIONS >>> MODIFY >>> CONTRACT = 10
EDIT >>> CUT
EDIT >>> PASTE >>> PASTE AS NEW LAYER
IMAGE >>> FLIP
SELECTIONS >>> DEFLOAT
SELECTIONS >>> MODIFY >>> CONTRACT = 10
EDIT >>> CLEAR
DESELECT
|
|
STEP 9
EFFECTS >>> EDGE EFFECTS >>> ENHANCE
ACTIVATE RASTER 2
EDIT >>> Repeat Enhance Edges
ACTIVATE RASTER 1
EDIT >>> Repeat Enhance Edges
ACTIVATE THE MERGED LAYER
EDIT >>> Repeat Enhance Edges
|
|
STEP 10
EFFECTS >>> 3D EFFECTS >>> INNER BEVEL |
|
STEP 11
ACTIVATE RASTER 1
EDIT >>> Repeat Inner Bevel
ACTIVATE RASTER 2
EDIT >>> Repeat Inner Bevel
ACTIVATE RASTER 3
EDIT >>> Repeat Inner Bevel
|
|
STEP 12
With your MAGIC WAND.... Same settings.
Select the CENTRE transparent area
Flood fill with #d0dbff
DESELECT
EFFECTS >>> IMAGE EFFECTS >>> PAGE CURL
COLOUR = #a4aff5
|
|
STEP 13
EFFECTS >>> IMAGE EFFECTS >>> PAGE CURL
COLOUR = #a4aff5 |
|
STEP 14
EFFECTS >>> IMAGE EFFECTS >>> PAGE CURL
COLOUR = #a4aff5 |
|
STEP 15
EFFECTS >>> IMAGE EFFECTS >>> PAGE CURL
COLOUR = #a4aff5 |
|
STEP 16
With your MAGIC WAND.... Same settings
BUT check ANTIALIAS
(PSPX-X3: Outside)
and while depressing your SHIFT KEY...
Select the 4 Dark Purple corners
EFFECTS >>> 3D EFFECTS >>> INNER BEVEL
DESELECT
|
|
STEP 17
With your MAGIC WAND.... Same settings
UNcheck ANTIALIAS
Select the Pale Purple centre
EDIT >>> CLEAR
DESELECT
LAYERS >>> MERGE >>> MERGE VISIBLE
|
|
STEP 18
LAYERS >>> DUPLICATE
IMAGE >>> RESIZE = 90%
Ensure "Resize all layers" is UNCHECKED
Resample using WEIGHTED AVERAGE
LAYERS >>> ARRANGE >>> MOVE DOWN
ADJUST >>> SHARPNESS >>> SHARPEN
|
|
STEP 19
ACTIVATE THE MERGED LAYER
With your MAGIC WAND.... Same settings
Select the CENTRE transparent area
SELECTIONS >>> MODIFY >>> EXPAND = 2
SELECTIONS >>> INVERT
LAYERS >>> NEW RASTER LAYER
LAYERS >>> ARRANGE >>> MOVE DOWN
EFFECTS >>> PLUGINS >>> EYE CANDY 3 >>> DROP SHADOW
|
|
STEP 20
EDIT >>> Repeat Drop Shadow.. change DIRECTION to 0
DESELECT
Save as .pspimage image
ACTIVATE THE MERGED LAYER
LAYERS >>> MERGE >>> MERGE DOWN
|
|
STEP 21
LAYERS >>> NEW RASTER LAYER
Flood fill with #a4aff5
LAYERS >>> ARRANGE >>> SEND TO BOTTOM
Open up the SS_1483_Misted image in your PSP workspace
Right click on the Title Bar and select COPY from the options
Right click on the Title Bar of your frame image
and select PASTE AS NEW LAYER from the options.
|
|
STEP 22
Open up the CGS~DovesLG image in your PSP workspace
Right click on the Title Bar and select COPY from the options
Right click on the Title Bar of your frame image
and select PASTE AS NEW LAYER from the options.
IMAGE >>> MIRROR
IMAGE >>> RESIZE = 50%
Ensure "Resize all layers" is UNCHECKED
Resample using WEIGHTED AVERAGE
LAYERS >>> ARRANGE >>> BRING TO TOP
ADJUST >>> SHARPNESS >>> SHARPEN
Reposition with your MOVER tool
|
|
STEP 23
LAYERS >>> ARRANGE >>> MOVE DOWN (Twice)
In your LAYER PALETTE
Reduce the Opacity of Raster 1 layer
and Copy of Merged layer to 40%
ACTIVATE RASTER 4
Choose your FREEHAND SELECTION TOOL
Selection Type = Point to Point
Mode = Replace
Feather = 0
Antialias = UNChecked
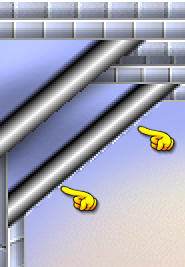
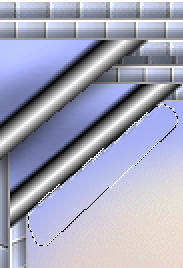
Select the area shown
|
|
STEP 24
Click inside the selection |
|
STEP 25
ACTIVATE Copy of Merged
Hit your DELETE key
ACTIVATE RASTER 1
Hit your DELETE key
DESELECT
Choose your FREEHAND SELECTION TOOL
Same settings
Select the area shown |
|
STEP 26
ACTIVATE Copy of Merged layer
Hit your DELETE key
DESELECT
In your LAYER PALETTE
Change the Opacity of the Raster 1
and Copy of Merged layer to 100%
|
|
STEP 27
Still on the Copy of Merged layer
We need to get rid of the white specks
Choose your FREEHAND SELECTION TOOL
Same settings
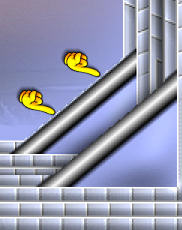
Select the area shown at the top left of your image
Hit your DELETE key
DESELECT
|
 .  |
STEP 28
Choose your FREEHAND SELECTION TOOL
Same settings
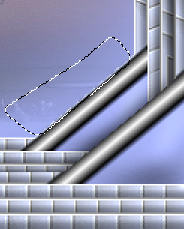
Select the area shown at the bottom rightof your image
Hit your DELETE key
DESELECT |
 .  |
STEP 29
EFFECTS >>> PLUGINS >>> EYE CANDY 3 >>> DROP SHADOW
|
|
STEP 30
EDIT >>> Repeat Drop Shadow.. change DIRECTION to 315
ACTIVATE RASTER 1
EDIT >>> Repeat Drop Shadow
EDIT >>> Repeat Drop Shadow.. change DIRECTION to 135
|
|
STEP 31
LAYERS >>> MERGE >>> MERGE ALL (Flatten)
Save as .jpg image
|