STEP 1
Open a new image 600 x 600
Transparent background
PSPX - X2: Colour Depth = 8bits/channel
PSPX3: Colour Depth RGB = 8bits/channel
VIEW >>> RULERS
|
STEP 2
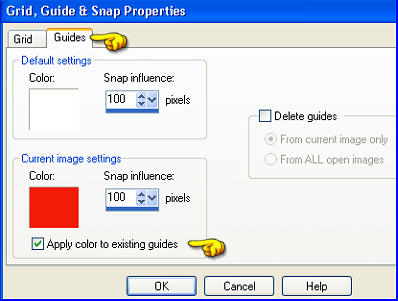
VIEW >>> GUIDES
VIEW >>> CHANGE GRID, GUIDE & SNAP PROPERTIES
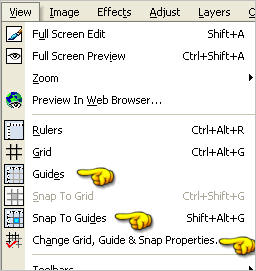
Click the GUIDES Tab and enter these settings
>>>>>>
VIEW >>> SNAP TO GUIDES
|
|
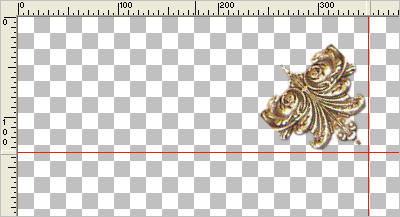
STEP 3
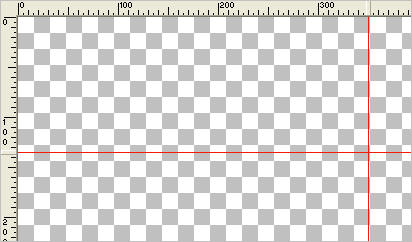
Place your cursor on the top ruler and drag down to
the 135 mark on the left ruler
Place your cursor on the left ruler and drag down to
the 350 mark on the top ruler
|
|
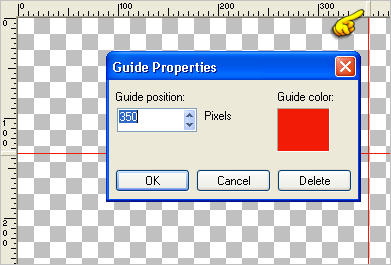
You can recheck your settings by right clicking on the
Guide handle on the ruler
and adjust the setting if necessary
|
|
STEP 4
Open up the jfcorner7 image in your PSP workspace
Right click on the Title Bar and select COPY from the options
Right click on the Title Bar of your frame image
and select PASTE AS NEW LAYER from the options.
Reposition with your MOVER tool and let it snap into place
|
|
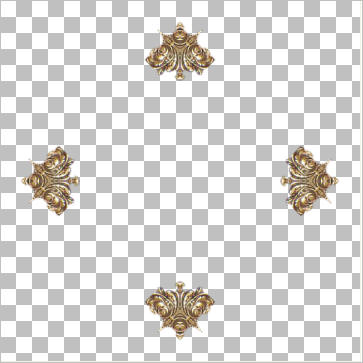
STEP 5
VIEW >>> GUIDES
( to disengage the Guides
)
EFFECTS >>> PLUGINS >>> SIMPLE >>> TOP LEFT MIRROR
LAYERS >>> DUPLICATE
PSP8 - PSP9: IMAGE >>> ROTATE >>> FREE ROTATE = RIGHT 90
Ensure "All layers" is UNCHECKED
PSPX - PSPX3: IMAGE >>> FREE ROTATE = RIGHT 90
Ensure "All layers" is UNCHECKED
LAYERS >>> MERGE >>> MERGE DOWN
|
|
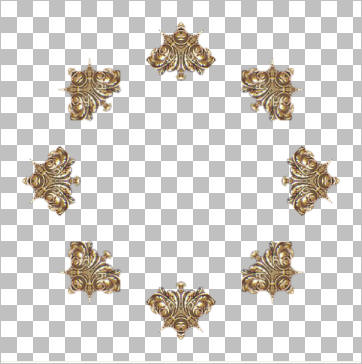
STEP 6
LAYERS >>> DUPLICATE
PSP8 - PSP9: IMAGE >>> ROTATE >>> FREE ROTATE = RIGHT 45
Ensure "All layers" is UNCHECKED
PSPX - PSPX3: IMAGE >>> FREE ROTATE = RIGHT 45
Ensure "All layers" is UNCHECKED
ADJUST >>> SHARPNESS >>> SHARPEN
|
|
STEP 7
LAYERS >>> DUPLICATE
PSP8 - PSP9: IMAGE >>> ROTATE >>>
FREE ROTATE = RIGHT 22.50
Ensure "All layers" is UNCHECKED
PSPX - PSPX3: IMAGE >>> FREE ROTATE = RIGHT 22.50
Ensure "All layers" is UNCHECKED
ADJUST >>> SHARPNESS >>> SHARPEN |
|
STEP 8
LAYERS >>> DUPLICATE
PSP8 - PSP9: IMAGE >>> ROTATE >>>
FREE ROTATE = RIGHT 45.00
Ensure "All layers" is UNCHECKED
PSPX - PSPX3: IMAGE >>> FREE ROTATE = RIGHT 45.00
Ensure "All layers" is UNCHECKED
ADJUST >>> SHARPNESS >>> SHARPEN
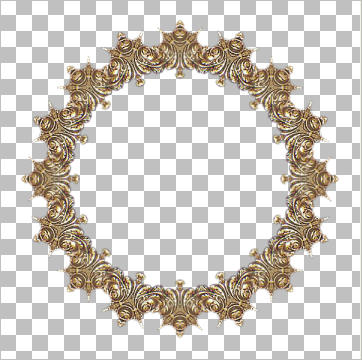
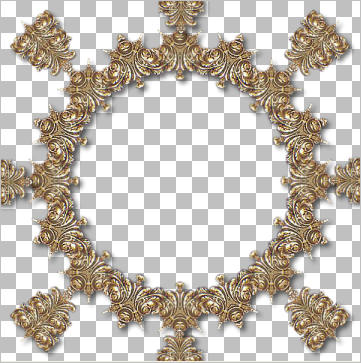
LAYERS >>> MERGE >>> MERGE VISIBLE
|
|
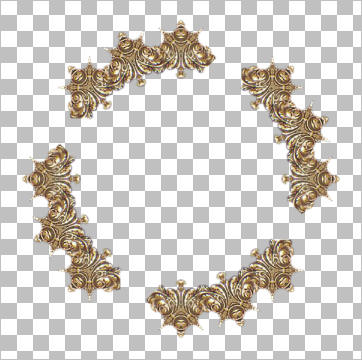
STEP 9
Open up the jfcorner7 image in your PSP workspace
Right click on the Title Bar and select COPY from the options
Right click on the Title Bar of your frame image
and select PASTE AS NEW LAYER from the options.
IMAGE >>> RESIZE = 85%
Ensure "Resize all layers" is UNCHECKED
Resample using WEIGHTED AVERAGE
ADJUST >>> SHARPNESS >>> SHARPEN
Reposition with your MOVER tool
|
|
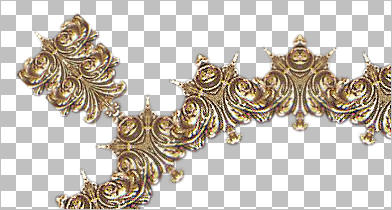
STEP 10
EFFECTS >>> PLUGINS >>> SIMPLE >>> TOP LEFT MIRROR
LAYERS >>> DUPLICATE
IMAGE >>> RESIZE = 85%
Ensure "Resize all layers" is UNCHECKED
Resample using WEIGHTED AVERAGE
ADJUST >>> SHARPNESS >>> SHARPEN |
|
STEP 11
LAYERS >>> DUPLICATE
PSP8 - PSP9: IMAGE >>> ROTATE >>>
FREE ROTATE = RIGHT 45.00
Ensure "All layers" is UNCHECKED
PSPX - PSPX3: IMAGE >>> FREE ROTATE = RIGHT 45.00
Ensure "All layers" is UNCHECKED
ADJUST >>> SHARPNESS >>> SHARPEN
IMAGE >>> RESIZE = 95%
Ensure "Resize all layers" is UNCHECKED
Resample using WEIGHTED AVERAGE
ADJUST >>> SHARPNESS >>> SHARPEN
|
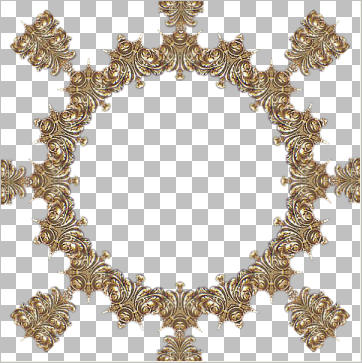
|
STEP 12
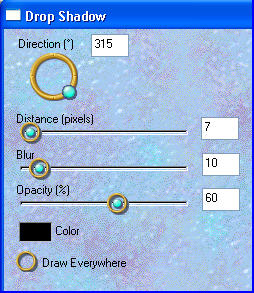
EFFECTS >>> PLUGINS >>> EYE CANDY 3 >>> DROP SHADOW |
|
STEP 13
ACTIVATE Copy of Raster 1
EDIT >>> Repeat Drop Shadow..
ACTIVATE Raster 1
EDIT >>> Repeat Drop Shadow..
ACTIVATE THE MERGED LAYER
EDIT >>> Repeat Drop Shadow..
|
|
STEP 14
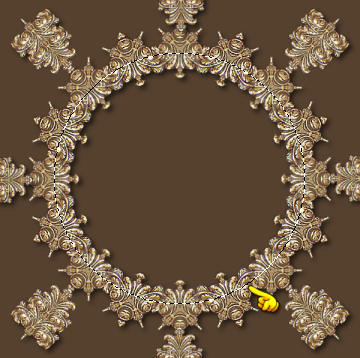
LAYERS >>> NEW RASTER LAYER
LAYERS >>> ARRANGE >>> MOVE DOWN
Flood fill with BROWN #56412f
Choose your SELECTION TOOL
Selection Type = CIRCLE
Mode = Replace
Feather = 0
Antialias = Checked
Starting at 300 pixels across and 300 pixels down
drag your cursor to half way through the frame and release
|
|
STEP 15
EDIT >>> CLEAR
DESELECT
ACTIVATE Copy (2) of Raster 1
LAYERS >>> NEW RASTER LAYER
Flood fill with BROWN #56412f
SELECTIONS >>> SELECT ALL
SELECTIONS >>> MODIFY >>> CONTRACT = 5
EDIT >>> CLEAR
SELECTIONS >>> INVERT
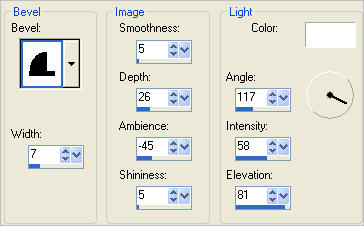
EFFECTS >>> 3D EFFECTS >>> INNER BEVEL
|
|
STEP 16
EFFECTS >>> PLUGINS >>> EYE CANDY 3 >>> DROP SHADOW
Same settings
EDIT >>> Repeat Drop Shadow.. change DIRECTION to 135
DESELECT
|
|
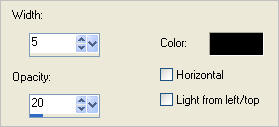
STEP 17
ACTIVATE RASTER 2
EFFECTS >>> TEXTURE EFFECTS >>> BLINDS
COLOUR = BLACK
|
|
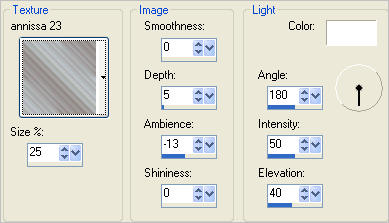
STEP 18
EFFECTS >>> TEXTURE EFFECTS >>> TEXTURE
TEXTURE = annissa 23
|
|
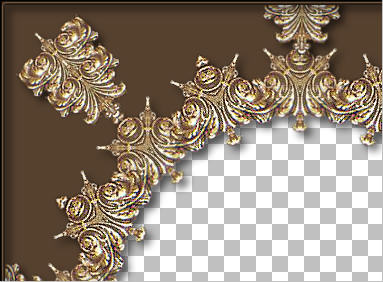
STEP 19
ACTIVATE RASTER 3
LAYERS >>> DUPLICATE
IMAGE >>> RESIZE = 90%
Ensure "Resize all layers" is UNCHECKED
Resample using WEIGHTED AVERAGE
In your LAYER PALETTE
drag this layer beneath the MERGED layer
|
|
STEP 20
LAYERS >>> DUPLICATE
IMAGE >>> RESIZE = 90%
Ensure "Resize all layers" is UNCHECKED
Resample using WEIGHTED AVERAGE
LAYERS >>> MERGE >>> MERGE VISIBLE
Save as .pspimage image
|
|
STEP 21
LAYERS >>> NEW RASTER LAYER
LAYERS >>> ARRANGE >>> MOVE DOWN
Flood fill with #ddd3c7
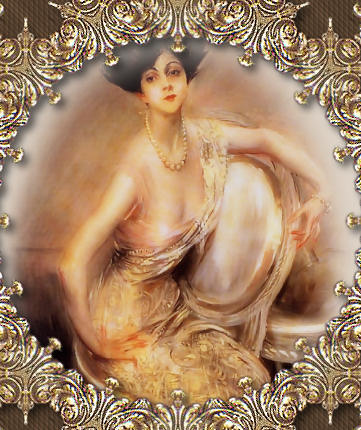
Open up the
CJ_Boldini_Giovanni_Portrait_of_Rita_de_Acosta_Lydig 1911_Mist
image
in your PSP workspace
Right click on the Title Bar and select COPY from the options
Right click on the Title Bar of your frame image
and select PASTE AS NEW LAYER from the options.
IMAGE >>> RESIZE = 65%
Ensure "Resize all layers" is UNCHECKED
Resample using WEIGHTED AVERAGE
Reposition with your MOVER tool
|
|
STEP 22
LAYERS >>> DUPLICATE
LAYERS >>> MERGE >>> MERGE ALL (Flatten)
Save as .jpg image
|
| ...
|