Note: Remember to save often in PSP and to Edit >> Empty Clipboard in PSP when
you come out of ANIMATION SHOP and back into PSP.
|
STEP 1
Open up the downloaded images in your PSP workspace and minimize.
Open solid bg tube in your PSP workspace
WINDOW >> DUPLICATE
Close the original image
This is now our working image
|
STEP 2
Open cleaned mask tube in your PSP workspace
Right click on the Title Bar and select COPY from the options.
Right click on the Title Bar of your 'working' image
and select PASTE AS NEW LAYER from the options.
|
STEP 3
With your MAGIC WAND
Mode = Replace
Match Mode = RGB Value
Tolerance = 0
Feather = 0
Antialias = UNchecked
Sample Merged = UNCHECKED
PSP9 - X3: Check CONTIGUOUS
PSPX - X3: There is no " Sample Merged"
PSPX - X3: Use all layers = UNChecked
Click outside your white hold down the shift key to get everything
selected, it will look like all the beige is selected.
LAYERS >> MERGE >> MERGE VISIBLE.
|
|
STEP 4
LAYERS >> NEW RASTER LAYER
Flood Fill selected area with #d3bca3 |
|
STEP 5
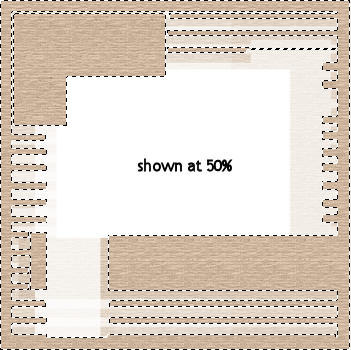
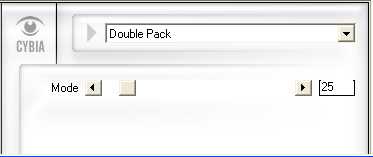
EFFECTS >> PLUGINS >> Cybia >> Screenworks
use these settings.
 .  |
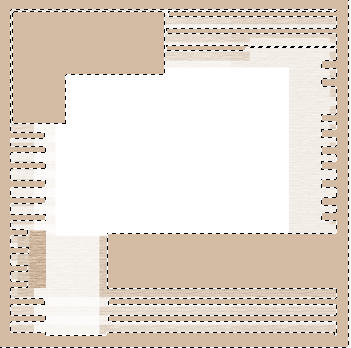
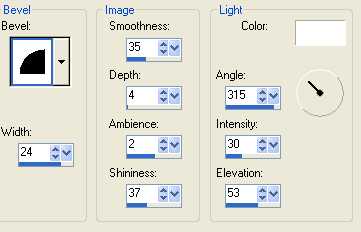
STEP 6
EFFECTS >> 3D EFFECTS >> INNER BEVEL
EDIT>> Repeat Inner Bevel
DESELECT
|
|
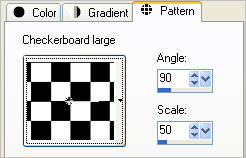
STEP 7
In your MATERIALS PALETTE
Load the ' Checkerboard large ' pattern in your foreground
using these settings. |
|
STEP 8
LAYERS >> NEW RASTER LAYER
SELECTIONS >> SELECT ALL
Flood Fill with black
SELECTIONS >> MODIFY >>CONTRACT =2
Keyboard Delete
|
|
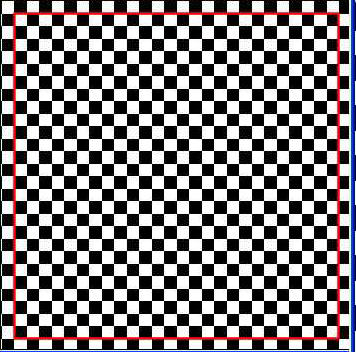
STEP 9
Flood Fill with pattern
DESELECT
Choose your SELECTION TOOL
Selection Type = Rectangle
Mode = Replace
Feather = 0
Antialias = Checked
Draw inside the first grid as shown by red lines
|
|
STEP 10
Flood Fill with black
SELECTIONS >> MODIFY >>CONTRACT =2
Keyboard Delete
DESELECT |
|
STEP 11
Open text master tube in your PSP workspace
Right click on the Title Bar and select COPY from the options.
Right click on the Title Bar of your 'working' image
and select PASTE AS NEW LAYER from the options.
Reposition with your Mover Tool
|
|
STEP 12
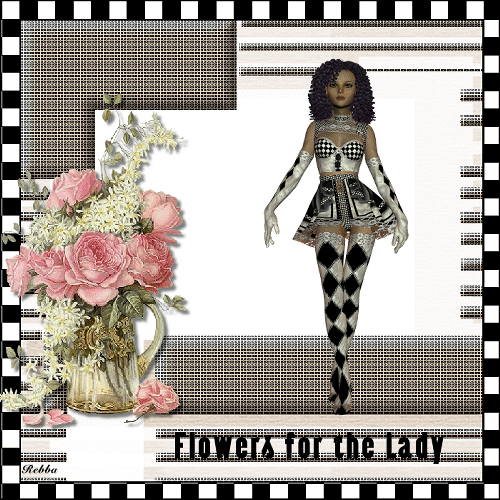
Open PitcherOfFlowers~V tube in your PSP workspace
Right click on the Title Bar and select COPY from the options.
Right click on the Title Bar of your 'working' image
and select PASTE AS NEW LAYER from the options.
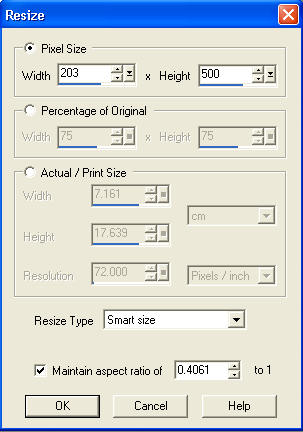
IMAGE >> RESIZE = 75%
Ensure "Resize all layers" is UNCHECKED
ADJUST >> SHARPNESS >> SHARPEN
Effects >> 3D Effects >> Drop Shadow
Vertical and Horizontal = 5
Opacity = 50
Blur = 5.00
Color = Black
Reposition with your Mover Tool
|
|
STEP 13
LAYERS >> NEW RASTER LAYER
Select your TEXT TOOL
with font and settings of your choice
add your name to the bottom left corner of the layer.
Minimize tag for now.
|
|
|
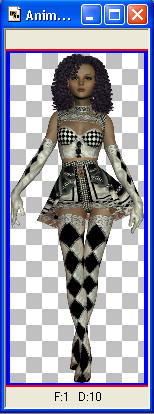
NOTE: we will now work with premade poser images to make an animation.
Open all the poser images zoom them down to fit into your workspace.
 We want poses that are close together don't go from her arms down
to arms up unless you have some in between arm movements.
If your lady will turn from one side to the other then add the front
pose in between the 2 As layer. You may need to mirror a pose to make
it fit into your plan. Think of how you actually move.
|
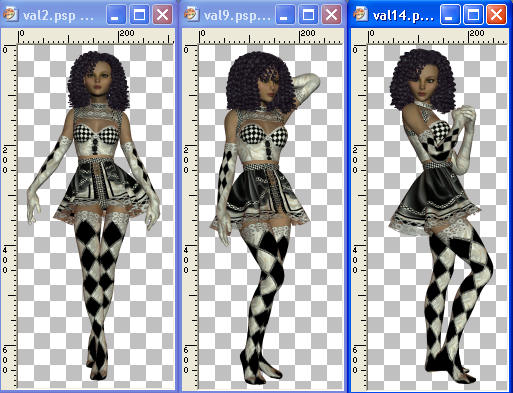
STEP 14
Select Val2
Right click on the Title Bar and select COPY from the options.
In ANIMATION SHOP
Right click the workspace and select
'Paste As New Animation' from the options. |
|
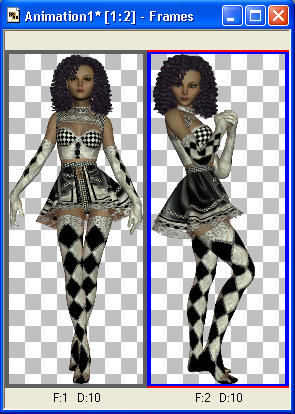
STEP 15
Back to PSP.
Select Val 14
Right click on the Title Bar and select COPY from the options.
In ANIMATION SHOP
Right click top of frame image and select
'Paste After Current Frame' from the options. |
|
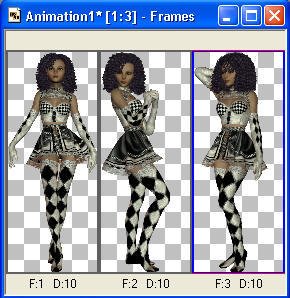
STEP 16
Back to PSP.
Select Val 9
IMAGE >>> MIRROR
Right click on the Title Bar and select COPY from the options.
In ANIMATION SHOP
Right click top of frame image and select
'Paste After Current Frame' from the options.
|
|
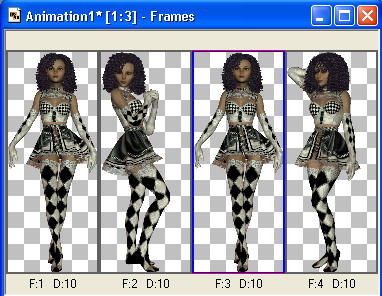
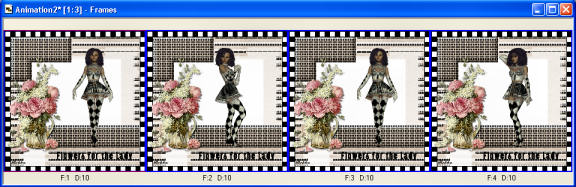
STEP 17
Select the gray edge around frame 1 (F:1)
Edit >> Copy
Select the gray edge around frame 2 (F:1)
Edit >> Paste After Current Frame
|
|
STEP 18
Animation >> Resize Animation
|
|
View Animation...
think of her walking down a runway and showing
off the dress. Is it ok?
|
STEP 19
Back to PSP.
Activate the minimized working image
Right click on Title Bar and select
Copy merged from the options
In ANIMATION SHOP
Right click the workspace and select
'Paste As New Animation' from the options.
Hold down the Ctrl and hit the L (Upper case) until you have 4 frames.
|
STEP 20
Activate the Val animation frames
Edit >> Select All
Edit >> Copy
Edit >> Propagate Paste
Select the working image
Edit >> Select All
ZOOM in on frame 1 (F:1)
Edit >> Paste into selected frame
The frame will be attached to the mouse move into
place and click the mouse to set it down.
|
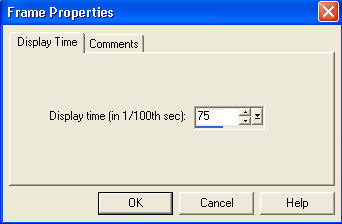
STEP 21
Right click on Title Bar of frames
Select 'Frame Properties' from the options
Display time =75
|
|
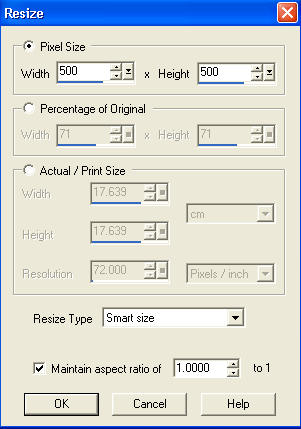
STEP 22
Animation >> Resize Animation |
|
STEP 23
View >> Animation
and while it is still running,
File >> Save As
Locate the folder in which you wish to save it.
Name your animation.
With the Gif Optimiser keep pressing NEXT
until you get to the last one... click FINISH
Close the Animation
Close the frames.
Close Animation Shop
|
|
|
I hope you have enjoyed working with poser images.
Rebba
|
|
|