This tutorial was written by Rebba to be shared with the Artistry Master Group.
JULY 2011
I have created the animation to have fun with but also to teach perhaps a
different way of doing it, I call My Way. I'm not a tutorial writer so this is more in
steps and doesn't expound on the design or PSP part of the tutorial. If you have any
STEP 1
Open up the downloaded images in your PSP workspace and minimize.
Open a new image 600 x 600
Transparent background
PSPX - X2: Colour Depth = 8bits/channel
PSPX3: Colour Depth RGB = 8bits/channel
Flood Fill with black
This is your 'working image'.
|
STEP 2
LAYERS >> NEW RASTER LAYER
Flood Fill with #7b5c4d
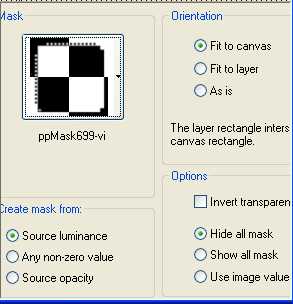
LAYERS >> Load/Save Mask >>
Load Mask from disc
LAYERS >> MERGE >> MERGE GROUP
|
|
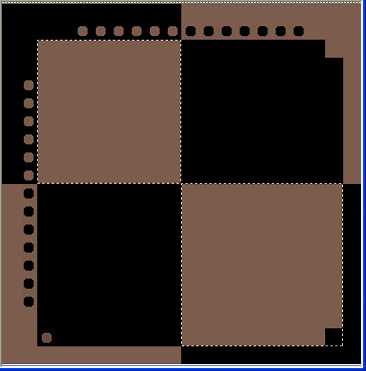
STEP 3
Choose your SELECTION TOOL
Selection Type = Rectangle
Mode = ADD (Shift)
Feather = 0
Antialias = Checked
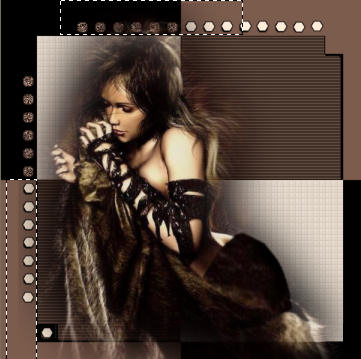
Draw out 2 rectangles over the brown ones
|
|
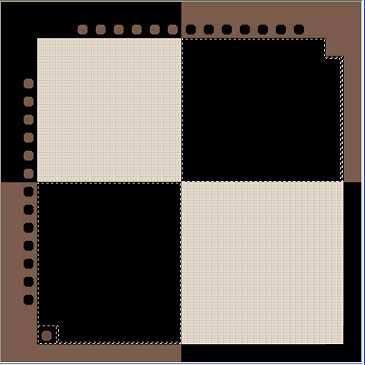
STEP 4
LAYERS >> NEW RASTER LAYER
Flood Fill selected areas
with #daccbc
EFFECTS >> PLUGINS >> Penta dots and cross
use these settings
DESELECT
|
|
STEP 5
Activate Group - Raster 2
With your MAGIC WAND
Mode = Replace
Match Mode = RGB Value
Tolerance = 0
Feather = 0
Antialias = UNchecked
Sample Merged = UNCHECKED
PSP9 - X3: Check CONTIGUOUS
PSPX - X3: There is no " Sample Merged"
PSPX - X3: Use all layers = UNChecked
and while depressing your SHIFT KEY
Select the black areas
|
|
STEP 6
Flood Fill with #7b5c4d
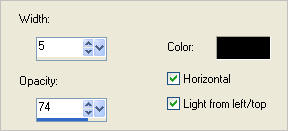
EFFECTS >> TEXTURE EFFECTS >> BLINDS
and use these settings
DESELECT
LAYERS >>> MERGE >> VISIBLE.
Rename this layer template bgd
|
|
STEP 7
With your MAGIC WAND
Mode = Replace
Match Mode = RGB Value
Tolerance = 3
Feather = 0
Antialias = UNchecked
Sample Merged = UNCHECKED
PSP9 - X3: Check CONTIGUOUS
PSPX - X3: There is no " Sample Merged"
PSPX - X3: Use all layers = UNChecked
NOTE
Depending on the version of PSP you are using,
especially higher versions,
you may need to adjust the TOLERANCE a little.
Select a light brown dot, hold down shift key and select all other light brown dots.
Selections >> Promote Selection to Layer
Rename this layer AS1
LAYERS >> DUPLICATE >> TWICE
Name AS2 and AS3
Close AS2 and AS3
Activate layer AS1
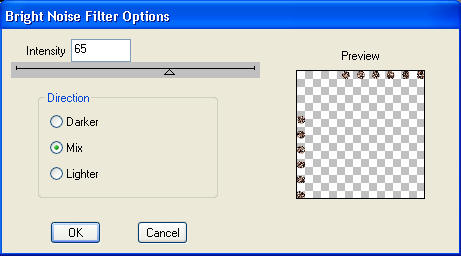
EFFECTS >> PLUGINS >>DSB FLUX bright noise
use these settings.
 Activate layer AS2
EFFECTS >> PLUGINS >>DSB FLUX bright noise
same settings.
EDIT >> Repeat Bright Noise
Activate layer AS3
EFFECTS >> PLUGINS >>DSB FLUX bright noise
same settings.
EDIT >> Repeat Bright Noise
EDIT >> Repeat Bright Noise
DESELECT
|
STEP 8
Maximize the cream dots.pspimage
in your PSP workspace
Right click on the Title Bar and
select COPY from the options.
Right click on the Title Bar of your 'working' image
and select PASTE AS NEW LAYER
from the options.
Place on top of black dots
with your MOVER TOOL
Rename this layer 'cream dots'
|
|
STEP 9
Activate the dressed lady image
Right click on the Title Bar and
select COPY from the options.
Right click on the Title Bar of your 'working' image
and select PASTE AS NEW LAYER
from the options.
Rename this layer 'lady'
IMAGE >> RESIZE = 90%
Ensure "Resize all layers" is UNCHECKED
Move down slightly
Choose your SELECTION TOOL
Selection Type = Rectangle
Mode = Replace
Feather = 0
Antialias = Checked
Select the 2 areas shown and delete to
eliminate the excess shadow.
DESELECT
|
|
STEP 10
LAYERS >> NEW RASTER LAYER
Select your TEXT TOOL
with font and settings of your choice
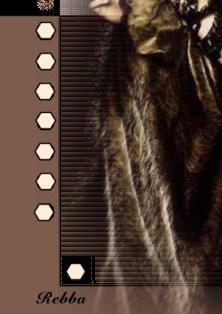
add your name to the bottom left corner
of the layer.
Rename this layer Name.
|
|
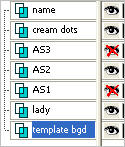
STEP 11
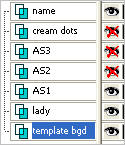
Set up LAYER PALETTE as shown
Right click on Title Bar and select
Copy merged from the options
In ANIMATION SHOP
Right click the workspace and select
'Paste As New Animation' from the options.
|
|
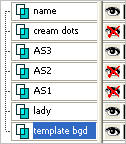
STEP 12
Back to PSP.
Set up LAYER PALETTE as shown
Right click on Title Bar and select
Copy merged from the options
In ANIMATION SHOP
Right click top of frame image and select
'Paste After Current Frame' from the options.
|
|
STEP 13
Back to PSP.
Set up LAYER PALETTE as shown
Right click on Title Bar and select
Copy merged from the options
In ANIMATION SHOP
Right click top of frame image and select
'Paste After Current Frame' from the options.
|
|
|
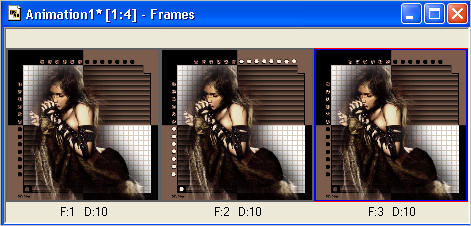
STEP 14
In ANIMATION SHOP
Edit >> Select All
Right click on top of frames
Select 'Frame Properties' from the options
Display time = 30 or what you wish
View >> Animation
and while it is still running,
File >> Save As
Locate the folder in which you wish to save it.
Name your animation.
With the Gif Optimiser keep pressing NEXT
until you get to the last one... click FINISH
Close the Animation
Close the frames.
Close Animation Shop
|
| |
I hope you enjoyed the simple tutorial
Rebba |
| |