STEP 1
Open up the downloaded images in your PSP workspace and minimize.
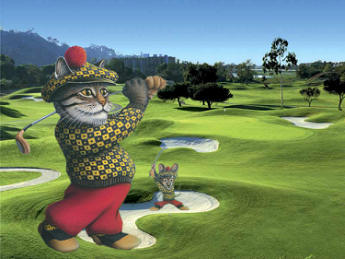
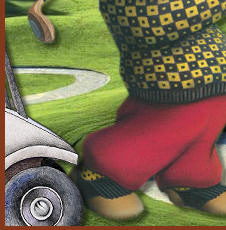
Open up the Vietnam golf course image in your PSP workspace
WINDOW >>> DUPLICATE
Close the original Image |
STEP 2
LAYERS >>> Promote background layer
Rename this layer bgd
Open b29 kitty golfer tube in your PSP workspace
Right click on the Title Bar
and select COPY from the options.
Right click on the Title Bar of your 'working' image
and select PASTE AS NEW LAYER from the options.
Rename this layer cats
Move to left bottom
|
|
STEP 3
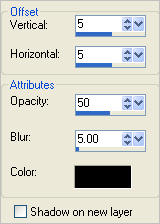
Effects >> 3D Effects >> Drop Shadow
Vertical and Horizontal = 5
Opacity = 50
Blur = 5.00
Color = Black |
|
STEP 4
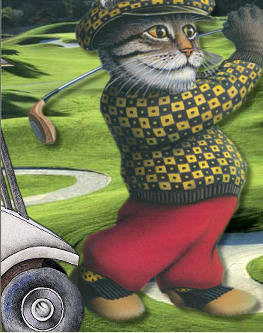
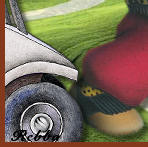
Open golf cart image
Activate the merged layer
Right click on the Title Bar
and select COPY from the options.
Right click on the Title Bar of your 'working' image
and select PASTE AS NEW LAYER from the options.
IMAGE >>> MIRROR
Put in lower left corner.
Rename this layer cart
|
|
STEP 5
Effects >> 3D Effects >> Drop Shadow
Vertical and Horizontal = 5
Opacity = 50
Blur = 5.00
Color = Black. |
STEP 6
In your MATERIALS PALETTE
Load BROWN #84391c in your background
|
STEP 7
We will arrange everything soon.
Activate the top layer
LAYERS >> NEW RASTER LAYER
Rename this layer frame
SELECTIONS >> SELECT ALL
SELECTIONS >> MODIFY >>CONTRACT = 5
SELECTIONS >> INVERT
Flood Fill with BROWN
DESELECT
|
|
STEP 8
LAYERS >> NEW RASTER LAYER
Select your TEXT TOOL
with font and settings of your choice
add your name to the bottom left corner of the layer.
Rename this layer name.
PSPX3.. click the "A" tool
then before clicking on the work
hold down the shift key and then click,
it will bring up the entry box as other versions do
|
|
STEP 9
LAYERS >> NEW RASTER LAYER
Rename this layer text
In the Materials Palette
NULL the foreground
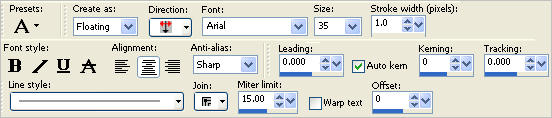
Select your TEXT TOOL
use these settings
Font = Arial
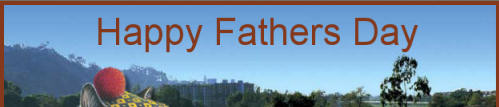
Type: Happy Fathers Day
move to top center.
|
STEP 10
You can minimize the PSP image now if you wish.
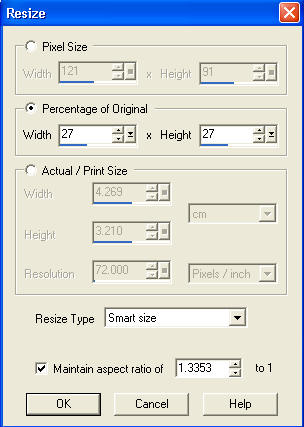
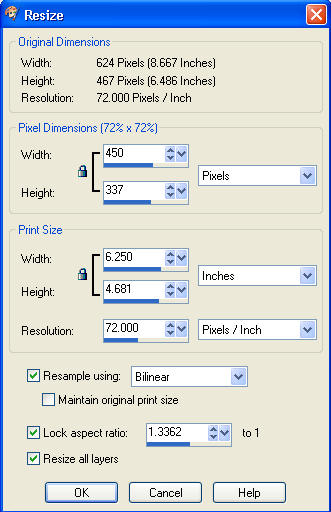
IMAGE >> RESIZE
Ensure "Resize all layers" is CHECKED
|
STEP 11
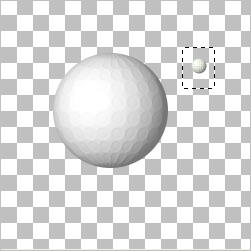
Open the golf ball.png image
WINDOW >> DUPLICATE
Close the original image
Choose your SELECTION TOOL
Selection Type = Rectangle
Mode = Replace
Feather = 0
Antialias = UNChecked
Select the small golf ball on the right
EDIT >> CLEAR
DESELECT
IMAGE >> RESIZE = 85%
Ensure "Resize all layers" is UNCHECKED
Right click on Title Bar and select
Copy from the options
|
|
STEP 12
In ANIMATION SHOP
Right click the workspace and select
'Paste As New Animation' from the options
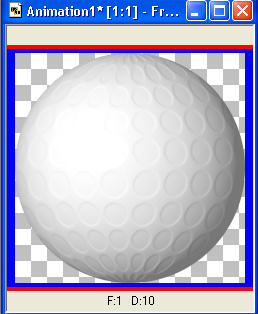
Click on the Title Bar of the golf ball image to select it
Effects >> Insert Image Effect
and select Rotate from the dropdown Effect options
use these settings.
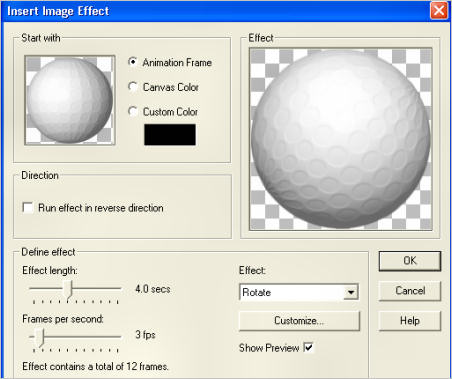
Check the bottom of the AS workspace and you will see the
golf ball now has 13 frames
|
STEP 13
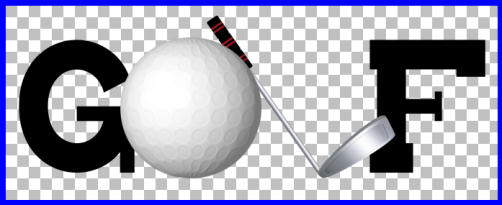
Back to PSP
Open the JRett Golf_825 in your PSP workspace
. Right click on the Title Bar
and select COPY from the options.
.
|
STEP 14
In ANIMATION SHOP
Right click the workspace and select
'Paste As New Animation' from the options
We will need 13 frames of the golf wordart
Depress your CTRL key and press the letter L
(Upper Case) 12 times
|
STEP 15
Click the top of the golf ball frames to select
Edit >> Select All
Edit >> Copy
Edit >> Propagate Paste
Click top of golf wordart frames to select
Edit >> Select All
Edit >> Paste into selected frame
The golf ball will be attached to the cursor arrow,
move it right on top of the golf ball,
and click to set the ball down.
It will cover some of the G and the handle as shown.
|
STEP 16
We need to resize the animation.
On the MENU..
Animation >> Resize animation
using
these settings |
|
STEP 17
Minimize the single golf ball frames.
Back to PSP.
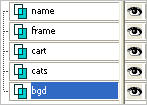
Set Layer palette as shown.
Right click on Title Bar and select
Copy merged from the options
|
|
STEP 18
In ANIMATION SHOP
Right click the workspace and select
'Paste As New Animation' from the options.
We need 13 frames of the background for our golf wordart.
Depress your CTRL key and press the letter L
(Upper Case) 12 times
.
|
STEP 19
In ANIMATION SHOP
On the background frames.
Edit >> Select All
Click top of golf wordart to select it,
Edit >> Select All
Edit >> Copy
Edit >> Propagate Paste
Click top of the background image to select it,
Edit >> Paste into selected frame
The image will be attached to the arrow,
place it to the bottom left and click to set
.
|
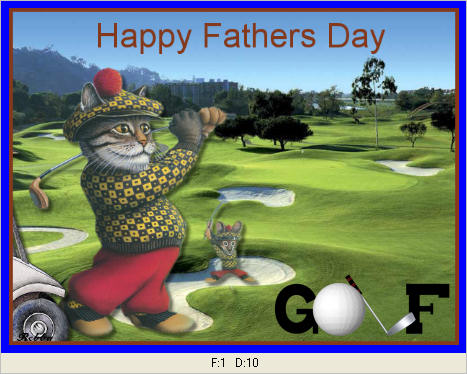
STEP 20
View >> Animation
and while it is still running,
File >> Save As
Locate the folder in which you wish to save it.
Name your animation.
With the Gif Optimizer keep pressing NEXT
until you get to the last one... click FINISH
Close the Animation
Close the frames.
Close Animation Shop
|
| |
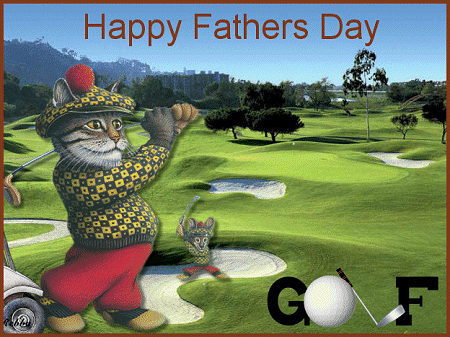
I hope you enjoyed the tutorial.
Rebba |