STEP 1
Open up the downloaded images in your PSP workspace and minimize.
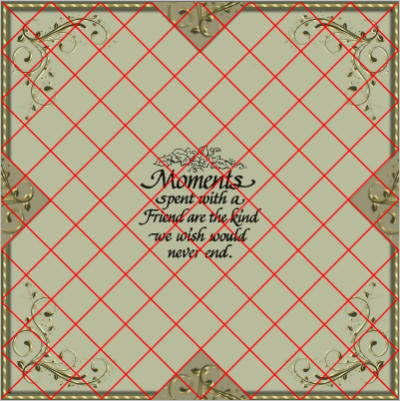
Open up the master tri need image in your PSP workspace
WINDOW >>> DUPLICATE
Close the original Image
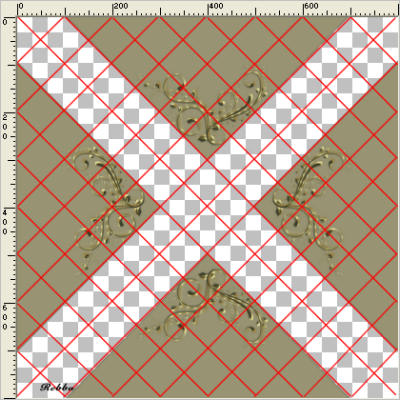
NOTE: these layers have been place and numbered
DO NOT MOVE PLACEMENT OF THE LAYERS!
|
STEP 2
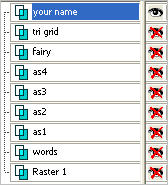
Set up LAYER PALETTE as shown |
|
STEP 3
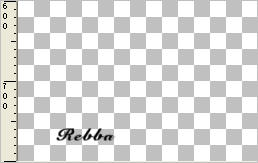
Select your TEXT TOOL
with font and settings of your choice
add your name to the bottom left corner of the layer.
Rename this layer Name.
|
|
STEP 4
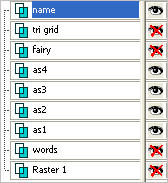
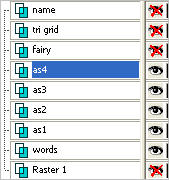
Set up LAYER PALETTE as shown
|
|
STEP 5
Right click on Title Bar and select
Copy merged from the options
In ANIMATION SHOP
Right click the workspace and select
'Paste As New Animation' from the options.
|
|
STEP 6
Back to PSP.
Open tri grid layer
With your Mover Tool
Move as1 up one triangle using the grid for placement
Move as2 left one triangle using the grid for placement
Move as3 down one triangle using the grid for placement
Move as4 right one triangle using the grid for placement
|
|
STEP 7
Turn off the tri grid layer
Set up LAYER PALETTE as shown
Right click on Title Bar and select
Copy merged from the options
|
|
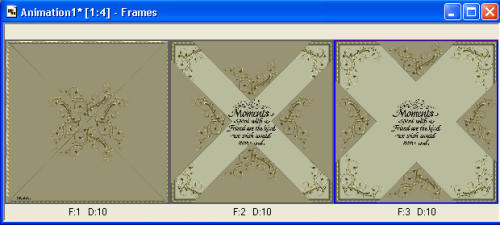
STEP 8
In ANIMATION SHOP
Right click top of frame image and select
'Paste After Current Frame' from the options. |
|
STEP 9
Back to PSP.
Turn on the tri grid layer
With your Mover Tool
Move as1 up one triangle using the grid for placement
Move as2 left one triangle using the grid for placement
Move as3 down one triangle using the grid for placement
Move as4 right one triangle using the grid for placement
|
|
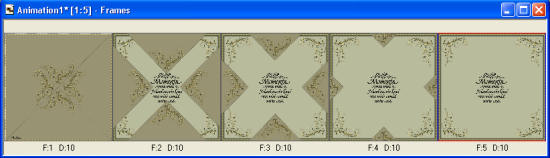
STEP 10
Turn off the tri grid layer
Right click on Title Bar and select
Copy merged from the options
In ANIMATION SHOP
Right click top of frame image and select
'Paste After Current Frame' from the options.
|
STEP 11
Back to PSP.
With your Mover Tool
Move as1 up one triangle using the grid for placement
Move as2 left one triangle using the grid for placement
Move as3 down one triangle using the grid for placement
Move as4 right one triangle using the grid for placement
|
|
STEP 12
Turn off the tri grid layer
Right click on Title Bar and select
Copy merged from the options
In ANIMATION SHOP
Right click top of frame image and select
'Paste After Current Frame' from the options.

|
STEP 13
Back to PSP.
Close the following layers as1-as4
Right click on Title Bar and select
Copy merged from the options
In ANIMATION SHOP
Right click top of frame image and select
'Paste After Current Frame' from the options.
|
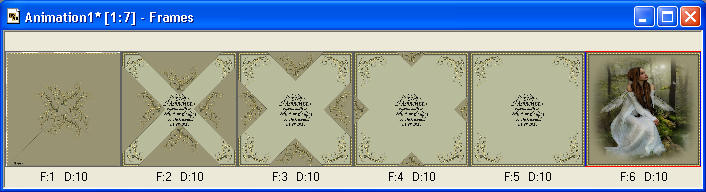
STEP 14
Back to PSP.
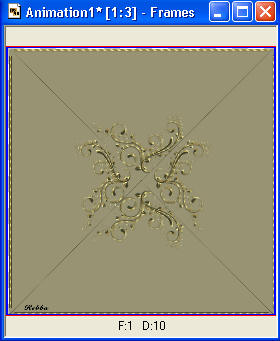
OPEN & Activate layer fairy
Close all other layers
Right click on Title Bar and select
Copy from the options
In ANIMATION SHOP
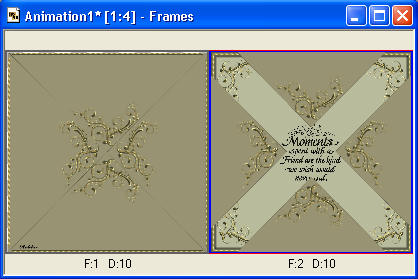
Scroll the arrow on the bottom of the frame to last frame (F:5)
Click the gray rim around the picture to highlight it,
Right click top of frame image and select
'Paste After Current Frame' from the options.
|
STEP 15
Select the gray edge around frame 5 (F:5)
Effects >> Insert Image Transition >> Star Wipe.
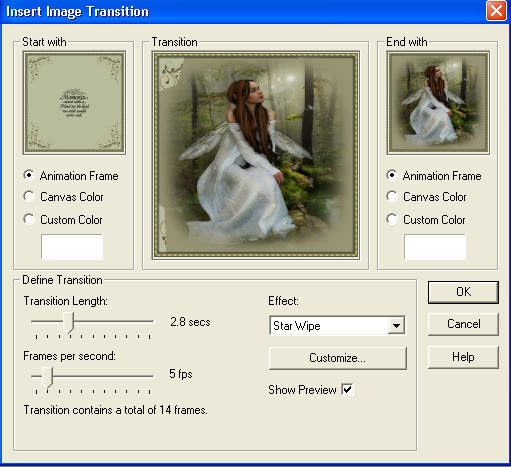 Click OK
|
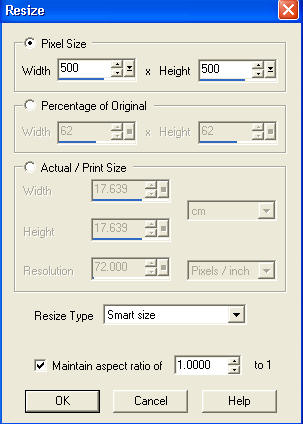
STEP 16
Edit >> Select All
Animation >> Resize Animation
500X500
|
|
Note: we need to cull the animation but we will
take out certain frames.
When we have all the ones selected we
will delete.
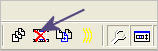
Recheck to make sure the right number is selected
then hit the delete icon
The frames change numbers when deleted |
|
STEP 17
Scroll the arrow on the bottom of the frame to sixth frame (F:6)
Click the gray rim around the picture to highlight it,
hold the Ctrl
key down
click frames 6,8,9,10,11,14,15,17,19,20
Hit the DELETE icon
|
STEP 18
EDIT >> Select All
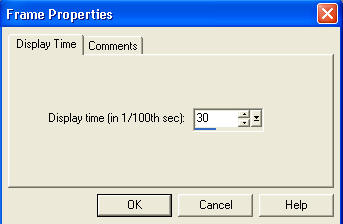
Right click on top of frames
Select 'Frame Properties' from the options
Display time =30 |
|
STEP 19
EDIT >> Select NONE
Right click inside frame 5 (F:5)
Select 'Frame Properties' from the options
Display time = 100
Right click inside frame 10 (F:10)
Select 'Frame Properties' from the options
Display time = 150
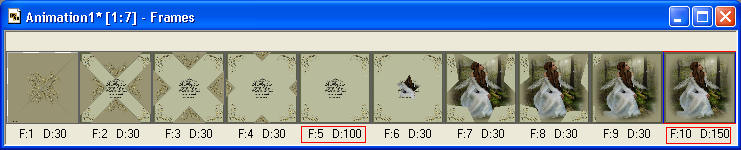
Edit >> Select All |
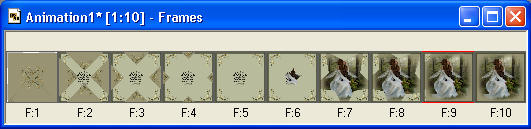
STEP 20
View >> Animation
and while it is still running,
File >> Save As
Locate the folder in which you wish to save it.
Name your animation.
With the Gif Optimiser keep pressing NEXT
until you get to the last one... click FINISH
Close the Animation
Close the frames.
Close Animation Shop
|
|
|
I hope you have enjoyed the tutorial
Rebba |
|
|