STEP 1
Open up the downloaded images in your PSP workspace and minimize.
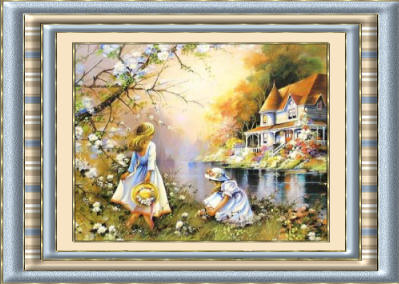
Open up the Scene image in your PSP workspace
WINDOW >>> DUPLICATE
Rename this layer scene
This is you 'working' image
Close the original Image
|
STEP 2
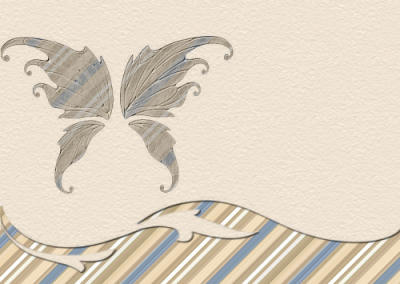
Activate the frame image
Right click on the Title Bar and select
COPY from the options.
Right click on the Title Bar of your 'working' image
and select PASTE AS NEW LAYER from the options.
Rename this layer frame
|
|
STEP 3
LAYERS >> NEW RASTER LAYER
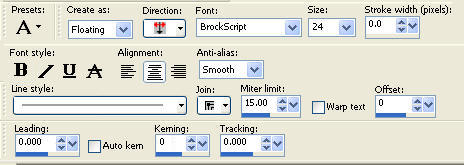
Select your TEXT TOOL
with font and settings of your choice
add your name to the bottom left corner of the layer.
Rename this layer Name. 3
Minimize your 'working' image for now
NOTE: Please decorate the frames on this
tutorial anyway you wish.
|
|
Your 'working' image will now have 3 layers
|
|
STEP 4
Open up the strip pat image in your PSP workspace
WINDOW >>> DUPLICATE
Close the original Image
Right click on the Title Bar and select COPY from the options.
Right click on the Title Bar of your 'working' image
and select PASTE AS NEW LAYER from the options.
Minimize your duplicated copy of the strip pat
|
STEP 5
Open up the beige pat image in your PSP workspace
Right click on the Title Bar and select COPY from the options.
Right click on the Title Bar of your 'working' image
and select PASTE AS NEW LAYER from the options.
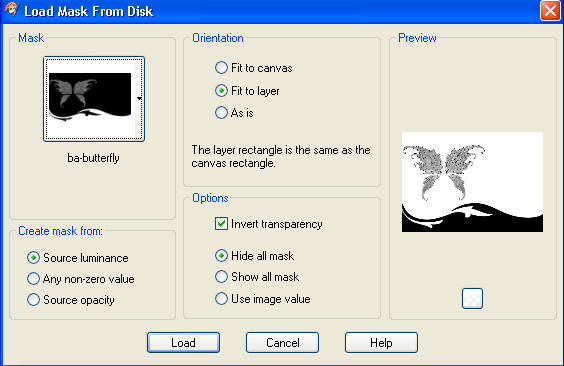
LAYERS >> Load/Save Mask >> Load Mask from disc
LAYERS >>> MERGE >>> MERGE GROUP
|
STEP 6
Effects >> 3D Effects >> Drop Shadow
Vertical and Horizontal = 1
Opacity = 100
Blur =0.00
Color = Black.
LAYERS >> MERGE >> MERGE DOWN
|
|
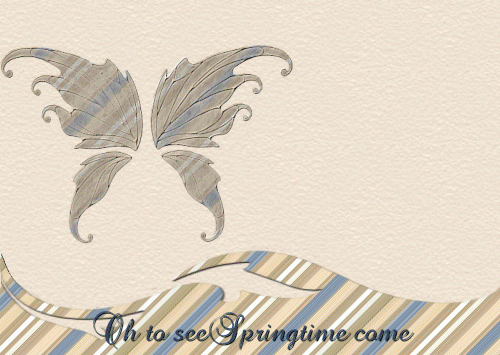
STEP 7
Load BLUE #415675 in your background
Close (NULL) foreground
Select your TEXT TOOL
 Enter any text you wish.
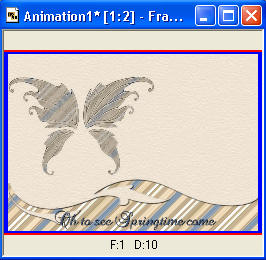
I chose "Oh to see Springtime come"

Click APPLY
Effects >> 3D Effects >> Drop Shadow
Vertical and Horizontal = 1
Opacity = 100
Blur =0.00
Color = Black.
Reposition with your MOVER tool
DESELECT

Rename this layer AS1
Minimize your 'working' image for now
|
STEP 8
Open up the duplicated strip pat image in your PSP workspace
Choose your SELECTION TOOL
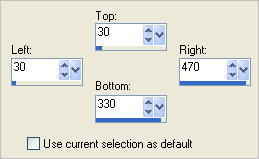
then click on the CUSTOM SELECTION symbol
and enter these coordinates.
|
|
STEP 9
Load Light Blue #8799ad in your foreground
LAYERS >> NEW RASTER LAYER
Flood Fill with Light Blue
EFFECTS >> PLUGINS >> Filters Unlimited 2
use these settings.
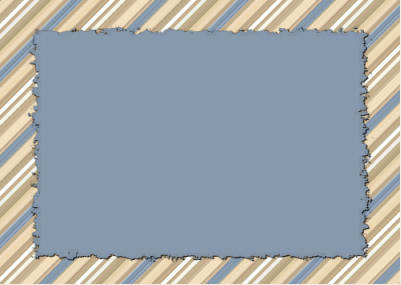
EDGES, SQUARE... Square Edge 04

DESELECT
|
STEP 10
Effects >> 3D Effects >> Drop Shadow
Vertical and Horizontal = 1
Opacity = 100
Blur =0.00
Color = Black.
|
|
STEP 11
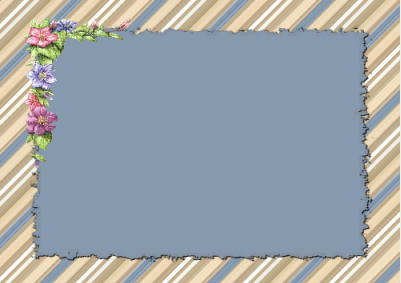
Activate the flower corner image
Right click on the Title Bar and select COPY from the options.
Right click on the Title Bar of your 'working' image
and select PASTE AS NEW LAYER from the options.
Reposition with your MOVER tool
|
|
|
|
STEP 12
In your MATERIALS PALETTE
NULL the foreground
Select your TEXT TOOL
Enter any text you wish.
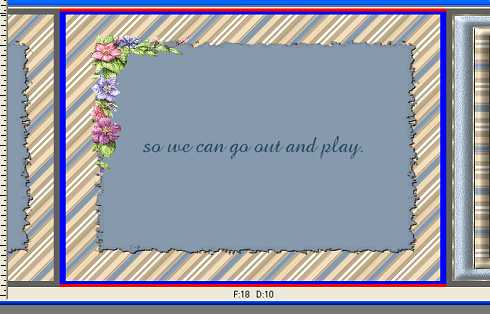
I chose "
so we can go out and play "
Centre your text on the blue background.
Effects >> 3D Effects >> Drop Shadow
Vertical and Horizontal = 1
Opacity = 100
Blur =0.00
Color = Black.

LAYERS >>> MERGE >>> MERGE VISIBLE
Right click on the Title Bar and select COPY from the options
Right click on the Title Bar of your 'working' image
and select PASTE AS NEW LAYER from the options.
Rename this layer AS2
|
STEP 13
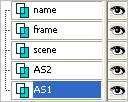
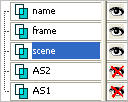
Set up LAYER PALETTE as shown |
|
STEP 14
Right click on Title Bar and select
Copy from the options
In ANIMATION SHOP
Right click the workspace and select
'Paste As New Animation' from the options. |
|
STEP 15
Back to PSP.
Activate the AS2 layer
Right click on Title Bar and select
Copy from the options
In ANIMATION SHOP
Right click top of frame image and select
'Paste After Current Frame' from the options.
|
|
STEP 16
Back to PSP.
Set up LAYER PALETTE as shown |
|
STEP 17
Right click on Title Bar and select
Copy Merged from the options
In ANIMATION SHOP
Right click top of frame image and select
'Paste After Current Frame' from the options.
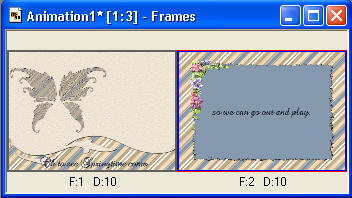
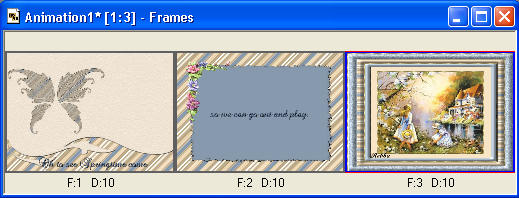
You should have 3 different frames attached together
|
STEP 18
Scroll the arrow on the bottom of the frame to first frame (F:1)
Click inside the frame to highlight it.
Effects >> Insert Image Transition.
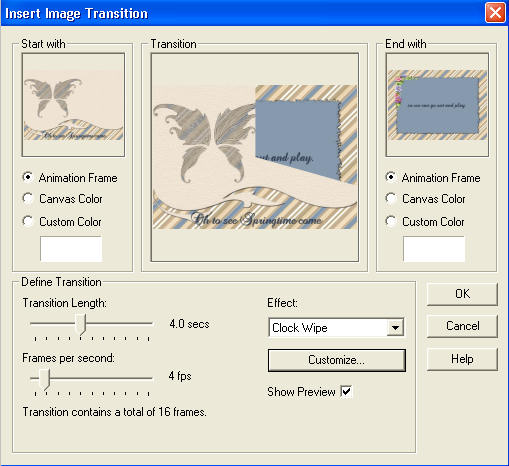 Click OK
|
STEP 19
Scroll the arrow on the bottom of the frame to 18 frame (F:18)
Click inside the frame to highlight it.
|
STEP 20
Effects >> Insert Image Transition.
Apply the Clock Wipe settings and click OK
View >> Animation
just to make sure that
both images are working
|
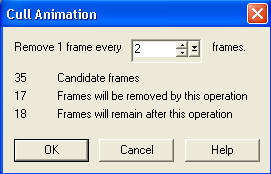
STEP 21
Edit >> Select All
Animation>> Cull Animation>> OK
|
|
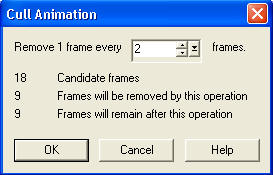
STEP 22
Edit >> Select All
Cull Animation again
NOTE: The culling took 2 pictures we need to replace
|
|
STEP 23
Back to PSP.
Open & Activate the AS2 layer
Right click on Title Bar and select
Copy from the options
In ANIMATION SHOP
Scroll arrow on bottom of frame to right frame 5 (F:5).
Click inside the frame to highlight it.
Right click top of frame image and select
'Paste After Current Frame' from the options. |
|
STEP 24
Back to PSP.
Set up LAYER PALETTE as shown |
|
STEP 25
Right click on Title Bar and select
Copy merged from the options
In ANIMATION SHOP
Scroll arrow on bottom of frame to right frame 10. (F:10)
Click inside the frame to highlight it.
Right click top of frame image and select
'Paste After Current Frame' from the options.

|
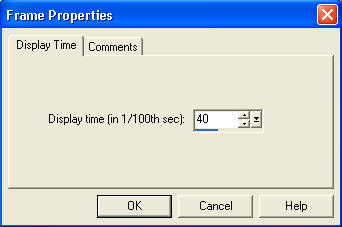
STEP 26
Edit >> Select All
Right click on title bar of frames
Select 'Frame Properties' from the options
Display time = 40 |
|
STEP 27
Scroll the arrow on the bottom of the frame to first frame (F:1)
Right click inside the frame
Select 'Frame Properties' from the options
Display time =100 |
STEP 28
Scroll the arrow on the bottom of the frame to sixth frame (F:6)
Right click inside the frame
Select 'Frame Properties' from the options
Display time = 100 |
STEP 29
Scroll the arrow on the bottom of the frame to last frame (F:11)
Right click inside the frame
Select 'Frame Properties' from the options
Display time = 150
|
STEP 30
View >> Animation
and while it is still running,
File >> Save As
Locate the folder in which you wish to save it.
Name your animation.
With the Gif Optimiser keep pressing NEXT
until you get to the last one... click FINISH
Close the Animation
Close the frames.
Close Animation Shop
|
|
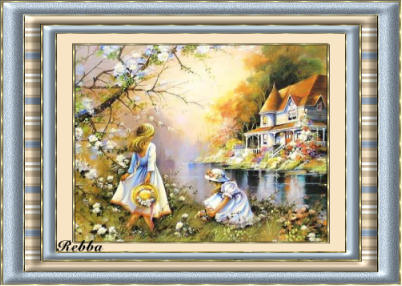
I hope you enjoyed the tutorial
Rebba |
|