This tutorial was written by Rebba to be shared with the Artistry Master Group.
JULY 2011
I have created the animation to have fun with but also to teach perhaps a
different way of doing it, I call My Way. I'm not a tutorial writer so this is more in
steps and doesn't expound on the design or PSP part of the tutorial. If you have any
STEP 1
Open up the downloaded images in your PSP workspace and minimize.
Open a new image 600 x 600
Transparent background
PSPX - X2: Colour Depth = 8bits/channel
PSPX3: Colour Depth RGB = 8bits/channel
Flood fill with #6e0606
Rename this layer "red bgd"
|
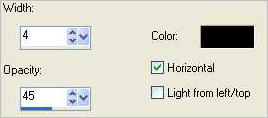
STEP 2
EFFECTS >> TEXTURE EFFECTS >> BLINDS
and use these settings.
|
|
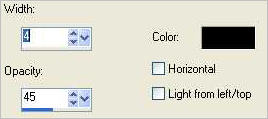
STEP 3
EFFECTS >> TEXTURE EFFECTS >> BLINDS
and use these settings.
|
|
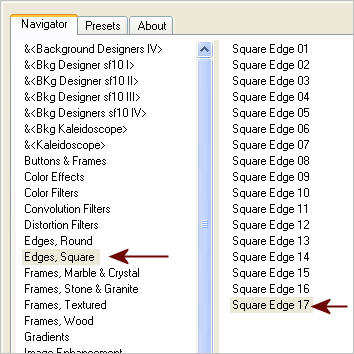
STEP 4
EFFECTS >> PLUGINS >> <I.C.NET Software> >>
FILTER UNLIMITED 2.0 >> Edges, Square
use these settings.
Square
Edge #17 |
|
STEP 5
LAYERS >> NEW RASTER LAYER
LAYERS >>> ARRANGE >>> SEND TO BOTTOM
Flood Fill with white
Rename this layer " white bgd "
|
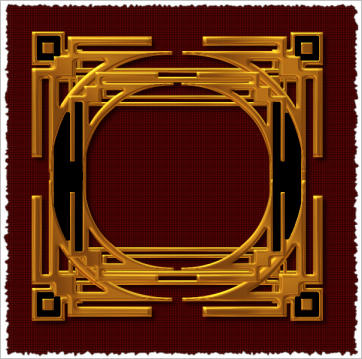
STEP 6
Open master frame tube in your PSP workspace
Right click on the Title Bar and select
COPY from the options.
Right click on the Title Bar of your 'working' image
and select PASTE AS NEW LAYER from the options.
LAYERS >> ARRANGE >> BRING TO TOP
Rename this layer " frame "
|
|
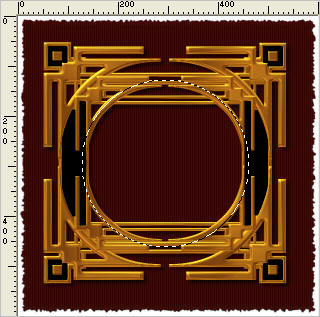
STEP 7
LAYERS >> NEW RASTER LAYER
Choose your SELECTION TOOL
Selection Type = CIRCLE
Mode = Replace
Feather = 0
Antialias = Checked
Starting at 295 pixels across and 295 pixels down
Draw a circle in the center until the
positions at the bottom right of your PSP screen
are the same as those below

|
|
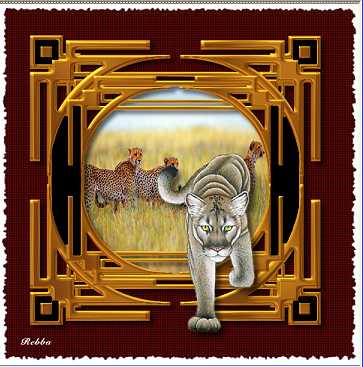
STEP 8
Open cid5A16F817-66BD.jpg
in your PSP workspace
Right click on the Title Bar and select
COPY from the options.
Right click on the Title Bar of your 'working' image
and select PASTE INTO SELECTION
from the options.
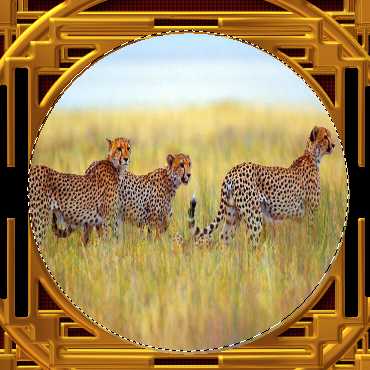
DESELECT
LAYERS >> ARRANGE >> MOVE DOWN
Rename this layer " scenery "
|
STEP 9
LAYERS >> NEW RASTER LAYER
Select your TEXT TOOL
with font and settings of your choice
add your name to the bottom left corner of the layer.
Rename this layer " name "
|
|
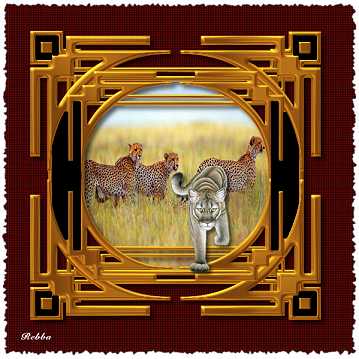
NOTE: for the cat tube I removed the legs and
reworked them so you don't have too.
|
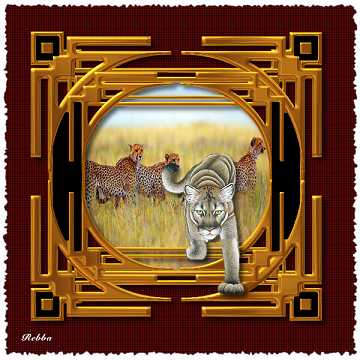
STEP 10
ACTIVATE THE TOP LAYER
Open as4 tube in your PSP workspace
Right click on the Title Bar and select
COPY from the options.
Right click on the Title Bar of your 'working' image
and select PASTE AS NEW LAYER from the options.
ADJUST >> SHARPNESS >> SHARPEN
Placement ----->>
Rename this layer " AS4"
CLOSE AS4
|
|
STEP 11
Open as3 tube in your PSP workspace
Right click on the Title Bar and select
COPY from the options.
Right click on the Title Bar of your 'working' image
and select PASTE AS NEW LAYER from the options.
ADJUST >> SHARPNESS >> SHARPEN
Placement ----->>
Rename this layer " AS3"
CLOSE AS3
|
|
STEP 12
CLOSE AS3
Open & Activate AS4
LAYERS >> DUPLICATE
CLOSE AS4
IMAGE >> RESIZE = 60%
Ensure "Resize all layers" is UNCHECKED
ADJUST >> SHARPNESS >> SHARPEN
Placement ----->>
Rename this layer AS2
|
|
STEP 13
CLOSE AS2
Open & Activate AS3
LAYERS >> DUPLICATE
CLOSE AS3
IMAGE >> RESIZE = 50%
Ensure "Resize all layers" is UNCHECKED
ADJUST >> SHARPNESS >> SHARPEN
Placement ----->>
Rename this layer AS1
|
|
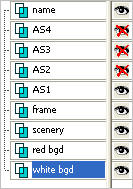
STEP 14
Set up LAYER PALETTE as shown
|
|
STEP 15
Right click on Title Bar and select
Copy merged from the options
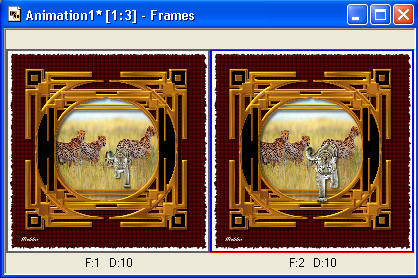
In ANIMATION SHOP
Right click the workspace and select
'Paste As New Animation' from the options. |
|
STEP 16
Back to PSP.
Open layer AS2
Close layer AS1
Right click on Title Bar and select
Copy merged from the options
In ANIMATION SHOP
Right click top of frame image and select
'Paste After Current Frame' from the options.
|
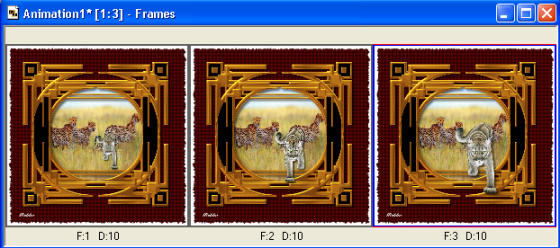
STEP 17
Back to PSP.
Open layer AS3
Close layer AS2
Right click on Title Bar and select
Copy merged from the options
In ANIMATION SHOP
Right click top of frame image and select
'Paste After Current Frame' from the options
|
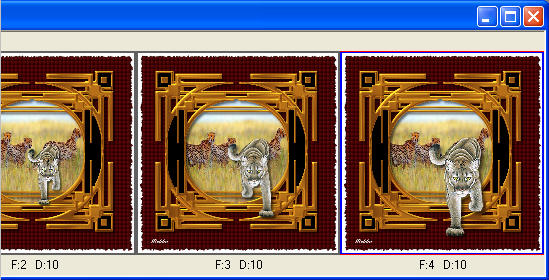
STEP 18
Back to PSP.
Open layer AS4
Close layer AS3
Right click on Title Bar and select
Copy merged from the options
In ANIMATION SHOP
Right click top of frame image and select
'Paste After Current Frame' from the options
|
STEP 19
Edit >> Select All
Right click on top of frames
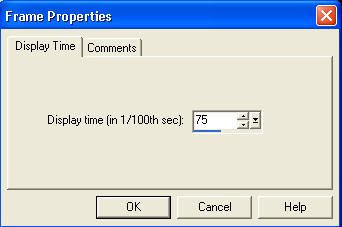
Select 'Frame Properties' from the options
Display time = 75 or speed you wish
|
|
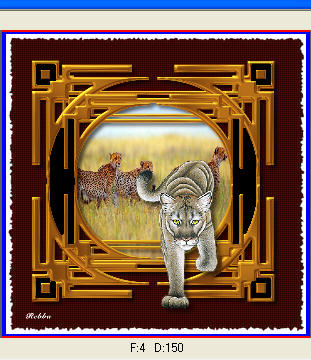
STEP 20
Select the gray edge around frame 4 (F:4)
Right click on top of frames
Select 'Frame Properties' from the options
Display time = 150
|
|
STEP 21
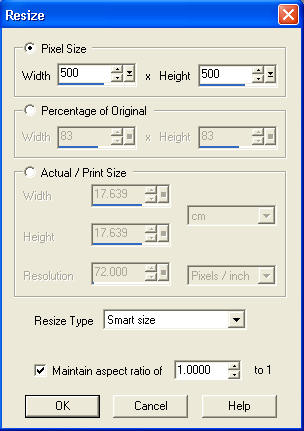
Edit >> Select All
Animation >> Resize Animation
500 pixel width & height |
|
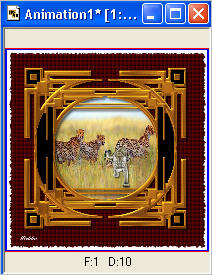
STEP 22
View >> Animation
and while it is still running,
File >> Save As
Locate the folder in which you wish to save it.
Name your animation.
With the Gif Optimiser keep pressing NEXT
until you get to the last one... click FINISH
Close the Animation
Close the frames.
Close Animation Shop |
| |
I hope you enjoyed the tutorial.
Rebba |
| |