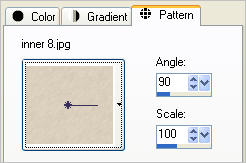
STEP 1
In your MATERIALS PALETTE
Load the ' inner 8 ' pattern in your foreground
using these settings
|
|
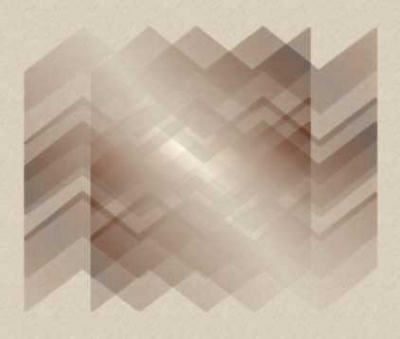
STEP 2
Open up the downloaded images in your PSP workspace and minimize.
Open a new image 650 x 550
Transparent background
PSPX - X2: Colour Depth = 8bits/channel
PSPX3: Colour Depth RGB = 8bits/channel
This is your "working" image
Flood fill with the pattern
Rename this layer bgd
|
STEP 3
Activate the master mask image
Right click on the Title Bar and select COPY from the options.
Right click on the Title Bar of your 'working' image
and select PASTE AS NEW LAYER from the options.
Rename this layer master mask
|
|
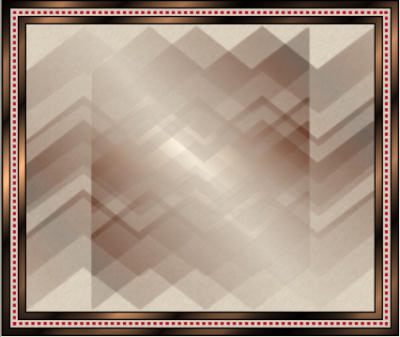
STEP 4
Activate the frame image
Right click on the Title Bar and select COPY from the options.
Right click on the Title Bar of your 'working' image
and select PASTE AS NEW LAYER from the options.
Rename this layer frame
|
|
STEP 5
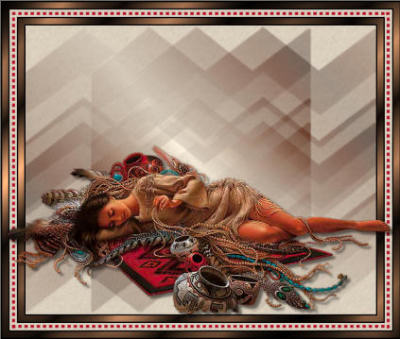
Activate the Image16Native Treasures_LR image
Right click on the Title Bar and select COPY from the options.
Right click on the Title Bar of your 'working' image
and select PASTE AS NEW LAYER from the options
IMAGE >> RESIZE = 70%
Ensure "Resize all layers" is UNCHECKED
ADJUST >>> SHARPNESS >>> SHARPEN
Reposition with your MOVER tool
Effects >> 3D Effects >> Drop Shadow
Vertical and Horizontal = 5
Opacity = 50
Blur 5.00
Color = Black.
Rename this layer tube
|
|
STEP 6
Activate the Text image
Right click on the Title Bar and select COPY from the options.
Right click on the Title Bar of your 'working' image
and select PASTE AS NEW LAYER from the options.
Reposition with your MOVER TOOL
Rename this layer text
|
|
STEP 7
Activate the blk outline image
Right click on the Title Bar and select COPY from the options.
Right click on the Title Bar of your 'working' image
and select PASTE AS NEW LAYER from the options.
Rename this layer blk outline
|
|
STEP 8
LAYERS >> NEW RASTER LAYER
Select your TEXT TOOL
with font and settings of your choice
add your name to the bottom left corner of the layer.
Rename this layer Name.
|
|
NOTE: we have everything on this working except the master scroll image but because
of the way the scroll fits we will be working between ANIMATION SHOP and PSP.
|
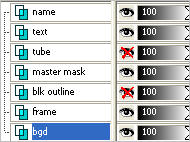
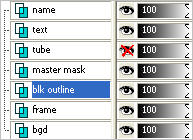
STEP 9
Set up LAYER PALETTE as shown
|
|
STEP 10
Right click on Title Bar and select
Copy merged from the options
In ANIMATION SHOP
Right click the workspace and select
'Paste As New Animation' from the options.
|
|
STEP 11
Back to PSP.
Activate the master scroll 1 part image
Right click on Title Bar and select
Copy from the options
In ANIMATION SHOP
Right click the workspace and select
'Paste As New Animation' from the options.
Edit >> Copy
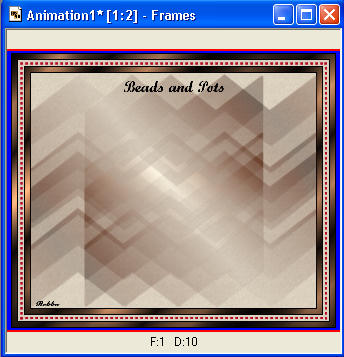
Edit >> Paste After Current Frame
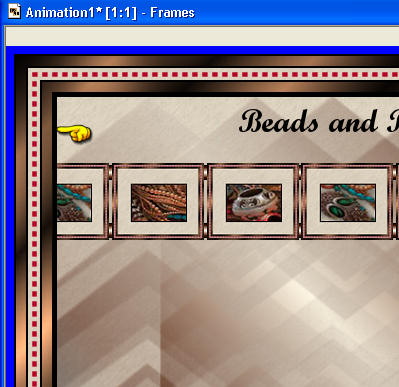
Scroll the arrow on the bottom of the frame to first frame (F:1)
Click the gray rim around the picture to highlight it.
|
STEP 12
Effects >> Insert Image Transition >> Wipe
|
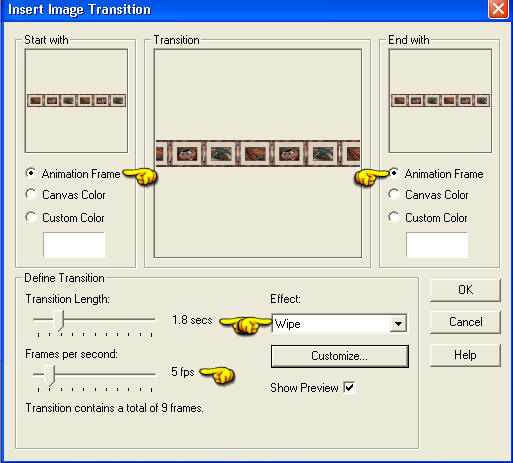
STEP 13
Click the Customize button
Enter these settings
CLICK OK
CLICK OK
|
|
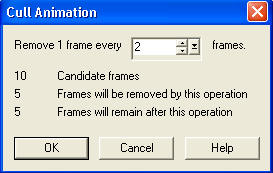
STEP 14
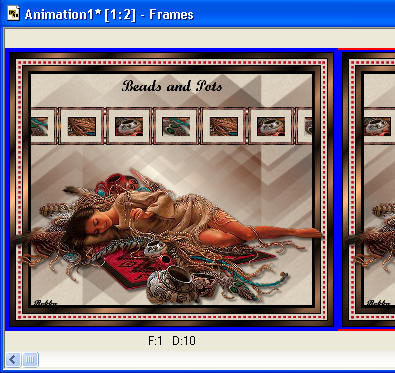
Scroll the arrow on the bottom of the frame to first frame (F:1)
Click the blue rim around the picture to highlight it.
DELETE FRAME 1
Animation >>Cull animation
|
|
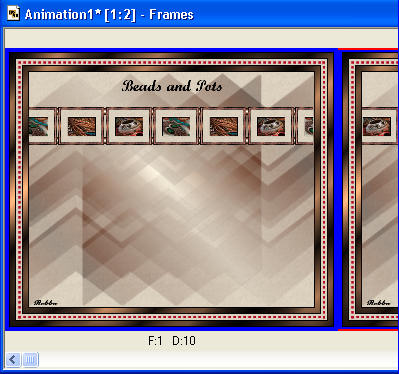
STEP 15
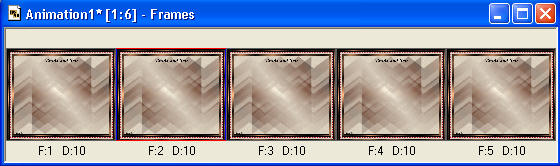
Activate the working image (Animation1*)
Edit >> Copy
Right click top of frame image and select
'Paste After Current Frame' from the options.
Make sure you 'CAPS LOCK"
key is on
Depress your CTRL key and press the letter L
(Upper Case) times 3
You should have 5 frames
(same number as scrolling image).
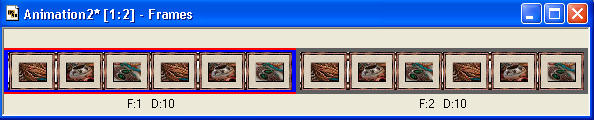
Activate the scroll image (Animation2*)
Edit >> Select All
Edit >> Copy |
NOTE: when you add the scroll to the working image
it is difficult to get it lined up across the frame but the
next step will take care if it. It doesn't touch just try to get it even on each side.
|
STEP 16
Activate the working image (Animation1*)
Edit >> Select All
Edit >> Propagate Paste
Edit >> Paste into selected frame
The image will be attached to the mouse
center best you can and click to place the image.
Minimize the scroll image |
|
STEP 17
Back to PSP.
OPEN and Activate the blk outline layer
Right click on the Title Bar
and select COPY from the options.
|
|
STEP 18
In ANIMATION SHOP
Right click the workspace and select
'Paste As New Animation' from the options.
Edit >> Copy
Activate the working image (Animation1*)
ZOOM in on frame 1 (F:1)
Edit >> Paste into selected frame
Center over the inter frame area and click to place.
|
|
STEP 19
Back to PSP.
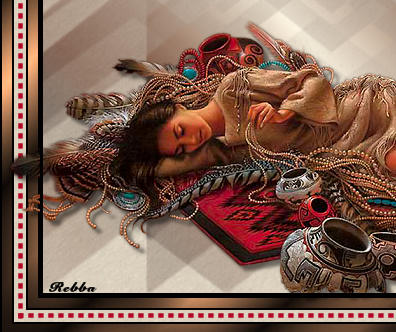
OPEN and Activate tube layer
Right click on the Title Bar and select COPY from the options.
In ANIMATION SHOP
Right click the workspace and select
'Paste As New Animation' from the options.
Edit >> Copy
Activate the working image (Animation1*)
ZOOM in on frame 1 (F:1)
Edit >> Paste into selected frame
Move to bottom click to place
|
|
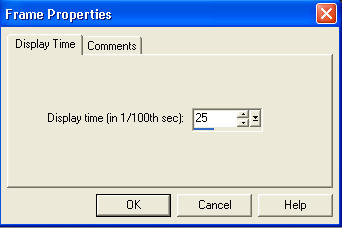
STEP 20
Right click on top of frames
Select 'Frame Properties' from the options
Display time = 25 |
|
STEP 21
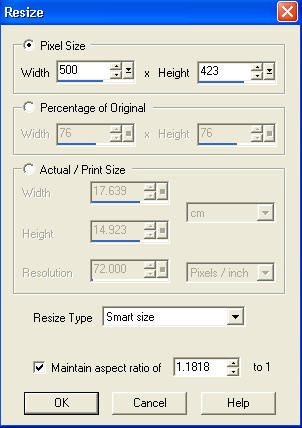
Animation >> Resize Animation
Use these settings... or make it smaller
if you wishl |
|
STEP 22
View >> Animation
and while it is still running,
File >> Save As
Locate the folder in which you wish to save it
Name your animation.
With the Gif Optimiser keep pressing NEXT
until you get to the last one... click FINISH
Close the Animation
Close the frames.
Close Animation Shop
|
|
|
I hope you have enjoyed the tutorial
Rebba
|
|
|