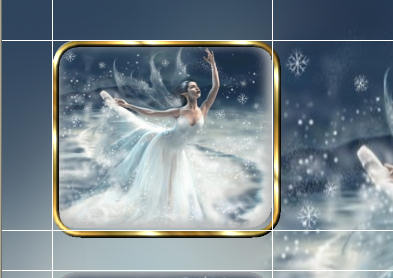
STEP 1
Open up the downloaded images in your PSP workspace and minimize.
Open up the background image in your PSP workspace
WINDOW >>> DUPLICATE
Close the original Image
Minimize the duplicated background image
|
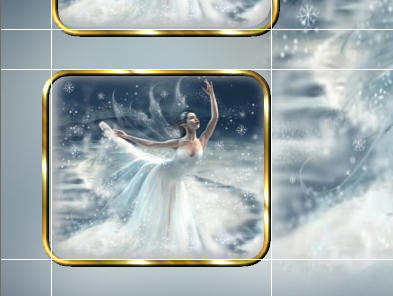
STEP 2
Maximize the single image side image
Right click on Title Bar and select
Copy from the options
In ANIMATION SHOP
Right click the workspace and select
'Paste As New Animation' from the options.
Effects >> Insert Image Effects.
Click on CUSTOMIZE button and enter these settings
EFFECT = PINCH
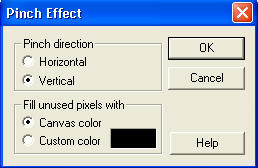
Click OK
Then enter these settings
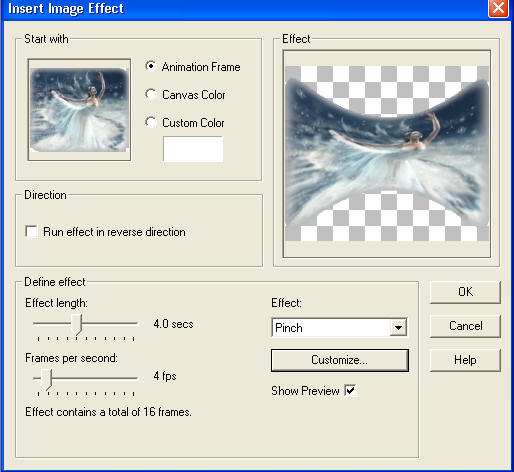
Click OK
|
STEP 3
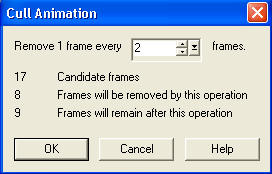
EDIT >> Select All
ANIMATION>> CULL ANIMATION
|
|
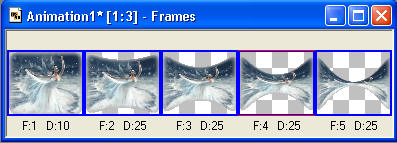
STEP 4
EDIT >> Select All
CULL ANIMATIONS 1 more time.
EDIT >> Select All
FILE>>Export frames to PSP
Minimize AS for now
|
|
NOTE 1:
If you can't "FILE >> Export Frames to PSP...
Because the instruction is 'greyed out'
Then do the following:
In ANIMATION SHOP
EDIT >> SELECT ALL
EDIT >> COPY
Hold down the SHIFT key and depress the letter "X"
Go back to PSP
Right click in your workspace amd select
PASTE AS NEW IMAGE .
All the layers will be named "Frame 1"
Rename the frames starting from the 2nd bottom layer...... to Frame 2 to Frame 5
MINIMIZE the animation in Animation Shop
|
STEP 5
BACK TO PSP
Maximize the background image
Rename this layer bgd
|
|
Now we are going to insert some GUIDES
Follow the next instruction.... STEP 6
then to ensure the GUIDES are exact....
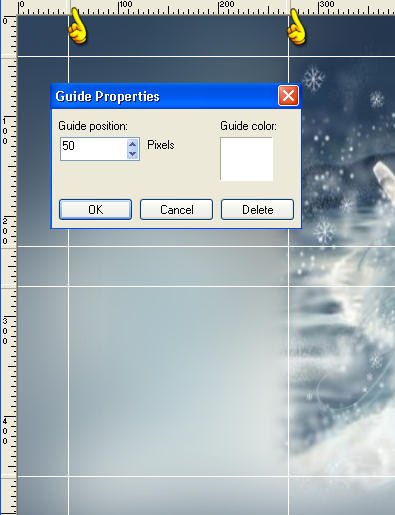
RIGHT CLICK on the raised part of the ruler
and insert the exact position
|
|
STEP 6
VIEW >>> RULERS
VIEW >>> GUIDES
VIEW >> SNAP TO GUIDES
We'll do the horizontal GUIDES first...
Place your cursor on the top ruler and drag down to the
460 pixel mark on your left ruler.
Place your cursor on the top ruler and drag down to the
270 pixel mark on your left ruler.
Place your cursor on the top ruler and drag down to the
230 pixel mark on your left ruler.
Place your cursor on the top ruler and drag down to the
40 pixel mark on your left ruler.
Now we'll do the vertical GUIDES
Place your cursor on the left ruler and drag across to the
270 pixel mark on your top ruler.
Place your cursor on the left ruler and drag across to the
50 pixel mark on your top ruler.
|
|
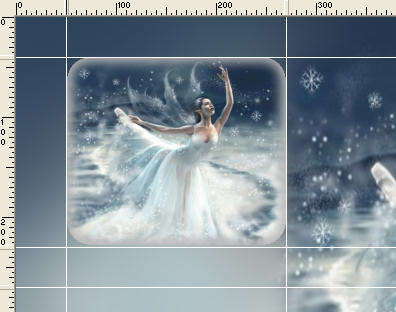
STEP 7
On your frames (side animation) imported from Animation Shop
Activate frame 1
Right click on the Title Bar and select COPY from the options.
Activate the background image
Right click on the Title Bar of your 'working' image
and select PASTE AS NEW LAYER from the options
Move the side ballerina to into the top position
|
|
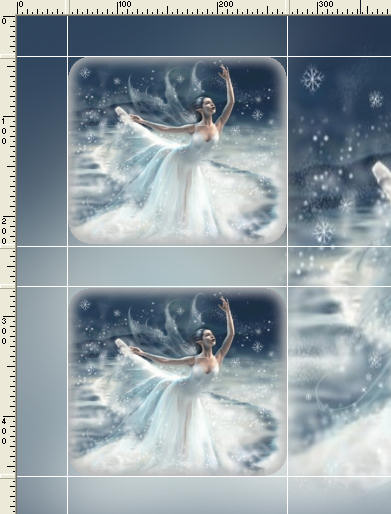
STEP 8
LAYERS >> DUPLICATE
Move duplicate down into lower place
Making sure that these layers snap into place. |
|
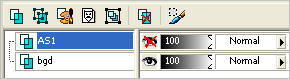
STEP 9
CLOSE bgd layer
LAYERS >>> MERGE >> VISIBLE.
Rename this layer AS 1 and close it
OPEN the bgd layer
|
|
STEP 10
On your frames (side animation) imported from Animation Shop
Close frame 1
Open & Activate frame 2
Right click on the Title Bar and select COPY from the options.
|
|
STEP 11
Right click on the Title Bar of your 'working' image
and select PASTE AS NEW LAYER from the options.
Move this into top place
LAYERS >> DUPLICATE
Move down into lower place
Making sure these snap into place
|
|
STEP 12
CLOSE bgd layer
LAYERS >>> MERGE >> VISIBLE.
Rename this layer AS2 |
|
STEP 13
Continue copying the next animation frame onto the working image
duplicate it, set placement of both as above,
close bgd layer
merge >>> visible
Rename each layer AS3 to AS5.
|
|
STEP 14
When ALL 5 frames are copied onto the working image
If you were able to export from Animation Shop...
ON THE SIDE ANIMATED IMAGE
click the X to close click no for save
click yes to update back to AS.
MINIMIZE animation FOR NOW
If you had to manually export the frames...
Close the Frames image
|
STEP 15
Back to PSP.
Close layers AS2 to AS5 on your working image
Activate the bgd layer
Activate the small frame image
Right click on the Title Bar and select COPY from the options.
Right click on the Title Bar of your 'working' image
and select PASTE AS NEW LAYER from the options.
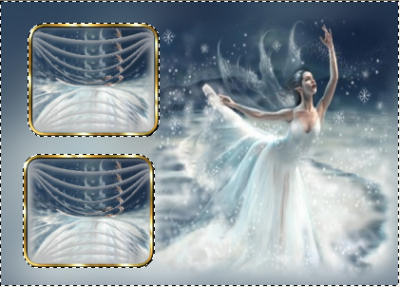
Place the small frame around the top side image |
|
STEP 16
LAYERS >> DUPLICATE
Place the small frame around the lower side image
|
|
STEP 17
LAYERS >>> MERGE >>> MERGE DOWN
Rename this layer small frames
VIEW>> GUIDES
(This will remove the GUIDES)
|
STEP 18
With your MAGIC WAND
Mode = Replace
Match Mode = RGB Value
Tolerance = 0
Feather = 0
Antialias = UNchecked
Sample Merged = UNCHECKED
PSP9 - X3: Check CONTIGUOUS
PSPX - X3: There is no " Sample Merged"
PSPX - X3: Use all layers = UNChecked
Click outside small frames |
|
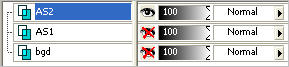
STEP 19
Now open and activate each AS layer one at a time and delete
this will remove any image outside of frame.
DESELECT
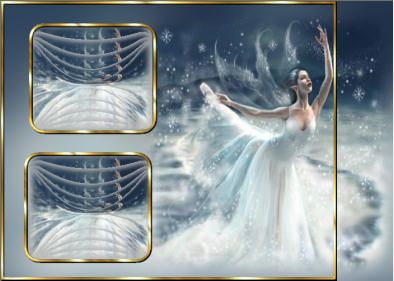
Activate the small frames layer
LAYERS >>> ARRANGE >>> BRING TO TOP
Activate the large frame image
Right click on the Title Bar and select COPY from the options.
Right click on the Title Bar of your 'working' image
and select PASTE AS NEW LAYER from the options.
Rename this layer large frame
Select your MOVER tool
Click on the frame
On your keyboard depress your LEFT ARROW
until the frame is on the left of your image
|
|
STEP 20
Activate the bgd layer
Select your DEFORMATION tool
Mode = SCALE
use default settings
PSPX-X3:Select your PICK tool
Drag the right centre node left to the right edge of the large frame
Click the RESET RECTANGLE arrow
Select the MOVER tool to disengage
the DEFORMATION tool (PICK tool)
|
|
STEP 21
Activate the large frame layer
With your MAGIC WAND.... Same settings.
Select the transparent area to the right of the frame
|
|
STEP 22
SELECTIONS >>> INVERT
IMAGE >>> Crop to selection
LAYERS >> NEW RASTER LAYER
Select your TEXT TOOL
with font and settings of your choice
add your name to the bottom left corner of the layer.
Rename this layer Name.
|
|
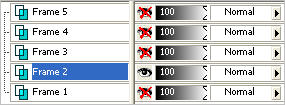
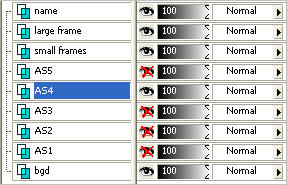
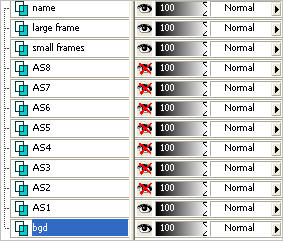
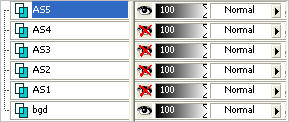
STEP 23
Set up LAYER PALETTE as shown
OPEN & Activate layer AS4
Close all other AS layers
|
|
STEP 24
LAYERS >>> DUPLICATE
Rename this layer AS6 and move above AS5
|
|
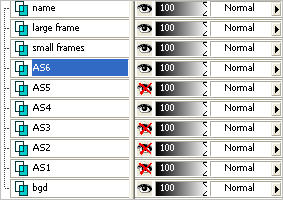
STEP 25
Open & Activate layer AS3
Close all other AS layers
LAYERS >>> DUPLICATE
Rename this layer AS7 and move above AS6
Open & Activate layer AS2
Close all other AS layers
LAYERS >>> DUPLICATE
Rename this layer AS8 and move above AS7
Set up LAYER PALETTE as shown
|
|
STEP 26
Right click on Title Bar and select
Copy merged from the options
In ANIMATION SHOP
Right click the workspace and select
'Paste As New Animation' from the options.
|
|
STEP 27
Back to PSP.
Close AS1 Open AS2
Right click on Title Bar and select
Copy merged from the options
Right click top of frame image and select
'Paste After Current Frame' from the options.
|
STEP 28
Continue these steps until all 8 layers has been copied into
Animation Shop
|
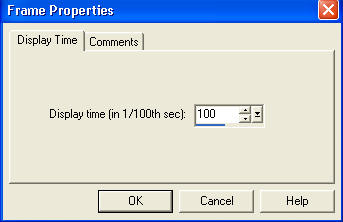
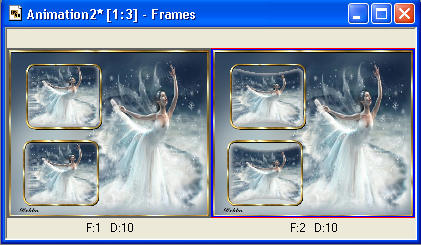
STEP 29
Edit >> Select All
Right click on top of frames
Select 'Frame Properties' from the options
Display time = 40
|
|
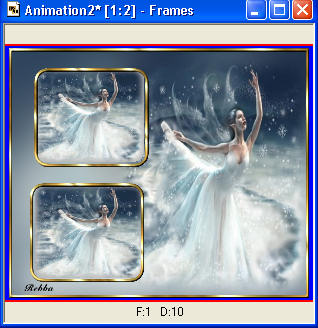
STEP 30
Scroll the arrow on the bottom of the frame to first frame (F:1)
Click the BLUE rim around the picture to highlight it,
|
 |
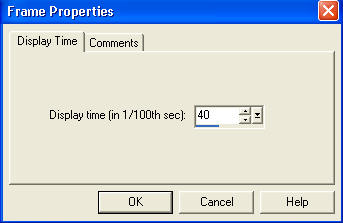
STEP 31
Right click on top of frames
Select 'Frame Properties' from the options
Display time = 100 |
|
STEP 32
View >> Animation
and while it is still running,
File >> Save As
Locate the folder in which you wish to save it.
Name your animation.
With the Gif Optimiser keep pressing NEXT
until you get to the last one... click FINISH
Close the Animation
Close the frames.
Close Animation Shop |
|
|
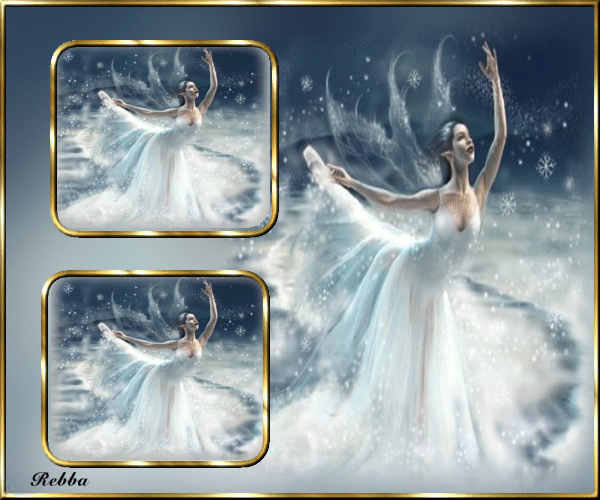
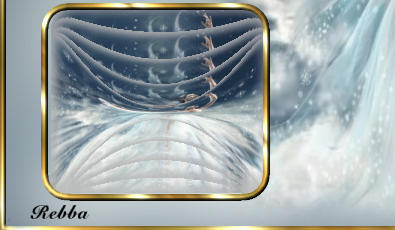
I hope you enjoyed the tutorial and didn't give up.
Rebba |