This tutorial was written by Rebba to be shared with the Artistry Master Group.
JULY 2011
I have created the animation to have fun with but also to teach perhaps a
different way of doing it, I call My Way. I'm not a tutorial writer so this is more in
steps and doesn't expound on the design or PSP part of the tutorial. If you have any
STEP 1
Open up the downloaded images in your PSP workspace and minimize.
Open up the bg.pspimage in your PSP workspace
WINDOW >>> DUPLICATE
Close the original Image
Rename this layer "bgd"
|
STEP 2
Open 28.psp tube in your PSP workspace
Right click on the Title Bar and
select COPY from the options.
Right click on the Title Bar of
your 'working' image
and select
PASTE AS NEW LAYER from the options.
|
STEP 3
Select the Deform Tool
PSPX-X3: Select your PICK tool
You may have to ZOOM in
to do the following.
Using default setting
pull out on top and bottom centre nodes,
leaving
10 pixels space from edge.
push in on left and right centre nodes,
leaving 10 pixels space from edge.
Click the RESET RECTANGLE arrow
Click the MOVER TOOL
to deselect the deform tool.
Rename this layer AS1
|
|
STEP 4
LAYERS >> DUPLICATE >>TWICE
Rename these layers AS2 and AS3
|
|
STEP 5
Open 1228507000-feerie.psp tube
in your PSP workspace
Activate the
Copie (2) sur Fusionné layer
Right click on the Title Bar and
select COPY from the options.
Right click on the Title Bar of your
'working' image
and select
PASTE AS NEW LAYER from the options.
IMAGE >> RESIZE = 85%
Ensure "Resize all layers" is UNCHECKED
ADJUST >> SHARPNESS >> SHARPEN
Activate the bgd layer
SELECTIONS >> SELECT ALL
|
|
STEP 6
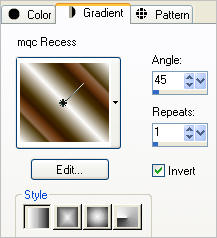
In your MATERIALS PALETTE
Load BLACK #000000 in your background
Load the ' mqc recess ' gradient
in your foreground
using these settings . |
|
STEP 7
LAYERS >> NEW RASTER LAYER
Flood Fill with black
SELECTIONS >> MODIFY >>CONTRACT = 2
EDIT >> CLEAR
Flood Fill with gradient
SELECTIONS >> MODIFY >>CONTRACT = 10
EDIT >> CLEAR
Flood Fill with black
SELECTIONS >> MODIFY >>CONTRACT = 2
EDIT >> CLEAR
SELECTIONS >> INVERT
|
|
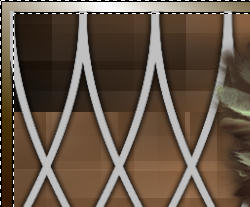
STEP 8
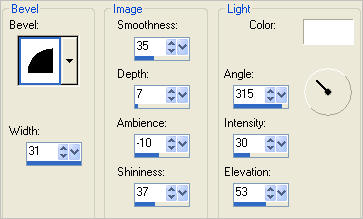
EFFECTS >> 3D EFFECTS >> INNER BEVEL |
|
STEP 9
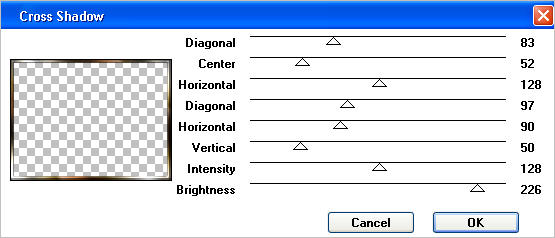
EFFECTS >> PLUGINS >> GRAPHICS PLUS >> CROSS SHADOW
use these settings.
|
DESELECT

Rename this layer " frame "
|
STEP 10
LAYERS >> NEW RASTER LAYER
Select your TEXT TOOL
with font and settings of your choice
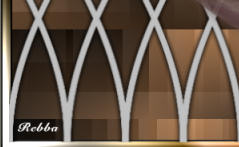
add your name to the bottom left corner of the layer.
Rename this layer Name.
|
|
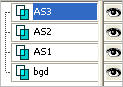
STEP 11
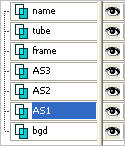
Set up LAYER PALETTE in order shown
with AS1 Activated
|
|
STEP 12
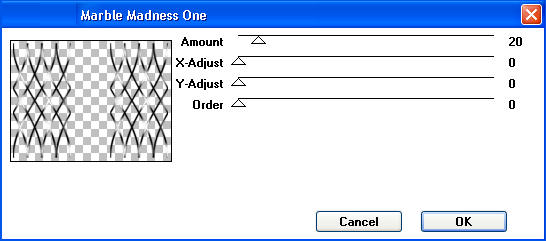
EFFECTS >> PLUGINS >> Filter Factory Gallery A >> Marble Madness One
use these settings.
 EFFECTS >> EDGE EFFECTS >> ENHANCE
Activate the AS2 Layer
EFFECTS >> PLUGINS >> Filter Factory Gallery A >> Marble Madness One
and change the AMOUNT to 29
EFFECTS >> EDGE EFFECTS >> ENHANCE
Activate the AS3 Layer
EFFECTS >> PLUGINS >> Filter Factory Gallery A >> Marble Madness One
and change the AMOUNT to 37
EFFECTS >> EDGE EFFECTS >> ENHANCE
|
STEP 13
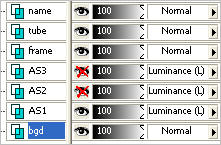
In your Layer Palette
change the BLEND MODE
on layers AS1, AS2, AS3
to Luminance (L)
Set up LAYER PALETTE as shown |
|
STEP 14
Right click on Title Bar and select
Copy merged from the options
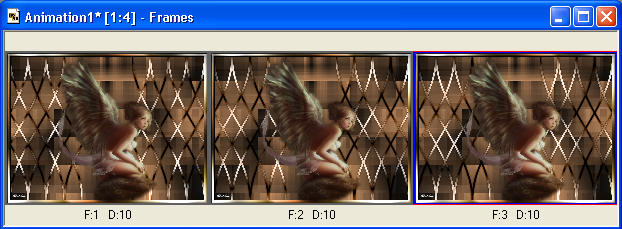
In ANIMATION SHOP
Right click the workspace and select
'Paste As New Animation' from the options.
|
STEP 15
Back to PSP.
OPEN layer AS2
Close layer AS1
Right click on Title Bar and select
Copy merged from the options
In ANIMATION SHOP
Right click top of frame image and select
'Paste After Current Frame' from the options.
|
STEP 16
Back to PSP.
OPEN layer AS3
Close layer AS2
Right click on Title Bar and select
Copy merged from the options
In ANIMATION SHOP
Right click top of frame image and select
'Paste After Current Frame' from the options.
|
STEP 17
Edit >> Select All
Animation >> Resize Animation

View >> Animation
and while it is still running,
File >> Save As
Locate the folder in which you wish to save it.
Name your animation.
With the Gif Optimiser keep pressing NEXT
until you get to the last one... click FINISH
Close the Animation
Close the frames.
Close Animation Shop |
| |
I hope you enjoyed the tutorial
Rebba |
| |