STEP 1
Open up the clownfish.jpg image in your PSP workspace
WINDOW >>> DUPLICATE
Close the original Image
LAYERS >> Promote background layer
VIEW >>> RULERS
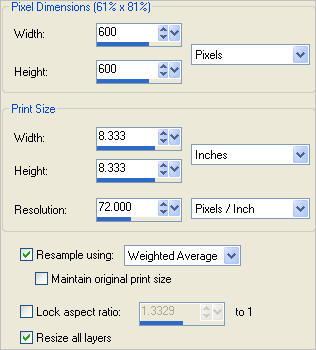
IMAGE >> RESIZE =600x600
Ensure "Resize all layers" is UNCHECKED
Rename this layer master bgd
|
STEP 2
IMAGE >> RESIZE =600x600
Ensure "Resize all layers" is CHECKED
Lock aspect ratio = unchecked
|
|
STEP 3
NOTE:
You may use image of choice but must be sized 600x600 pixels.
VIEW >>> GRID
VIEW >>> CHANGE GRID, GUIDE & SNAP PROPERTIES
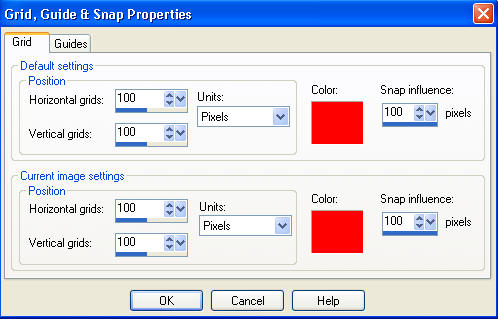
VIEW >> SNAP TO GRID
|
STEP 4
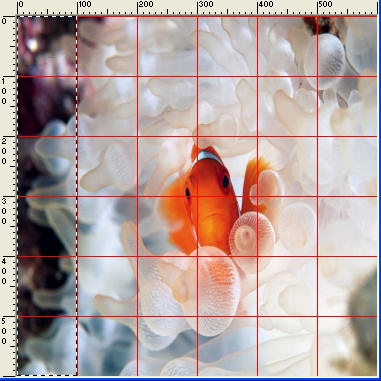
On our working image
Choose your SELECTION TOOL
Selection Type = Rectangle
Mode = Replace
Feather = 0
Antialias = Checked
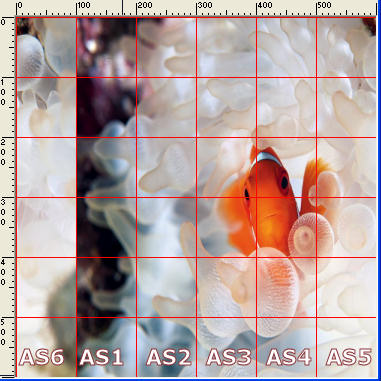
Starting at 0 pixels across and 0 pixels down
drag your cursor to 100 pixels across and 600 pixels down and release
|
|
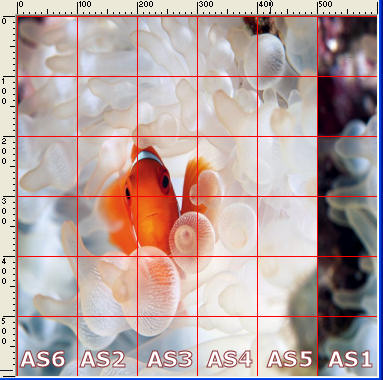
STEP 5
Selections >> Promote Selection to Layer
Rename this layer AS1
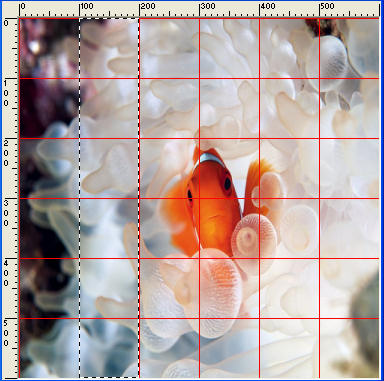
ACTIVATE master bgd
Hover mouse over the selection until the +shows
hold down your right mouse button and
move the marching ant section to the next grid 100 to 200
|
|
STEP 6
Selections >> Promote Selection to Layer
Rename this layer AS2
ACTIVATE master bgd
Continue moving the selection over one grid ,
on master bgd each time promote selection to layer
and
name that layer the next AS number.
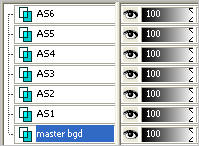
You will have AS1-AS6.
DESELECT
VIEW >>> GRID
Set up LAYER PALETTE as shown
|
|
STEP 7
Open a new image 600 x 600
Transparent background
PSPX - X2: Colour Depth = 8bits/channel
PSPX3: Colour Depth RGB = 8bits/channel
We'll call the new image our Sphere image |
STEP 8
On your 'working image'
Right click on Title Bar and select
Copy merged from the options
OPEN your empty Sphere image
Right click on the Title Bar of your 'sphere' image
and select PASTE AS NEW LAYER from the options.
Rename this layer AS1
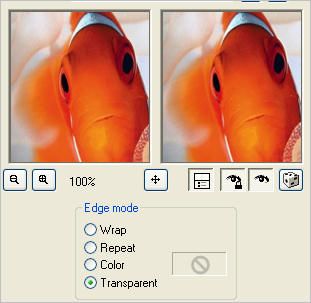
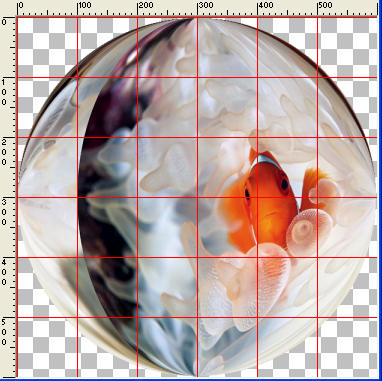
EFFECTS >> GEOMETRIC EFFECTS >> CIRCLE
|
|
STEP 9
On working image
Close master bgd and AS1
VIEW >>> GRID
|
|
STEP 10
With the Mover tool move the AS2 left into the AS1 place.
With the Mover tool move the AS3 left into the AS2 place.
With the Mover tool move the AS4 left into the AS3 place.
With the Mover tool move the AS5 left into the AS4 place.
With the Mover tool move the AS6 left into the AS5 place.
|
|
STEP 11
CLOSE AS2
OPEN AS1
|
|
STEP 12
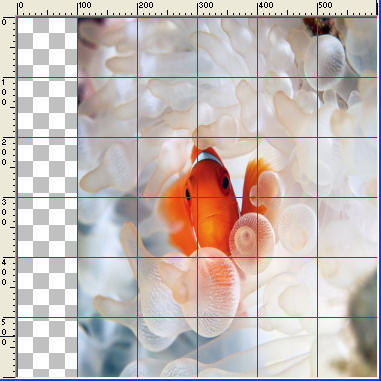
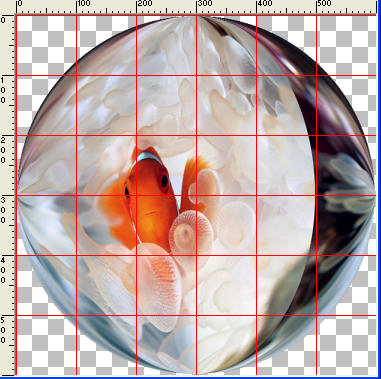
With the move tool move the AS1 into the AS6 (right blank area) place.
OPEN AS2
THIS IS WHAT YOUR image should look like
|
|
STEP 13
Right click on Title Bar and select
Copy merged from the options
OPEN your blank Sphere image
Right click on the Title Bar of your 'sphere' image
and select PASTE AS NEW LAYER from the options.
Rename this layer AS2
EFFECTS >> GEOMETRIC EFFECTS >> CIRCLE
Same settings
This is what your Sphere image should look like
|
|
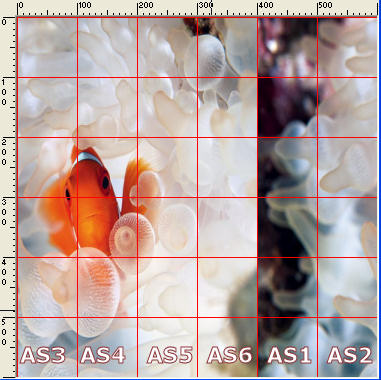
STEP 14
ON WORKING IMAGE
With the Mover tool move the AS1 left into the AS5 place.
(It will disappear)
With the Mover tool move the AS2 right into the AS6 place.
With the Mover tool move the AS3 left into the AS1 place.
With the Mover tool move the AS4 left into the AS2 place.
With the Mover tool move the AS5 left into the AS3 place.
With the Mover tool move the AS6 left into the AS4 place.
(AS1 will reappear)
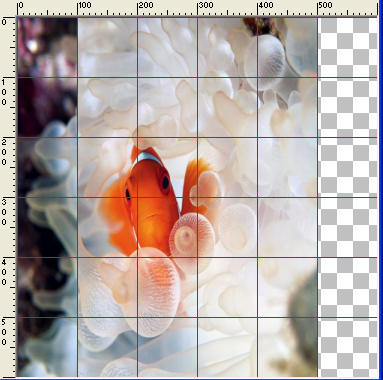
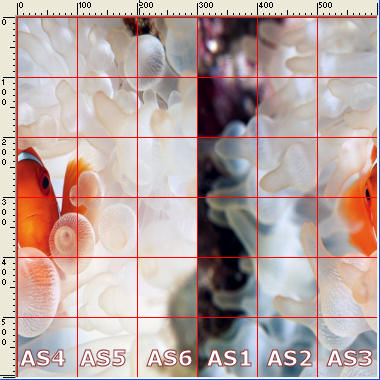
This is what your Working image should look like
|
|
STEP 15
Right click on Title Bar and select
Copy merged from the options
ACTIVATE your Sphere image
Right click on the Title Bar of your 'sphere' image
and select PASTE AS NEW LAYER from the options.
Rename this layer AS3
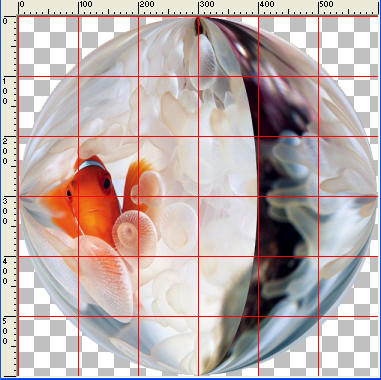
EFFECTS >> GEOMETRIC EFFECTS >> CIRCLE
Same settings
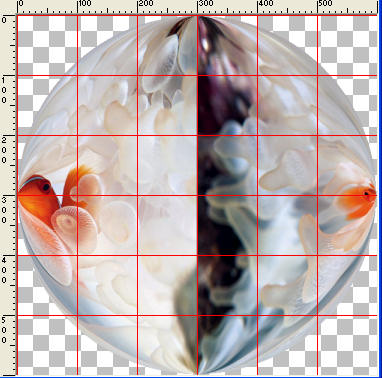
This is what your Sphere image should look like
|
|
STEP 16
ON WORKING IMAGE
With the move tool move the AS1 left into the AS4 place.
(It will disappear)
With the Mover tool move the AS2 left into the AS5 place.
With the Mover tool move the AS3 right into the AS6 place.
With the Mover tool move the AS4 left into the AS1 place.
With the Mover tool move the AS5 left into the AS2 place.
With the Mover tool move the AS6 left into the AS3 place.
(AS1 will reappear)
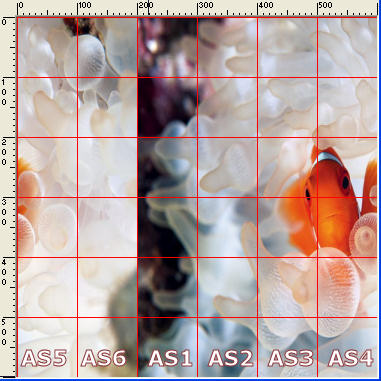
This is what your Working image should look like
|
|
STEP 17
Right click on Title Bar and select
Copy merged from the options
OPEN your Sphere image
Right click on the Title Bar of your 'sphere' image
and select PASTE AS NEW LAYER from the options.
EFFECTS >> GEOMETRIC EFFECTS >> CIRCLE
Same settings
Rename this layer AS4
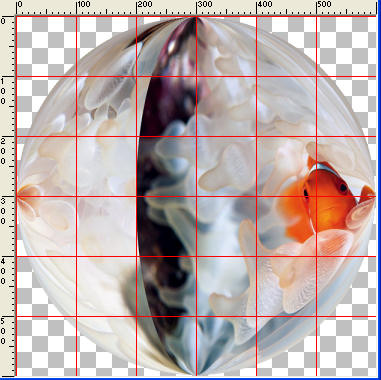
This is what your Sphere image should look like
|
|
STEP 18
ON WORKING IMAGE
With the move tool move the AS1 left into the AS3 place.
(It will disappear)
With the Mover tool move the AS2 left into the AS4 place.
With the Mover tool move the AS3 left into the AS5 place.
With the Mover tool move the AS4 right into the AS6 place.
With the Mover tool move the AS5 left into the AS1 place.
With the Mover tool move the AS6 left into the AS2 place.
(AS1 will reappear)
This is what your Working image should look like
|
|
STEP 19
Right click on Title Bar and select
Copy merged from the options
OPEN your Sphere image
Right click on the Title Bar of your 'sphere' image
and select PASTE AS NEW LAYER from the options.
EFFECTS >> GEOMETRIC EFFECTS >> CIRCLE
Same settings
Rename this layer AS5
This is what your Sphere image should look like
|
|
STEP 20
ON WORKING IMAGE
With the move tool move the AS1 left into the AS2 place.
(It will disappear)
With the Mover tool move the AS2 left into the AS3 place.
With the Mover tool move the AS3 left into the AS4 place.
With the Mover tool move the AS4 left into the AS5 place.
With the Mover tool move the AS5 right into the AS6 place.
With the Mover tool move the AS6 left into the AS1 place.
(AS1 will reappear)
This is what your Working image should look like
|
|
STEP 21
Right click on Title Bar and select
Copy merged from the options
OPEN your Sphere image
Right click on the Title Bar of your 'sphere' image
and select PASTE AS NEW LAYER from the options.
EFFECTS >> GEOMETRIC EFFECTS >> CIRCLE
Same settings
Rename this layer AS6
This is what your Sphere image should look like
|
|
| |
|
|
| |
|