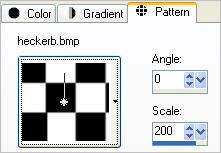
In your MATERIALS PALETTE
Load the ' heckerb.bmp ' pattern in your foreground
using the settings below. |
|
Open a new image 500 x 500
Transparent background
PSPX - X2: Colour Depth = 8bits/channel
PSPX3: Colour Depth RGB = 8bits/channel
Flood fill with the pattern
LAYERS >>> NEW RASTER LAYER
Flood fill with BLACK
SELECTIONS >>> SELECT ALL
SELECTIONS >>> MODIFY >>> CONTRACT = 1
EDIT >>> CLEAR
LAYERS >>> MERGE >>> MERGE DOWN
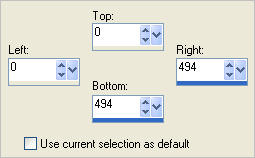
Choose your SELECTION TOOL then click on the
CUSTOM SELECTION symbol
and enter these coordinates. |
|
IMAGE >>> CROP TO SELECTION
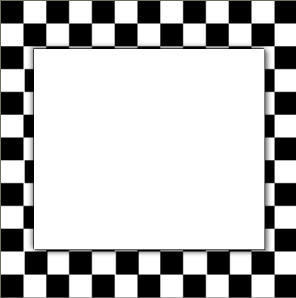
LAYERS >>> NEW RASTER LAYER
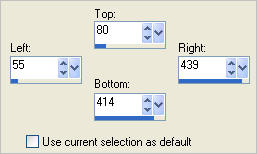
Choose your SELECTION TOOL then click on the
CUSTOM SELECTION symbol
and enter these coordinates.
|
|
Flood fill with WHITE
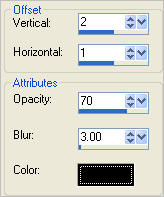
EFFECTS >>> 3D EFFECTS >>> DROP SHADOW
Vertical & Horizontal offsets = 1
Colour = Black
Opacity = 100
Blur = 0
Repeat Drop Shadow effect changing
Vertical & Horizontal Offsets to - ( minus ) 1
Click OK
DESELECT
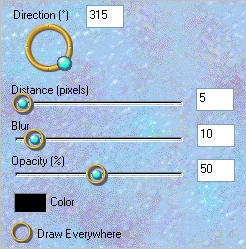
EFFECTS >>> PLUGINS >>> EYE CANDY 3 >>> DROP SHADOW |
|
EDIT >>> Repeat Drop Shadow.. change DIRECTION to 135 |
|
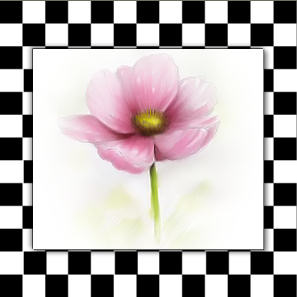
Open up the 2509.pspimage in your PSP workspace
Right click on the Title Bar and select COPY from the options
Right click on the Title Bar of your tag image
and select PASTE AS NEW LAYER from the options.
Choose your SELECTION TOOL then click on the
CUSTOM SELECTION symbol
and enter these coordinates.
|
|
SELECTIONS >>> INVERT
EDIT >>> CLEAR
DESELECT
LAYERS >>> MERGE >>> MERGE DOWN
|
|
LAYERS >>> DUPLICATE
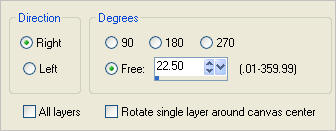
PSP8 - PSP9:IMAGE >>> ROTATE >>> FREE ROTATE
Ensure "All layers" is UNCHECKED
PSPX - PSPX3: IMAGE >>> FREE ROTATE
Ensure "All layers" is UNCHECKED
|
|
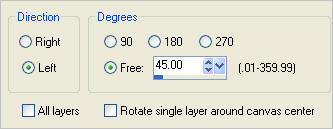
LAYERS >>> ARRANGE >>> MOVE DOWN
LAYERS >>> DUPLICATE
PSP8 - PSP9:IMAGE >>> ROTATE >>> FREE ROTATE
Ensure "All layers" is UNCHECKED
PSPX - PSPX3: IMAGE >>> FREE ROTATE
Ensure "All layers" is UNCHECKED
|
|
ACTIVATE RASTER 2
EFFECTS >>> EDGE EFFECTS >>> ENHANCE
LAYERS >>> MERGE >>> MERGE DOWN
EDIT >> Repeat Layers Merge Down
Rename this layer Raster 2
|
|
In your MATERIALS PALETTE
Load DARKPINK #a8486c in your foreground
Load PINK
#da809f in your background
LAYERS >>> NEW RASTER LAYER
Select your TEXT tool
Locate the "Cut & Paste" font
and use these settings

Enter the letter " T " in the Text Entry box
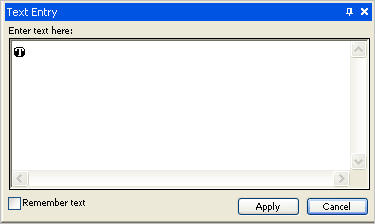
|
Position on the right side as shown
SELECTIONS >>> SELECT NONE |
|
LAYERS >>> NEW RASTER LAYER
Enter the letter " H " in the Text Entry box
Position on the right side as shown
SELECTIONS >>> SELECT NONE
|
|
LAYERS >>> NEW RASTER LAYER
Enter the letter " A " in the Text Entry box
Position on the right side as shown
SELECTIONS >>> SELECT NONE
LAYERS >>> NEW RASTER LAYER
Enter the letter " N " in the Text Entry box
Position on the right side as shown
SELECTIONS >>> SELECT NONE
|
|
LAYERS >>> NEW RASTER LAYER
Enter the letter " K " in the Text Entry box
Position on the right side as shown
SELECTIONS >>> SELECT NONE
LAYERS >>> NEW RASTER LAYER
Enter the letter " S " in the Text Entry box
Position on the right side as shown
SELECTIONS >>> SELECT NONE
|
|
EFFECTS >>> 3D EFFECTS >>> DROP SHADOW |
|
ACTIVATE RASTER 7
EDIT >>> Repeat Drop Shadow
ACTIVATE RASTER 6
EDIT >>> Repeat Drop Shadow
ACTIVATE RASTER 5
EDIT >>> Repeat Drop Shadow
ACTIVATE RASTER 4
EDIT >>> Repeat Drop Shadow
ACTIVATE RASTER 3
EDIT >>> Repeat Drop Shadow
|
|
ACTIVATE RASTER 8
Open up the 10deco65image in your PSP workspace
Right click on the Title Bar and select
COPY from the options
Right click on the Title Bar of your tag image
and select PASTE AS NEW LAYER from the options.
ADJUST >>> SHARPNESS >>> SHARPEN
Reposition with your MOVER tool
|
|
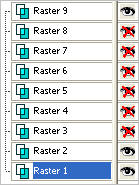
Set up LAYER PALETTE as shown |
|
Right click on Title Bar and select
Copy merged from the options
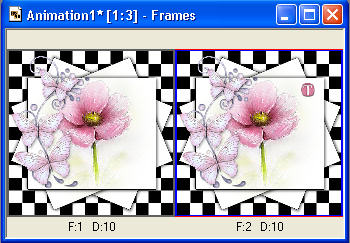
In ANIMATION SHOP
Right click the workspace and select
'Paste As New Animation' from the options.
Back to PSP.
OPEN RASTER 3
Right click on Title Bar and select
Copy merged from the options
In ANIMATION SHOP
Right click the workspace and select
'Paste After Current Frame' from the options.
|
|
Back to PSP.
OPEN RASTER 4
Right click on Title Bar and select
Copy merged from the options
In ANIMATION SHOP
Right click the workspace and select
'Paste After Current Frame' from the options.
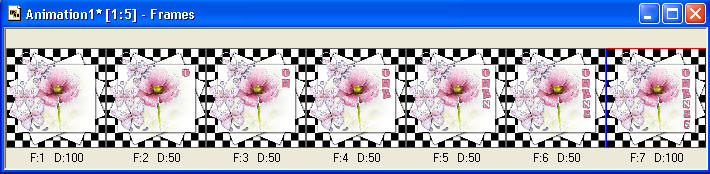
Continue in this manner until all layers are open in PSP
and you have 7 frames in Animation Shop

|
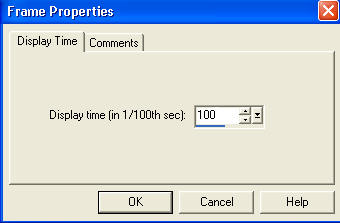
Edit >> Select All
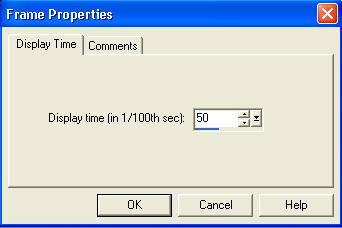
Right click on Title Bar of frames
Select 'Frame Properties' from the options
Display time =50
|
|
LEFT click inside frame 1 (F:1) to select
then
Right click inside the first frame (F:1)
and select
'Frame Properties' from the options
Display time = 100
|
|
LEFT click inside frame 7 (F:7) to select
then
Right click inside the seventh frame (F:7) and select
'Frame Properties' from the options
Display time = 100
 |
View >> Animation
and while it is still running,
File >> Save As
Locate the folder in which you wish to save it.
Name your animation.
With the Gif Optimiser keep pressing NEXT
until you get to the last one... click FINISH
Close the Animation
Close the frames.
Close Animation Shop |
|
|