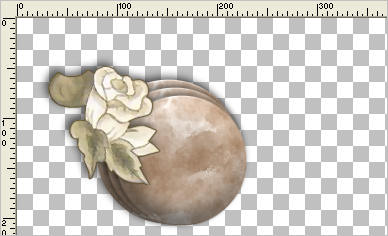
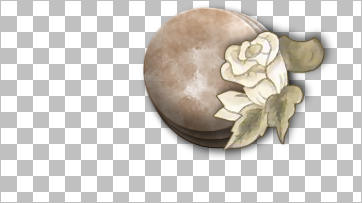
We haven't used scrap templates for quite a while
so I thought
this might be a good opportunity. |
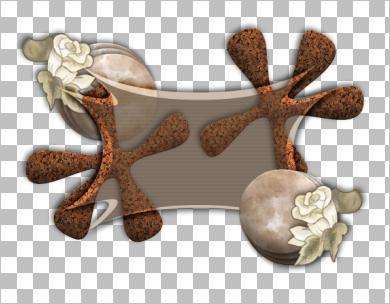
Open up the Template23 image in your PSP workspace
WINDOW >>> DUPLICATE
Close the original Image
Delete the "DenzDesignz" layer
|
ACTIVATE the back1 layer
and
CLOSE all other layers
In your LAYER PALETTE change the OPACITY to 55%
ADJUST >>> HUE & SATURATION >>> COLORIZE

|
|
EFFECTS >>> TEXTURE EFFECTS >>> BLINDS
|
|
CLOSE the back1 layer
OPEN & ACTIVATE the back2 layer
ADJUST >>> HUE & SATURATION >>> COLORIZE
Same settings
In your LAYER PALETTE change the BLEND MODE to OVERLAY
EFFECTS >>> PLUGINS >>> EYE CANDY 3 >>> DROP SHADOW
 EDIT >>> Repeat Drop Shadow.. change DIRECTION to 135
|
|
CLOSE the back2 layer
OPEN & ACTIVATE the splat1 layer
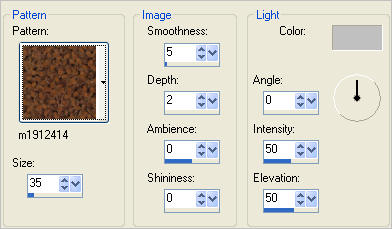
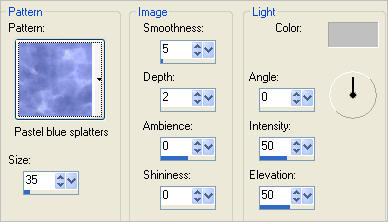
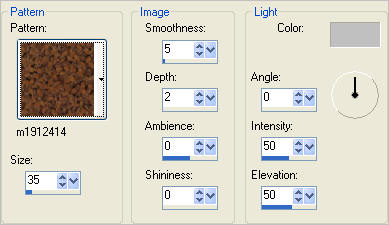
EFFECTS >>> TEXTURE EFFECTS >>> SCULPTURE
COLOUR = #c0c0c0
|
|
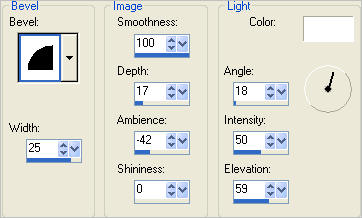
EFFECTS >>> 3D EFFECTS >>> INNER BEVEL |
|
CLOSE the splat1 layer
OPEN & ACTIVATE the splat2 layer
EFFECTS >>> TEXTURE EFFECTS >>> SCULPTURE
COLOUR = #c0c0c0
Same settings
EFFECTS >>> 3D EFFECTS >>> INNER BEVEL
Same settings
|
|
CLOSE the splat2 layer
OPEN & ACTIVATE the circle1 layer
EFFECTS >>> TEXTURE EFFECTS >>> SCULPTURE
COLOUR = #c0c0c0
|
|
ADJUST >>> HUE & SATURATION >>> COLORIZE
Same settings
EFFECTS >>> 3D EFFECTS >>> INNER BEVEL
Same settings
|
|
LAYERS >>> DUPLICATE
IMAGE >>> RESIZE = 95%
Ensure "Resize all layers" is UNCHECKED
Resample using WEIGHTED AVERAGE
LAYERS >>> DUPLICATE
IMAGE >>> RESIZE = 95%
Ensure "Resize all layers" is UNCHECKED
Resample using WEIGHTED AVERAGE
|
|
EFFECTS >>> PLUGINS >>> EYE CANDY 3 >>> DROP SHADOW
Same settings
BUT .. change DIRECTION to 315
ACTIVATE Copy of circle1
EDIT >>> Repeat Drop Shadow..
ACTIVATE circle1
EDIT >>> Repeat Drop Shadow..
LAYERS >>> MERGE >>> MERGE VISIBLE
|
|
CLOSE the MERGED layer
ACTIVATE circle2
EFFECTS >>> TEXTURE EFFECTS >>> SCULPTURE
COLOUR = #c0c0c0
Same settings
ADJUST >>> HUE & SATURATION >>> COLORIZE
Same settings
EFFECTS >>> 3D EFFECTS >>> INNER BEVEL
Same settings
LAYERS >>> DUPLICATE
IMAGE >>> RESIZE = 95%
Ensure "Resize all layers" is UNCHECKED
Resample using WEIGHTED AVERAGE
LAYERS >>> DUPLICATE
IMAGE >>> RESIZE = 95%
Ensure "Resize all layers" is UNCHECKED
Resample using WEIGHTED AVERAGE
|
|
EFFECTS >>> PLUGINS >>> EYE CANDY 3 >>> DROP SHADOW
Same settings BUT
.. change DIRECTION to 135
ACTIVATE Copy of circle2
EDIT >>> Repeat Drop Shadow..
ACTIVATE circle2
EDIT >>> Repeat Drop Shadow..
LAYERS >>> MERGE >>> MERGE VISIBLE
|
|
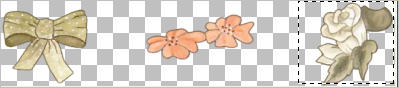
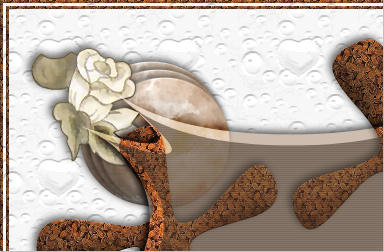
Open up the NelVanVeen-Flowers18_ptv image in your PSP workspace
Choose your SELECTION TOOL
Selection Type = Rectangle
Mode = Replace
Feather = 0
Antialias = UNChecked
Select the flower on the right hand side
Right click on the Title Bar and select COPY from the options |
|
Right click on the Title Bar of your tag image
and select PASTE AS NEW LAYER from the options.
IMAGE >>> MIRROR
EFFECTS >>> PLUGINS >>> EYE CANDY 3 >>> DROP SHADOW
Same settings
Reposition with your MOVER tool
|
|
LAYERS >>> DUPLICATE
LAYERS >>> ARRANGE >>> BRING TO TOP
IMAGE >>> MIRROR
Reposition with your MOVER tool
|
|
OPEN & ACTIVATE the splat1 layer
EFFECTS >>> PLUGINS >>> EYE CANDY 3 >>> DROP SHADOW
Same settings
OPEN & ACTIVATE the splat2 layer
EFFECTS >>> PLUGINS >>> EYE CANDY 3 >>> DROP SHADOW
Same settings
OPEN ALL LAYERS
LAYERS >>> MERGE >>> MERGE VISIBLE |
|
LAYERS >>> NEW RASTER LAYER
Flood fill with WHITE
LAYERS >>> ARRANGE >>> MOVE DOWN
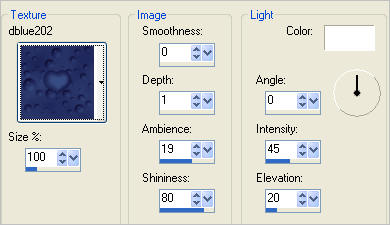
EFFECTS >>> TEXTURE EFFECTS >>> TEXTURE
Texture = dblue202
|
|
SELECTIONS >>> SELECT ALL
SELECTIONS >>> MODIFY >>> CONTRACT = 3
SELECTIONS >>> INVERT
EFFECTS >>> TEXTURE EFFECTS >>> SCULPTURE
COLOUR = #c0c0c0
|
|
SELECTIONS >>> INVERT
SELECTIONS >>> MODIFY >>> CONTRACT = 3
LAYERS >>> NEW RASTER LAYER
Flood fill with WHITE
EFFECTS >>> TEXTURE EFFECTS >>> SCULPTURE
COLOUR = #c0c0c0
Same settings
SELECTIONS >>> MODIFY >>> CONTRACT = 3
EDIT >>> CLEAR
DESELECT
LAYERS >>> MERGE >>> MERGE VISIBLE
|
|
Open up the LDD_wordart_0085 image
in your PSP workspace
Right click on the Title Bar and select COPY from the options
Right click on the Title Bar of your tag image
and select PASTE AS NEW LAYER from the options.
IMAGE >>> RESIZE = 80%
Ensure "Resize all layers" is UNCHECKED
Resample using WEIGHTED AVERAGE
ADJUST >>> COLOUR BALANCE >>> NEGATIVE IMAGE
PSPX - X3: IMAGE >>> NEGATIVE IMAGE
EFFECTS >>> 3D EFFECTS >>> DROP SHADOW
Vertical & Horizontal offsets = - ( minus ) 2
Colour = Black
Opacity = 70
Blur = 0
Reposition with your MOVER tool
|
|
LAYERS >>> DUPLICATE
LAYERS >>> MERGE >>> MERGE DOWN
Right click on Title Bar and select
Copy from the options
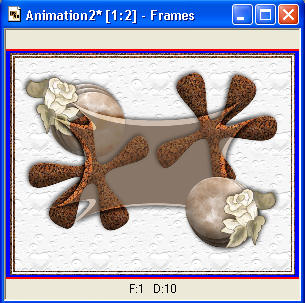
In ANIMATION SHOP
Right click the workspace and select
'Paste As New Animation' from the options.
Right click top of frame image and select
'Paste After Current Frame' from the options.
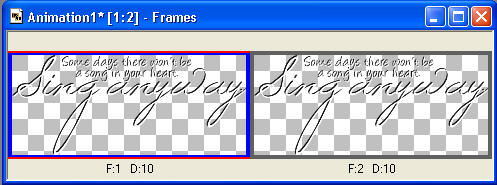
Click inside frame 1 (F:1) to activate
|
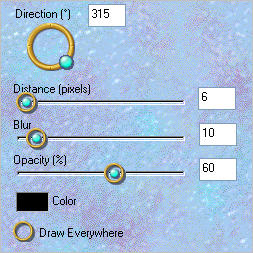
Effects >> Insert Image Transition.
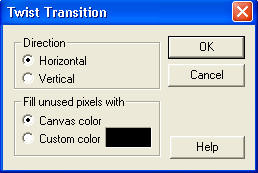
Select the TWIST effect
Then click on CUSTOMIZE and enter these settings
Click OK
Then enter these settings and click OK
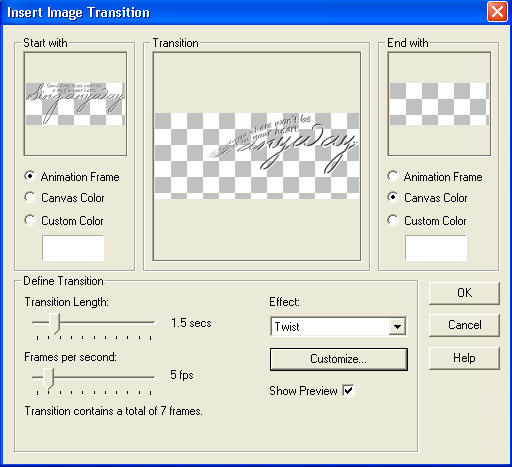
You will have 9 frames
|
Back to PSP.
ACTIVATE THE MERGED LAYER
Right click on Title Bar and select
Copy from the options
In ANIMATION SHOP
Right click the workspace and select
'Paste As New Animation' from the options.
|
|
Depress your CTRL key and press the letter L
(Upper Case) 8 times
Edit >> Select All
Activate the wordart frames
Edit >> Select All
Edit >> Copy
Edit >> Propagate Paste
ACTIVATE the background frames
ZOOM in on the first frame (F:1)
Edit >> Paste into selected frame
...place the image as shown
then release your mouse button
|
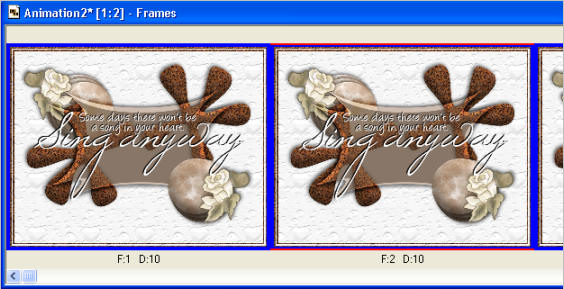
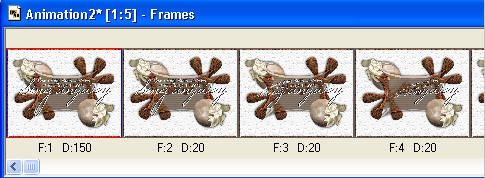
Right click on Title Bar of frames (Animation2*)
Select 'Frame Properties' from the options
Display time = 20
Click inside frame 1 (F:1) to activate
Right click and select 'Frame Properties' from the options
Display time = 150
|
View >> Animation
and while it is still running,
File >> Save As
Locate the folder in which you wish to save it.
Name your animation.
With the Gif Optimiser keep pressing NEXT
until you get to the last one... click FINISH
Close the Animation
Close the frames.
Close Animation Shop |
|
|