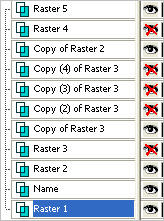
STEP 1
ACTIVATE RASTER 1
LAYERS >> NEW RASTER LAYER
Select your TEXT TOOL
with font and settings of your choice
add your name to the bottom left corner of the layer.
|
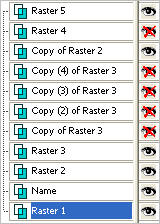
STEP 2
ACTIVATE RASTER 3
Choose your FREEHAND SELECTION TOOL
Selection Type = Point to Point
Mode = Replace
Feather = 0
Antialias = Checked
Section off the mouth area as shown
|
|
STEP 3
LAYERS >>> DUPLICATE
(Copy of Raster 3)
EFFECTS >>> DISTORTION EFFECTS >>> PINCH
Strength = 32%
LAYERS >>> DUPLICATE
(Copy (2) of Raster 3)
EFFECTS >>> DISTORTION EFFECTS >>> PINCH
Strength = 32%
|
|
STEP 4
LAYERS >>> DUPLICATE
(Copy (3) of Raster 3)
EFFECTS >>> DISTORTION EFFECTS >>> PINCH
Strength = 32%
LAYERS >>> DUPLICATE
(Copy (4) of Raster 3)
EFFECTS >>> DISTORTION EFFECTS >>> PINCH
Strength = 32%
DESELECT
|
|
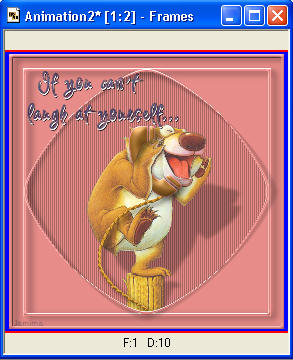
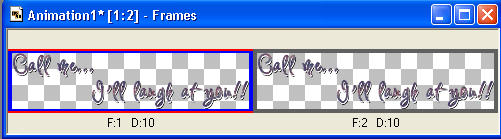
STEP 5
ACTIVATE RASTER 4
Right click on Title Bar and select
Copy from the options
In ANIMATION SHOP
Right click the workspace and select
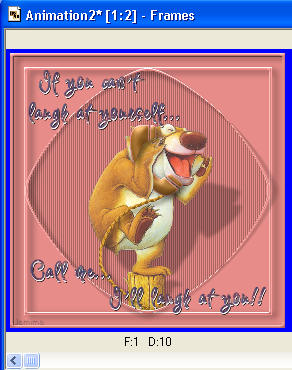
'Paste As New Animation' from the options.
Right click top of frame image and select
'Paste After Current Frame' from the options.
Click inside the first frame (F:1) to activate
|
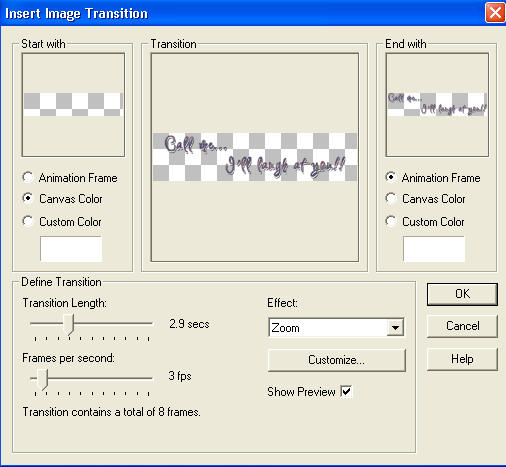
STEP 6
Effects >> Insert Image Transition.
Choose the ZOOM effect
Click the CUSTOMIZE button first
and enter these settings
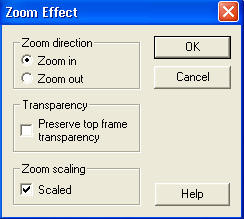
Then enter these settings
|
STEP 7
Back to PSP.
Set up LAYER PALETTE as shown
Right click on Title Bar and select
Copy merged from the options
|
|
STEP 8
In ANIMATION SHOP
Right click the workspace and select
'Paste As New Animation' from the options.
|
|
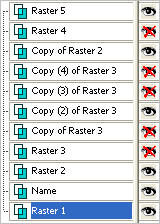
STEP 9
Back to PSP.
Set up LAYER PALETTE as shown
Right click on Title Bar and select
Copy merged from the options
|
|
STEP 10
In ANIMATION SHOP
Right click top of frame image and select
'Paste After Current Frame' from the options.
2 frames
|
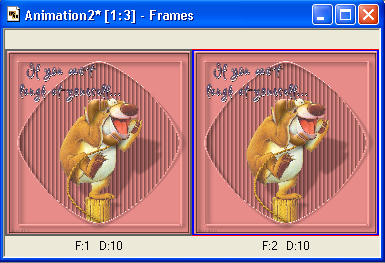
STEP 11
Back to PSP.
Set up LAYER PALETTE as shown
Right click on Title Bar and select
Copy merged from the options |
|
STEP 12
In ANIMATION SHOP
Right click top of frame image and select
'Paste After Current Frame' from the options.
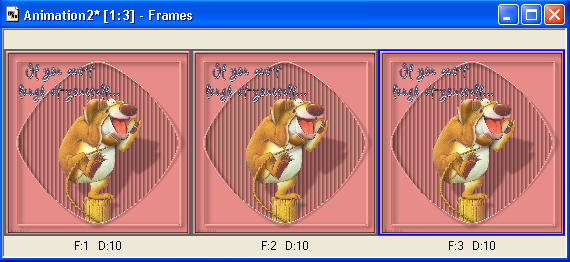
You should now have 3 frames
|
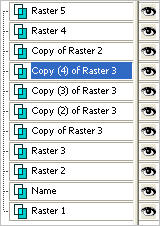
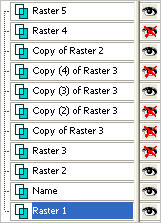
STEP 13
Back to PSP.
Set up LAYER PALETTE as shown
Right click on Title Bar and select
Copy merged from the options |
|
STEP 14
In ANIMATION SHOP
Right click top of frame image and select
'Paste After Current Frame' from the options.
You should now have 4 frames
|
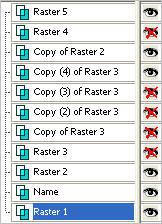
STEP 15
Back to PSP.
Set up LAYER PALETTE as shown
Right click on Title Bar and select
Copy merged from the options |
|
STEP 16
In ANIMATION SHOP
Right click top of frame image and select
'Paste After Current Frame' from the options.
You should now have 5 frames |
STEP 17
Edit >> Select All
Edit >> Copy
Edit >> Paste After Current Frame
Animation >> Reverse frames
10 frames
|
STEP 18
ACTIVATE the first animation (wordart)
Edit >> Select All
Edit >> Copy
Edit >> Propagate Paste
|
STEP 19
ACTIVATE the second animation
Edit >> Select All
Edit >> Paste into selected frame
Place carefully in first frame and release mouse button
|
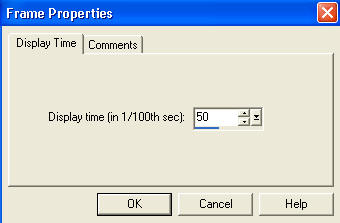
STEP 20
Click inside the first frame (F:1) to activate
Right click on Title Bar of frames
Select 'Frame Properties' from the options
Display time =50
|
|
STEP 21
View >> Animation
and while it is still running,
File >> Save As
Locate the folder in which you wish to save it.
Name your animation.
With the Gif Optimiser keep pressing NEXT
until you get to the last one... click FINISH
Close the Animation
Close the frames.
Close Animation Shop |
| |
|