Open a new image 550 x 550
Transparent background
PSPX - X2: Colour Depth = 8bits/channel
PSPX3: Colour Depth RGB = 8bits/channel
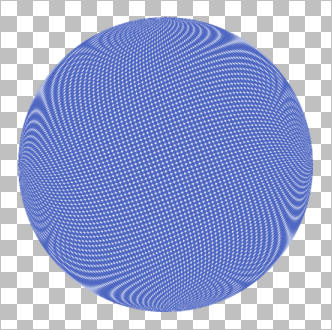
Flood fill with BLUE #4d66c2 |
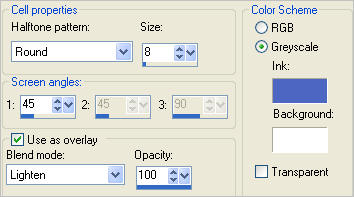
EFFECTS >>> ART MEDIA EFFECTS >>> HALFTONE
COLOUR = #4d66c2 |
|
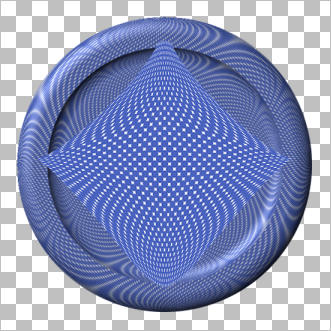
EFFECTS >>> GEOMETRIC EFFECTS >>> CIRCLE
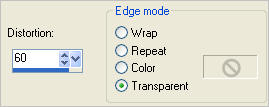
Edge Mode = Transparent
IMAGE >>> RESIZE = 90%
Ensure "Resize all layers" is UNCHECKED
Resample using WEIGHTED AVERAGE |
|
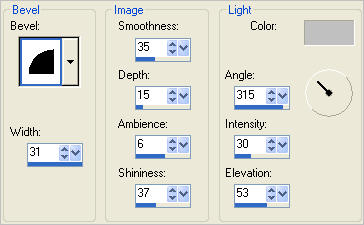
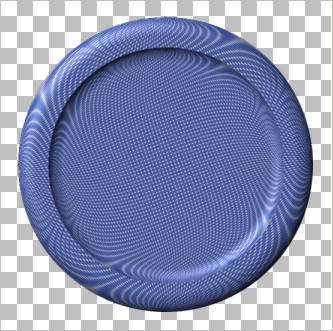
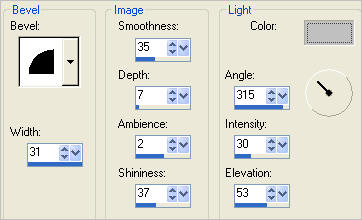
EFFECTS >>> 3D EFFECTS >>> INNER BEVEL
COLOUR = #c0c0c0
|
|
LAYERS >>> DUPLICATE
IMAGE >>> RESIZE = 80%
Ensure "Resize all layers" is UNCHECKED
Resample using WEIGHTED AVERAGE
IMAGE >>> FLIP
IMAGE >>> MIRROR
|
|
LAYERS >>> NEW RASTER LAYER
Flood fill with BLUE #4d66c2
EFFECTS >>> ART MEDIA EFFECTS >>> HALFTONE
COLOUR = #4d66c2
|
|
IMAGE >>> RESIZE = 80%
Ensure "Resize all layers" is UNCHECKED
Resample using WEIGHTED AVERAGE
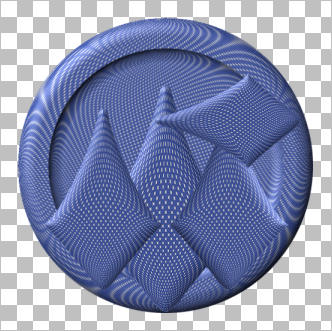
EFFECTS>>> GEOMETRIC EFFECTS >>> PENTAGON
EFFECTS>>> GEOMETRIC EFFECTS >>> CIRCLE
Edge Mode = Transparent
EDIT >>> Repeat Circle (3 times)
|
|
EFFECTS>>> GEOMETRIC EFFECTS >>> Perspective Vertical |
|
EFFECTS >>> 3D EFFECTS >>> INNER BEVEL
COLOUR = #c0c0c0
ADJUST >>> SHARPNESS >>> SHARPEN
|
|
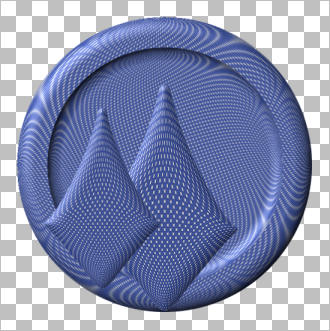
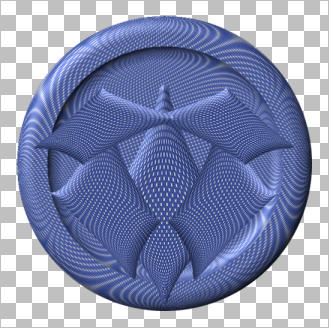
LAYERS >>> DUPLICATE
IMAGE >>> RESIZE = 80%
Ensure "Resize all layers" is UNCHECKED
Resample using WEIGHTED AVERAGE
Reposition to the left with your MOVER tool
|
|
LAYERS >>> DUPLICATE
IMAGE >>> MIRROR
LAYERS >>> DUPLICATE
PSP8 - PSP9:IMAGE >>> ROTATE >>> FREE ROTATE = LEFT 90
Ensure "All layers" is UNCHECKED
PSPX - PSPX3: IMAGE >>> FREE ROTATE = LEFT 90
Ensure "All layers" is UNCHECKED
IMAGE >>> RESIZE = 80%
Ensure "Resize all layers" is UNCHECKED
Resample using WEIGHTED AVERAGE
ADJUST >>> SHARPNESS >>> SHARPEN
Reposition with your MOVER tool
|
|
LAYERS >>> DUPLICATE
IMAGE >>> MIRROR
Close Raster 1
Close Copy of Raster 1
LAYERS >>> MERGE >>> MERGE VISIBLE
EFFECTS>>> GEOMETRIC EFFECTS >>> CIRCLE
Edge Mode = Transparent
EDIT >>> Repeat Circle
Open all layers
|
|
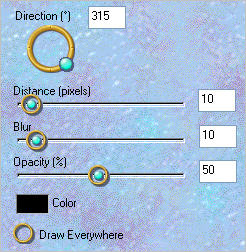
EFFECTS >>> PLUGINS >>> EYE CANDY 3 >>> DROP SHADOW
|
|
EDIT >>> Repeat Drop Shadow.. change DIRECTION to 135
LAYERS >>> MERGE >>> MERGE VISIBLE
|
|
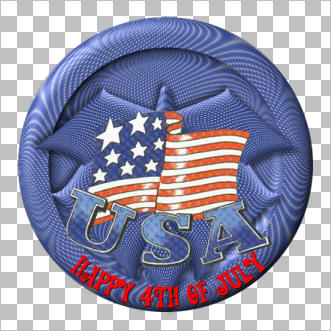
Open up the Happy4th_WA.pspimage image in your PSP workspace
Right click on the Title Bar and select COPY from the options
Right click on the Title Bar of your tag image
and select PASTE AS NEW LAYER from the options.
Reposition with your MOVER tool
LAYERS >>> MERGE >>> MERGE VISIBLE
|
|
Open up the F625.pspimageimage in your PSP workspace
Right click on the Title Bar and select COPY from the options
Right click on the Title Bar of your tag image
and select PASTE AS NEW LAYER from the options.
IMAGE >>> RESIZE = 85%
Ensure "Resize all layers" is UNCHECKED
Resample using WEIGHTED AVERAGE
ADJUST >>> SHARPNESS >>> SHARPEN
Reposition with your MOVER tool |
|
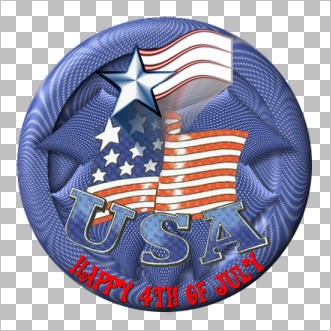
Open up the starlogomotion002_mdh.psp image in your PSP workspace
Right click on the Title Bar and select COPY from the options
Right click on the Title Bar of your tag image
and select PASTE AS NEW LAYER from the options.
IMAGE >>> RESIZE = 90%
Ensure "Resize all layers" is UNCHECKED
Resample using WEIGHTED AVERAGE
ADJUST >>> SHARPNESS >>> SHARPEN
Reposition with your MOVER tool |
|
ACTIVATE RASTER 1
Right click on Title Bar and select
Copy from the options
In ANIMATION SHOP
Right click the workspace and select
'Paste As New Animation' from the options.
Right click top of frame image and select
'Paste After Current Frame' from the options.
|
|
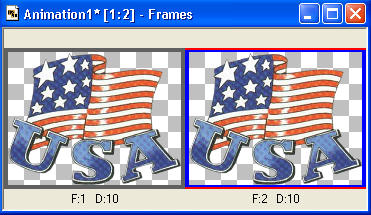
Click inside first frame (F:1) to activate
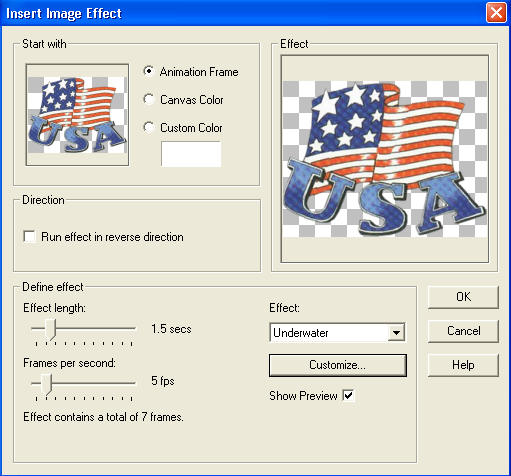
Effects >> Insert Image Effects >> Underwater
Click on the CUSTOMIZE button
Enter these settings
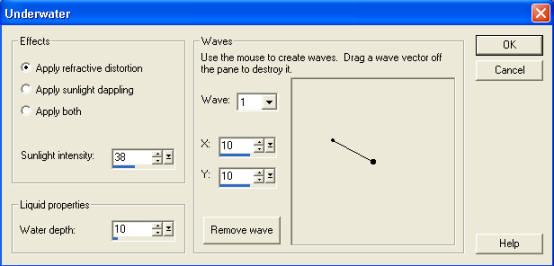
Click OK
Then enter these settings
Click OK
Right click inside frame 2 (F:2) and select DELETE from the options
|
Back to PSP.
ACTIVATE the MERGED layer
Right click on Title Bar and select Copy from the options
In ANIMATION SHOP
Right click the workspace and select
'Paste As New Animation' from the options.
Depress your CTRL key and press the letter L
(Upper Case) 7 times
|
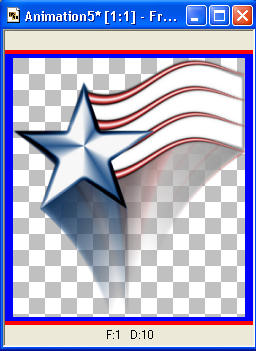
Activate the Flag frames
Edit >> Select All
Edit >> Copy
Edit >> Propagate Paste
Activate the background frames
Edit >> Select All
Edit >> Paste into selected frame
Place into position in frame 1 (F:1) and release mouse button
|
|
Back to PSP.
ACTIVATE RASTER 2
Right click on Title Bar and select Copy from the options
In ANIMATION SHOP
Right click the workspace and select
'Paste As New Animation' from the options.
Right click on Title Bar and select
Copy from the options
|
|
Activate the background and Flag frames
Edit >> Paste into selected frame
Place into position in frame 1 (F:1) and release mouse button
|
|
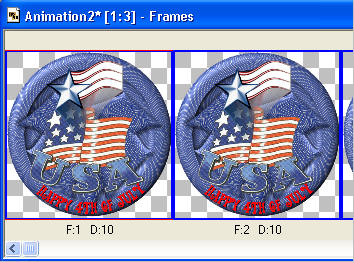
Edit >> Select All
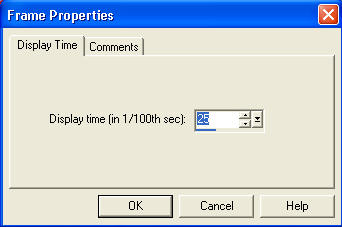
Right click on Title Bar of frames
Select 'Frame Properties' from the options
Display time =25
|
|
Right click inside frame 1 (F:1) and select DELETE from the options
View >> Animation
and while it is still running,
File >> Save As
Locate the folder in which you wish to save it.
Name your animation.
With the Gif Optimiser keep pressing NEXT
until you get to the last one... click FINISH
Close the Animation
Close the frames.
Close Animation Shop
|
|
|


.jpg)