STEP 21
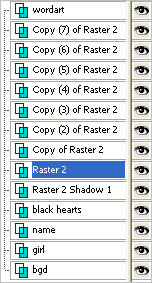
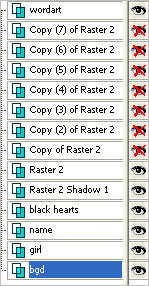
Check that your LAYER PALETTE
is set up like this and
ACTIVATE RASTER 2
|
|
STEP 22
With your MAGIC WAND.... Same settings.
Select the centres of the 2 hearts
SELECTIONS >>> MODIFY >>> EXPAND = 4
Save your image as .psp or
.pspimage
|
|
STEP 23
Now we'll put
your image aside for a while.
EDIT >>> Empty Clipboard
Open ANIMATION SHOP
Click on the 'folder' icon on the top menu
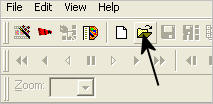
Locate the
Glitter0022.gif an open up in AnimationShop
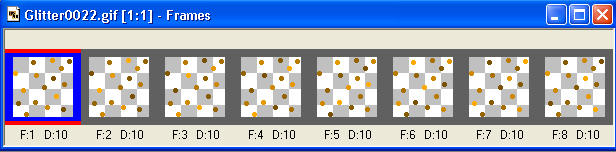
We need to open these frames in PSP.
You have 2 options.
Option (1) FILE >>> Export Frames >>> To Paint Shop Pro

As you can see mine doesn't work... so Option (2)
EDIT >>>Select All
EDIT >>> Copy
Go back to PSP
Right Click in workspace and select "Paste as New Image"
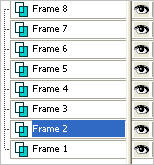
Your Layer Palette will look like this............
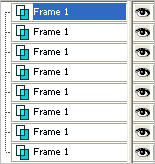
You need to rename the layers
like this........ 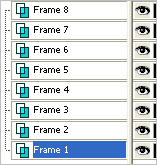
ACTIVATE FRAME 1
Save the layered glitter image as a .psp or .pspimage incase you want to use it again
Delete the animation in ANIMATION SHOP
|
STEP 24
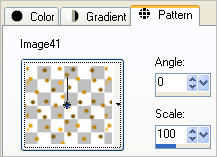
In your MATERIALS PALETTE
Load the ' Glitter0022 ' pattern
in your foreground
It will not be called Glitter0022
It will be Image #??
depending on how much work you've done in PSP... mine is "Image 41"
use these settings.
(Keep the Glitter image on your workspace) |
|
STEP 25
Now we'll go back to work on your tag image.
ACTIVATE your tag image,
make sure you still have the hearts selected on Raster 2
Flood fill both hearts with the Glitter pattern.
DO NOT DESELECT

ACTIVATE Copy of Raster 2
|
STEP 26
ACTIVATE your glitter image
ACTIVATE FRAME 2 layer
|
|
STEP 27
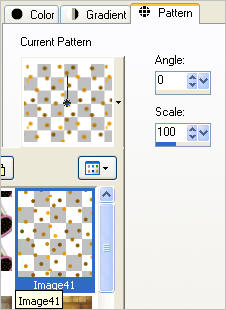
In your MATERIALS PALETTE
Click in the pattern window in your foreground
Load the ' Glitter0022 ' (Image 41) pattern
using the same settings
NOTE: The pattern has changed because
we're now using "Frame 2"
|
|
STEP 28
Back to your tag image...
Flood fill the selected areas with the pattern
|
|
STEP 29
ACTIVATE your glitter image
ACTIVATE FRAME 3 layer
In your MATERIALS PALETTE
Click in the pattern window in your foreground
Load the ' Glitter0022 ' (Image 41) pattern
using the same settings
NOTE: The pattern has changed because
we're now using "Frame 3"
Back to your tag image...
ACTIVATE Copy (2) of Raster 2
Flood fill the selected areas with the pattern
|
|
STEP 30
ACTIVATE your glitter image
ACTIVATE FRAME 4 layer
In your MATERIALS PALETTE
Click in the pattern window in your foreground
Load the ' Glitter0022 ' (Image 41) pattern
using the same settings
NOTE: The pattern has changed because
we're now using "Frame 4"
Back to your tag image...
ACTIVATE Copy (3) of Raster 2
Flood fill the selected areas with the pattern
|
|
STEP 31
ACTIVATE your glitter image
ACTIVATE FRAME 5 layer
In your MATERIALS PALETTE
Click in the pattern window in your foreground
Load the ' Glitter0022 ' (Image 41) pattern
using the same settings
Back to your tag image...
ACTIVATE Copy (4) of Raster 2
Flood fill the selected areas with the pattern |
|
STEP 32
ACTIVATE your glitter image
ACTIVATE FRAME 6 layer
In your MATERIALS PALETTE
Click in the pattern window in your foreground
Load the ' Glitter0022 ' (Image 41) pattern
using the same settings
Back to your tag image...
ACTIVATE Copy (5) of Raster 2
Flood fill the selected areas with the pattern
|
|
STEP 33
ACTIVATE your glitter image
ACTIVATE FRAME 7 layer
In your MATERIALS PALETTE
Click in the pattern window in your foreground
Load the ' Glitter0022 ' (Image 41) pattern
using the same settings
Back to your tag image...
ACTIVATE Copy (6) of Raster 2
Flood fill the selected areas with the pattern |
|
STEP 34
ACTIVATE your glitter image
ACTIVATE FRAME 8 layer
In your MATERIALS PALETTE
Click in the pattern window in your foreground
Load the ' Glitter0022 ' (Image 41) pattern
using the same settings
Back to your tag image...
ACTIVATE Copy (7) of Raster 2
Flood fill the selected areas with the pattern
DESELECT
|
|
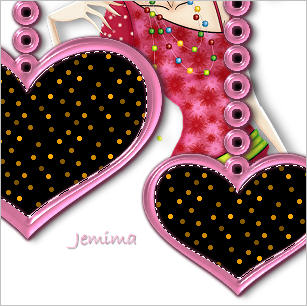
WOO HOO!!! All the hard slog is done!!
If you wish to add a frame to your image now is the time to do it.
Make it the top layer and keep the layer open
|
STEP 35
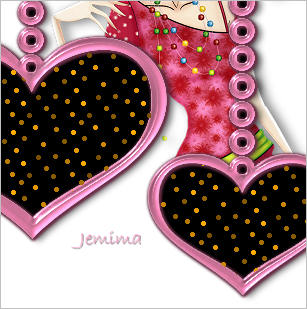
Set up your LAYER PALETTE like this..
Mine is without a frame.
|
|
STEP 36
Right click on Title Bar and select
Copy merged from the options
In ANIMATION SHOP
Right click the workspace and select
'Paste As New Animation' from the options.
|
|
STEP 37
Back to PSP.
Close Raster 2
OPEN
Copy of Raster 2
Right click on Title Bar and select
Copy merged from the options
In ANIMATION SHOP
Right click top of frame image and select
'Paste After Current Frame' from the options.
|
STEP 38
Back to PSP.
Close Copy of Raster 2
OPEN Copy (2) of Raster 2
Right click on Title Bar and select
Copy merged from the options
In ANIMATION SHOP
Right click top of frame image and select
'Paste After Current Frame' from the options.
|
STEP 39
Back to PSP.
Close Copy (2) of Raster 2
OPEN Copy (3) of Raster 2
Right click on Title Bar and select
Copy merged from the options
In ANIMATION SHOP
Right click top of frame image and select
'Paste After Current Frame' from the options.
Continue in this manner until you have 8 frames in ANIMATION SHOP
|
STEP 40
Edit >> Select All
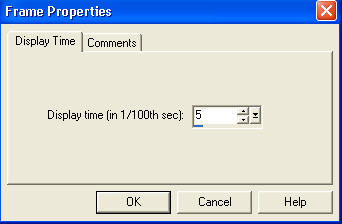
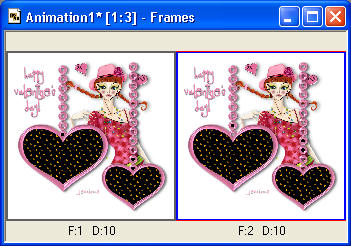
Right click on Title Bar of frames
Select 'Frame Properties' from the options
Display time =5
|
|
STEP 41
View >> Animation
and while it is still running,
File >> Save As
Locate the folder in which you wish to save it.
Name your animation.
With the Gif Optimiser keep pressing NEXT
until you get to the last one... click FINISH
Close the Animation
Close the frames.
Close Animation Shop
|
| |