STEP 1
Open a new image 500 x 500
Transparent background
PSPX - X2: Colour Depth = 8bits/channel
PSPX3: Colour Depth RGB = 8bits/channel
Flood fill with WHITE
Rename this layer bgd
|
STEP 2
Open the caro_accents_valentine5.psp image
in your PSP workspace
Activate the Fusionné Ombres : 1 layer
Right click on the Title Bar
and select COPY from the options
Right click on the Title Bar of your tag image
and select PASTE AS NEW LAYER from the options.
|
|
STEP 3
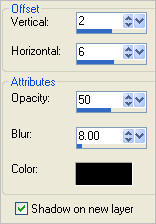
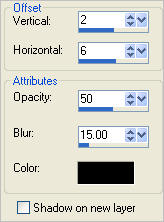
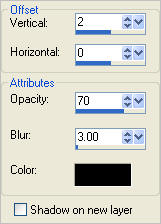
EFFECTS >>> 3D EFFECTS >>> DROP SHADOW
NOTE: Shadow on new layer
|
|
STEP 4
ACTIVATE RASTER 2
With your MAGIC WAND
Mode = Replace
Match Mode = RGB Value
Tolerance = 40
Feather = 0
Antialias = UNchecked
Sample Merged = UNCHECKED
PSP9 - X3: Check CONTIGUOUS
PSPX - X3: There is no " Sample Merged"
PSPX - X3: Use all layers = UNChecked
and while depressing your SHIFT KEY...
Select the transparent centres of the 2 hearts
SELECTIONS >>> MODIFY >>> EXPAND = 5
|
|
STEP 5
LAYERS >>> NEW RASTER LAYER
LAYERS >>> ARRANGE >>> MOVE DOWN
EDIT >>> Repeat Move Layer Down
Flood fill with BLACK
DESELECT
|
|
STEP 6
ACTIVATE RASTER 2
LAYERS >>> DUPLICATE
EDIT >>> Repeat Duplicate Layer (6 Times)
|
|
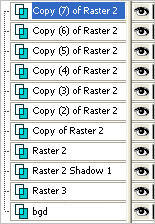
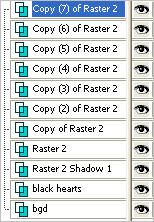
STEP 7
Rename the layers as shown |
|
STEP 8
With your MAGIC WAND.... Same settings.
and while depressing your SHIFT KEY...
Select all the transparent centres
of the chains
|
|
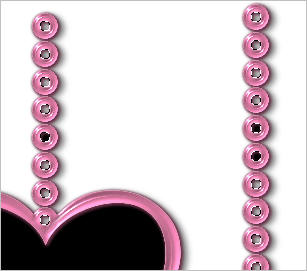
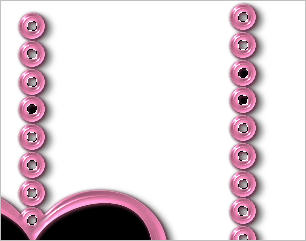
STEP 9
ACTIVATE Raster 2
Flood fill the first 2 circles on the RIGHT chain
and ONE circle on LEFT chain
with BLACK
|
|
STEP 10
CLOSE RASTER 2
ACTIVATE Copy of Raster 2
Flood fill the next 2 circles up on the RIGHT chain
and the next circle up on LEFT chain
with BLACK |
|
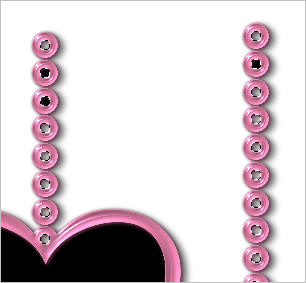
STEP 11
CLOSE Copy of Raster 2
ACTIVATE Copy (2) of Raster 2
Flood fill the 5th & 6th circles up on the RIGHT chain
and the 3rd circle on LEFT chain
with BLACK
|
|
STEP 12
CLOSE Copy (2) of Raster 2
ACTIVATE Copy (3) of Raster 2
Flood fill the 7th & 8th circles up on the RIGHT chain
and the 4th circle on LEFT chain
with BLACK
|
|
STEP 13
CLOSE Copy (3) of Raster 2
ACTIVATE Copy (4) of Raster 2
Flood fill the 9th & 10th circles up on the RIGHT chain
and the 5th circle on LEFT chain
with BLACK
|
|
STEP 14
CLOSE Copy (4) of Raster 2
ACTIVATE Copy (5) of Raster 2
Flood fill the 11th circle up on the RIGHT chain
and the 6th & 7th circles on LEFT chain
with BLACK
|
|
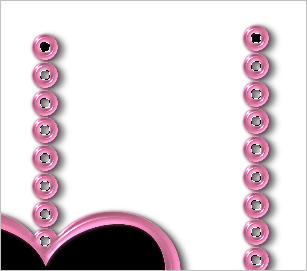
STEP 15
CLOSE Copy (5) of Raster 2
ACTIVATE Copy (6) of Raster 2
Flood fill the last circle on each chain
with BLACK
|
|
STEP 16
DESELECT
ACTIVATE the bgd layer
Open the vsc_Beautiful Girls Drawings Wallpapers (41)
image
in your PSP workspace
Right click on the Title Bar
and select COPY from the options
Right click on the Title Bar of your tag image
and select PASTE AS NEW LAYER from the options.
IMAGE >>> RESIZE = 40%
Ensure "Resize all layers" is UNCHECKED
Resample using WEIGHTED AVERAGE
ADJUST >>> SHARPNESS >>> SHARPEN
Reposition with your MOVER tool
NOTE: I opened all layers... you don't have to.
|
|
STEP 17
EFFECTS >>> 3D EFFECTS >>> DROP SHADOW
Rename this layer girl
|
|
STEP 18
LAYERS >> NEW RASTER LAYER
Select your TEXT TOOL
with font and settings of your choice
add your name to the bottom of the layer.
Rename this layer Name. |
|
STEP 19
ACTIVATE THE TOP LAYER
Open the ValentineDoodles1-13-08~LM
image in your PSP workspace
The word art is already selected
Right click on the Title Bar
and select COPY from the options
Right click on the Title Bar of your tag image
and select PASTE AS NEW LAYER from the options.
Reposition with your MOVER tool
|
|
STEP 20
EFFECTS >>> 3D EFFECTS >>> DROP SHADOW
Rename this layer wordartl |
|
|