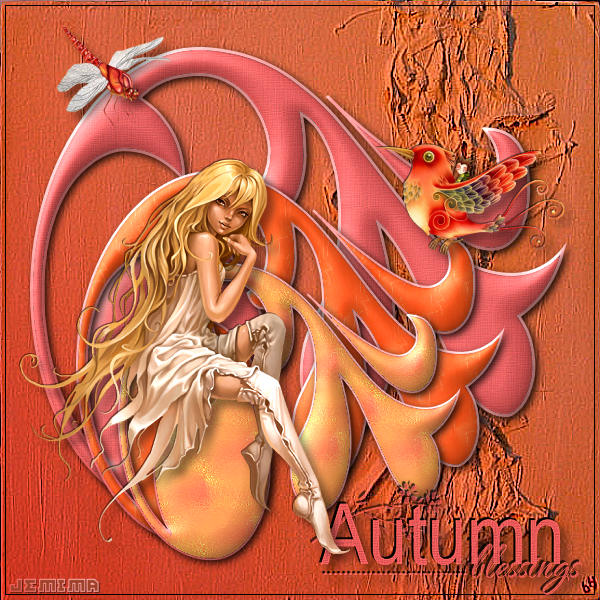
Open a new image 600 x 600
Transparent background
RASTER BACKGROUND
PSPX - X2: Colour Depth = 8bits/channel
PSPX3: Colour Depth RGB = 8bits/channel
.
|
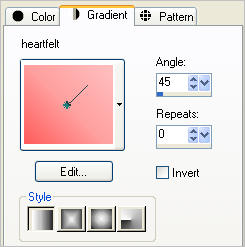
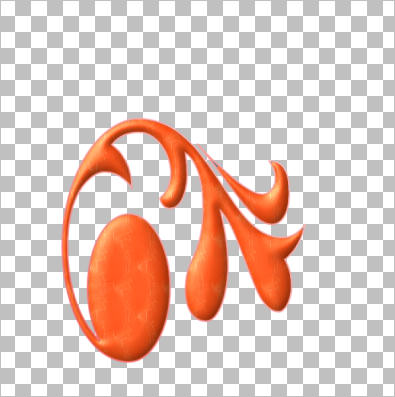
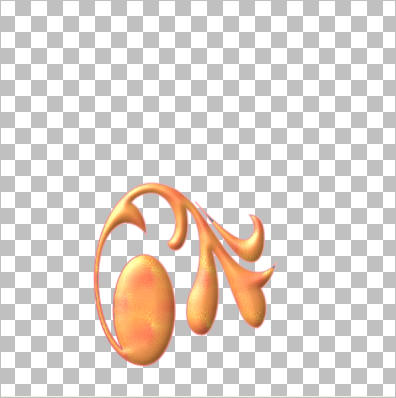
In your MATERIALS PALETTE load
heartfelt GRADIENT in the foreground using these settings |
|
Load BLUE" #567585" in your background
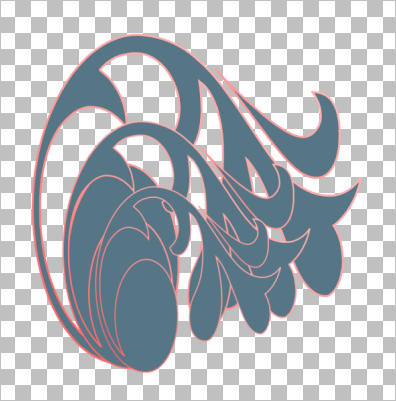
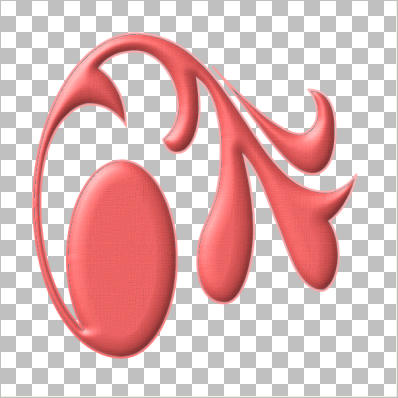
Select your PRESET SHAPES tool
|
Starting at 60 pixels across and 60 pixels down
drag your cursor to 540 pixels across and 540 pixels down and release |
|
LAYERS >>> DUPLICATE
IMAGE >>> RESIZE = 75%
Ensure "Resize all layers" is UNCHECKED
Resample using WEIGHTED AVERAGE
LAYERS >>> DUPLICATE
IMAGE >>> RESIZE = 75%
Ensure "Resize all layers" is UNCHECKED
Resample using WEIGHTED AVERAGE
Reposition layers
Copy (2) of Raster 1
and
Copy of Raster 1
with your MOVER TOOL
|
|
CLOSE layers
Copy (2) of Raster 1
and
Copy of Raster 1
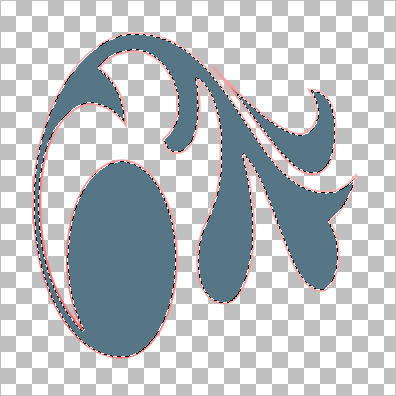
ACTIVATE RASTER 1
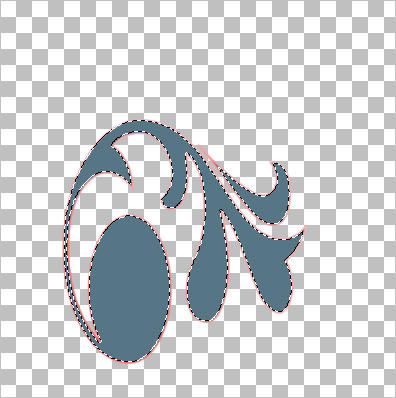
With your MAGIC WAND
Mode = Replace
Match Mode = RGB Value
Tolerance = 0
Feather = 0
Antialias = Checked
Sample Merged = UNCHECKED
PSP9 - X3: Check CONTIGUOUS
PSPX - X3: There is no " Sample Merged"
PSPX - X3: Use all layers = UNChecked
PSP9 - X3: ANTIALIAS = Outside
and while depressing your SHIFT KEY...
Select the BLUE areas
|
|
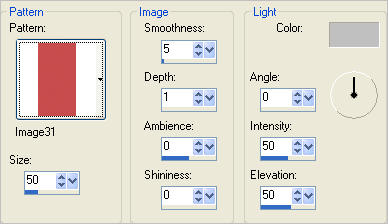
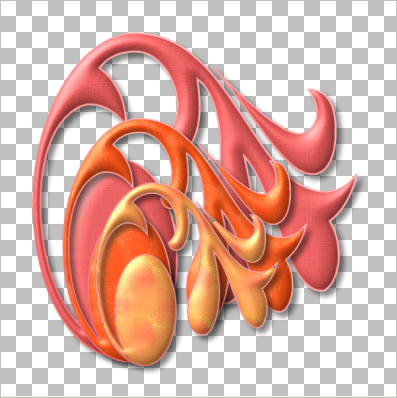
EFFECTS >>> TEXTURE EFFECTS >>> SCULPTURE
Pattern = Image 31
Colour = #c0c0c0 |
|
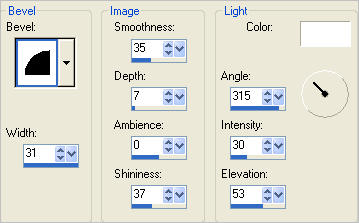
EFFECTS >>> 3D EFFECTS >>> INNER BEVEL
|
|
DESELECT |
|
CLOSE Raster 1
OPEN & ACTIVATE Copy of Raster 1
With your MAGIC WAND.... Same settings.
and while depressing your SHIFT KEY...
Select the BLUE areas
|
|
EFFECTS >>> TEXTURE EFFECTS >>> SCULPTURE
Same settings
Pattern = Peelingpaint
Colour = #c0c0c0
EFFECTS >>> 3D EFFECTS >>> INNER BEVEL
Same settings
DESELECT
|
|
CLOSE Copy of Raster 1
OPEN & ACTIVATE Copy (2)of Raster 1
With your MAGIC WAND.... Same settings.
and while depressing your SHIFT KEY...
Select the BLUE areas |
|
EFFECTS >>> TEXTURE EFFECTS >>> SCULPTURE
Same settings
Pattern = satsuma
Colour = #c0c0c0
EFFECTS >>> 3D EFFECTS >>> INNER BEVEL
Same settings
DESELECT |
|
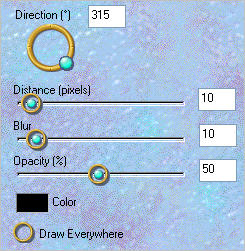
EFFECTS >>> PLUGINS >>> EYE CANDY 3 >>> DROP SHADOW
|
|
OPEN & ACTIVATE Copy (2)of Raster 1
EDIT >>> Repeat Drop Shadow
OPEN & ACTIVATE Raster 1
EDIT >>> Repeat Drop Shadow
|
|
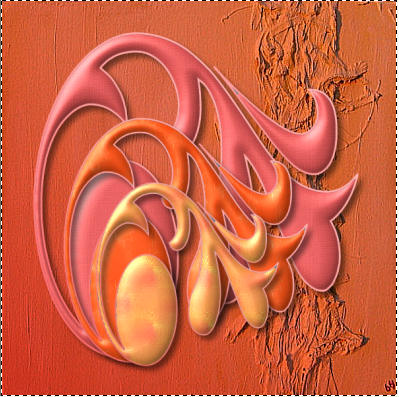
LAYERS >>> NEW RASTER LAYER
LAYERS >>> ARRANGE >>> MOVE DOWN
Flood fill with gradient
|
|
LAYERS >>> NEW RASTER LAYER
SELECTIONS >>> SELECT ALL
Open up the three1large image in your PSP workspace
Right click on the Title Bar and select COPY from the options
Right click on the Title Bar of your tag image
and select PASTE INTO SELECTION from the options.
In your LAYER PALETTE change BLEND MODE to MULTIPLY
EFFECTS >>> EDGE EFFECTS >>> ENHANCE MORE
|
|
SELECTIONS >>> MODIFY >>> CONTRACT = 5
SELECTIONS >>> INVERT
EFFECTS >>> 3D EFFECTS >>> INNER BEVEL
DESELECT
|
|
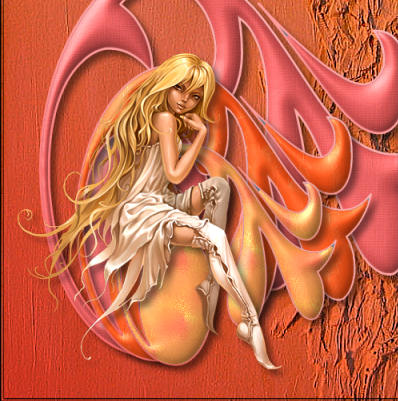
ACTIVATE Copy (2) of Raster 1
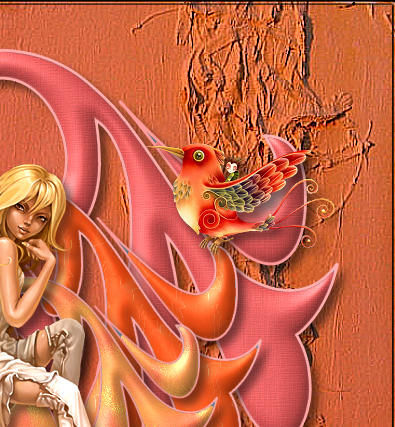
Open up the rw-starlightfairy image in your PSP workspace
Right click on the Title Bar and select COPY from the options
Right click on the Title Bar of your tag image
and select PASTE AS NEW LAYER from the options.
IMAGE >>> RESIZE = 65%
Ensure "Resize all layers" is UNCHECKED
Resample using WEIGHTED AVERAGE
ADJUST >>> SHARPNESS >>> SHARPEN
EFFECTS >>> PLUGINS >>> EYE CANDY 3 >>> DROP SHADOW
Same settings
Reposition with your MOVER tool
|
|
Open up the calguisredbird291108 image in your PSP workspace
Right click on the Title Bar and select COPY from the options
Right click on the Title Bar of your tag image
and select PASTE AS NEW LAYER from the options.
IMAGE >>> RESIZE = 25%
Ensure "Resize all layers" is UNCHECKED
Resample using WEIGHTED AVERAGE
ADJUST >>> SHARPNESS >>> SHARPEN
EFFECTS >>> PLUGINS >>> EYE CANDY 3 >>> DROP SHADOW
Same settings
Reposition with your MOVER tool
|
|
Open up the dragonfly image in your PSP workspace
Right click on the Title Bar and select COPY from the options
Right click on the Title Bar of your tag image
and select PASTE AS NEW LAYER from the options.
IMAGE >>> RESIZE = 30%
Ensure "Resize all layers" is UNCHECKED
Resample using WEIGHTED AVERAGE
ADJUST >>> SHARPNESS >>> SHARPEN
EFFECTS >>> PLUGINS >>> EYE CANDY 3 >>> DROP SHADOW
Same settings
Reposition with your MOVER tool
|
|
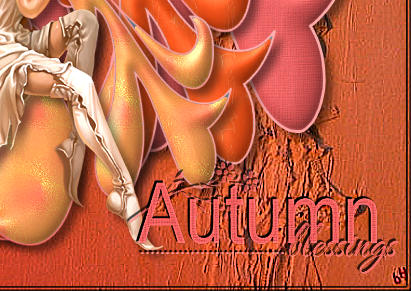
Open up the SE_wordART_AutumnBlessings image
in your PSP workspace
Right click on the Title Bar and select COPY from the options
Right click on the Title Bar of your tag image
and select PASTE AS NEW LAYER from the options.
IMAGE >>> RESIZE = 50%
Ensure "Resize all layers" is UNCHECKED
Resample using WEIGHTED AVERAGE
EFFECTS >>> TEXTURE EFFECTS >>> SCULPTURE
Same settings
Pattern = Image 31
Colour = #c0c0c0
EFFECTS >>> 3D EFFECTS >>> DROP SHADOW
Vertical & Horizontal offsets = - ( minus ) 2
Colour = Black
Opacity = 100
Blur = 0
Reposition with your MOVER tool
|
|
ADJUST >>> SHARPNESS >>> SHARPEN
EFFECTS >>> PLUGINS >>> EYE CANDY 3 >>> DROP SHADOW
Same settings
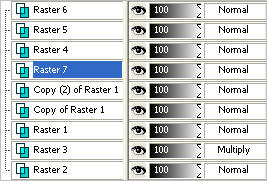
In your Layer Palette drag Raster 7
beneath Raster 4
|
|
LAYERS >>> MERGE >>> MERGE ALL (Flatten)
Save as .jpg image
.
|
|
|